On OpenShift#
MTO is RedHat Certified operator available on the Red Hat Ecosystem Catalog.
This document contains instructions on installing, uninstalling and configuring Multi Tenant Operator on OpenShift.
Requirements#
- An OpenShift cluster
Installing via Software Catalog UI#
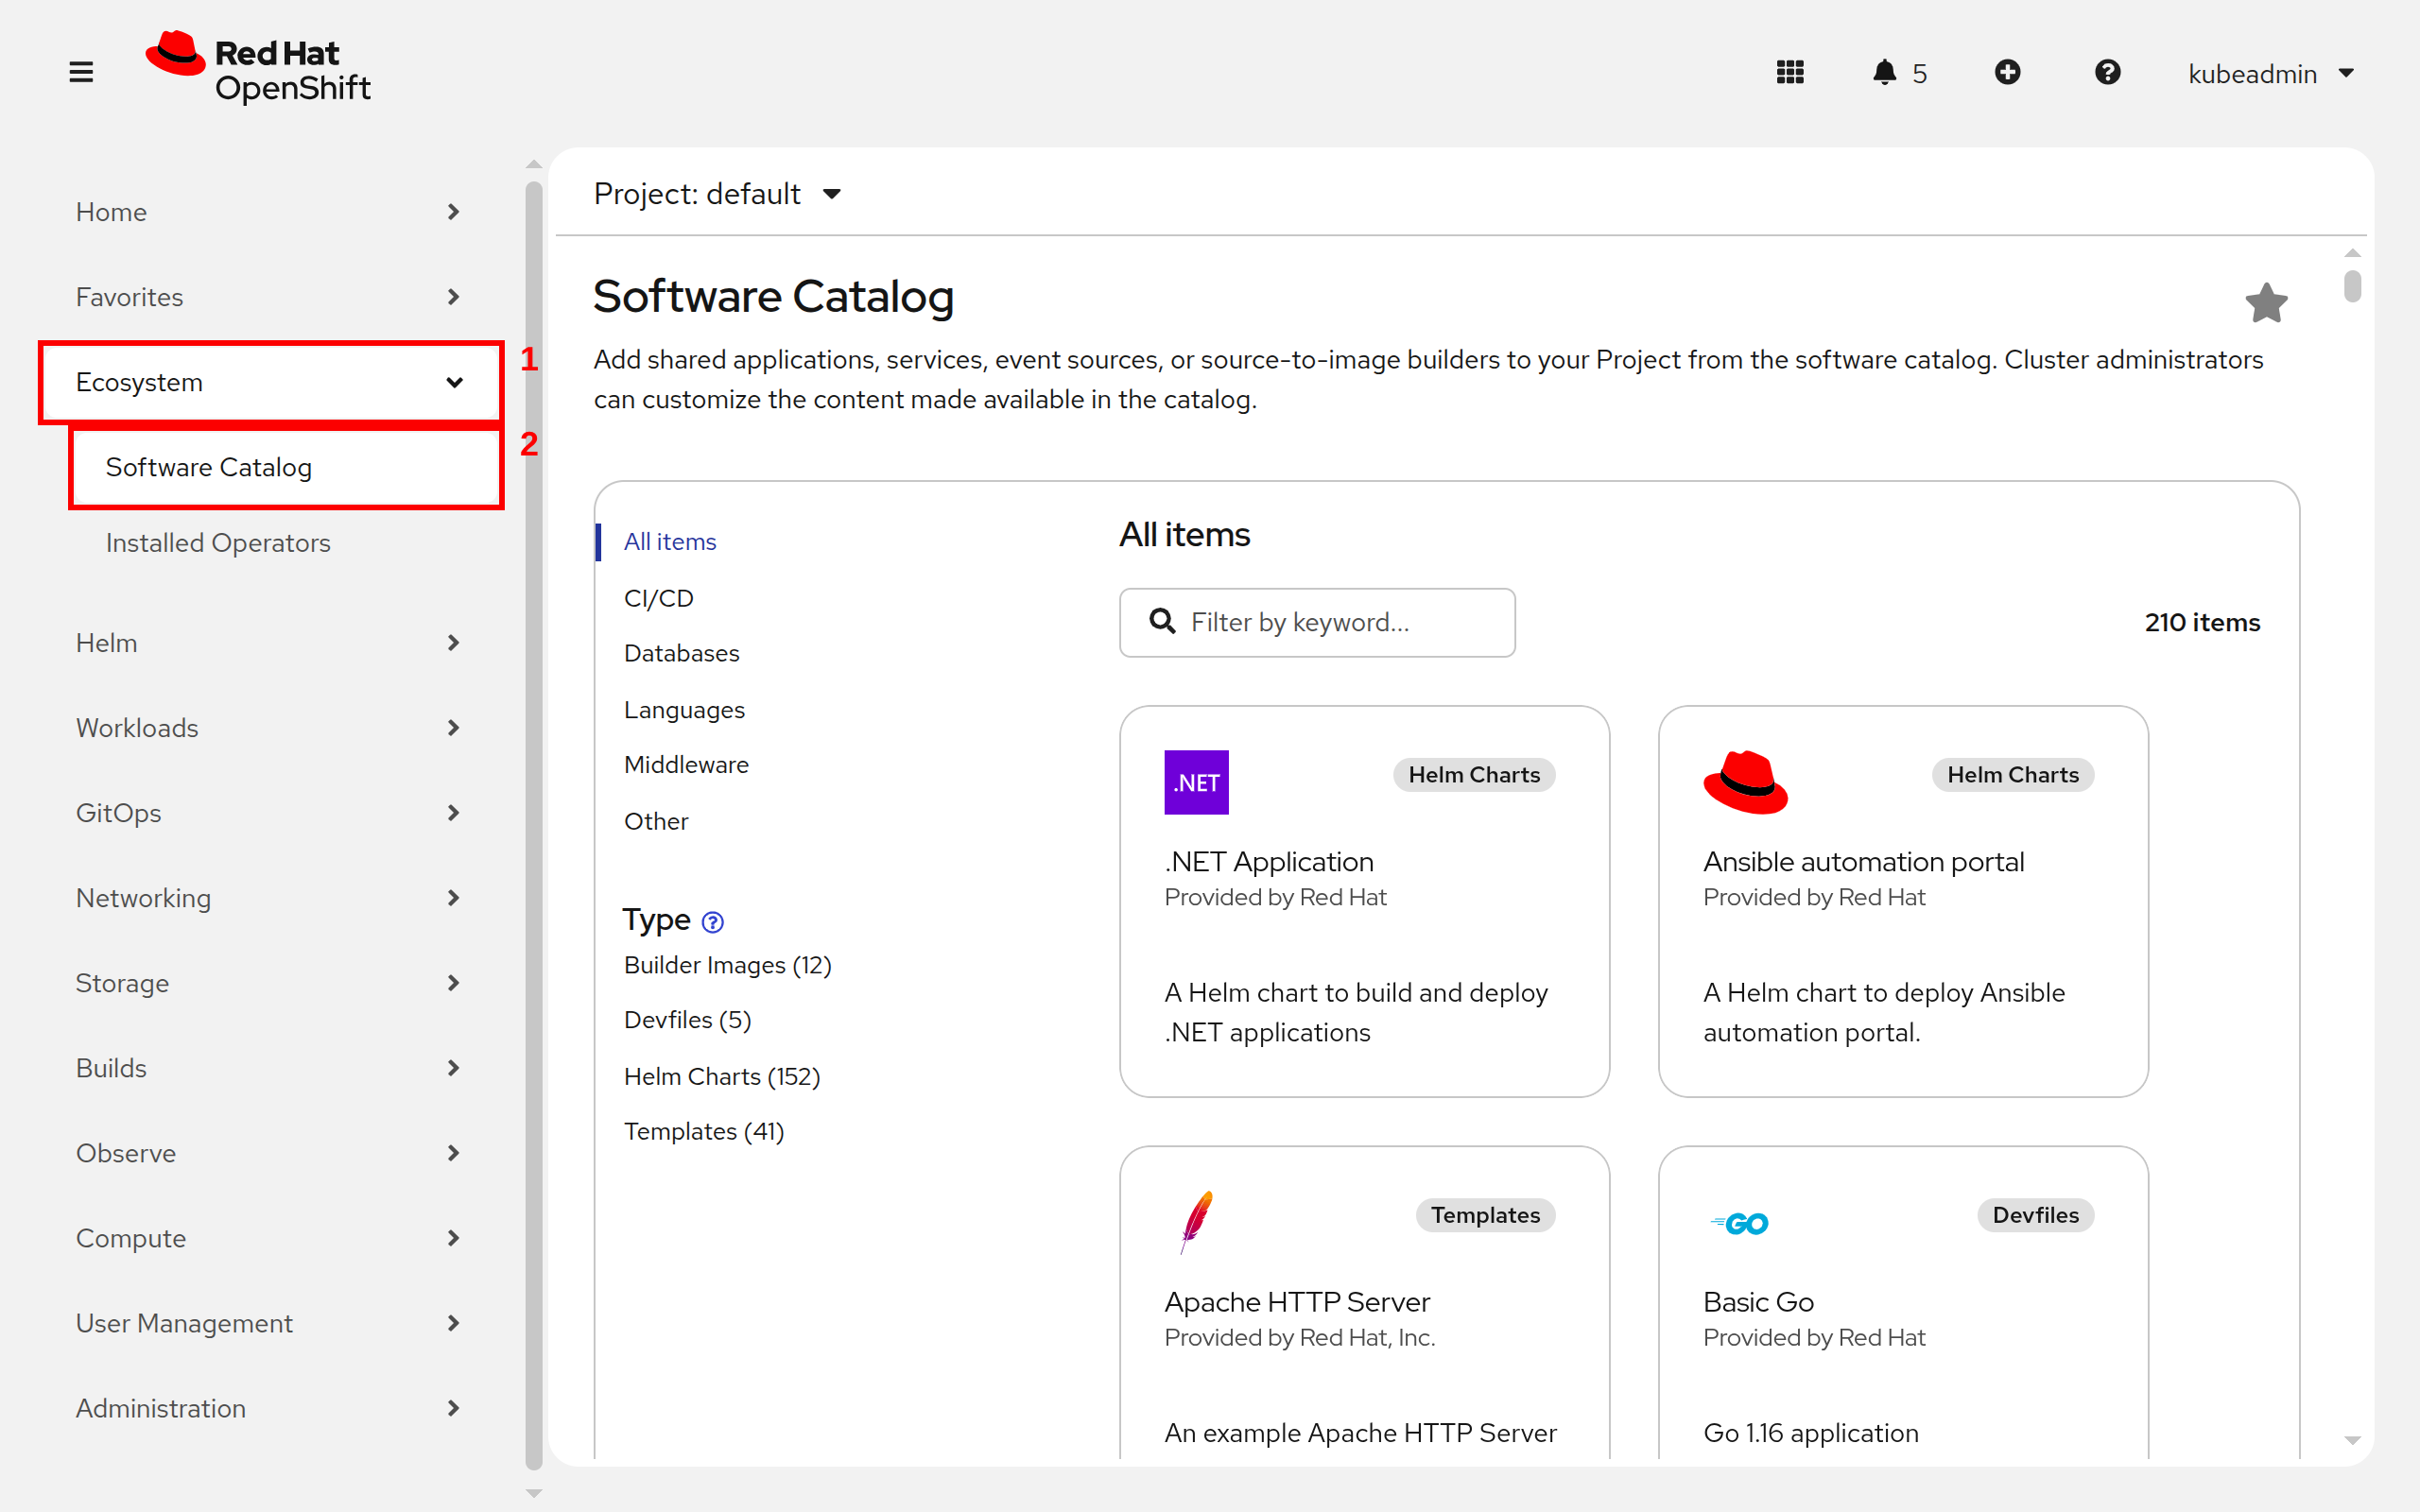
- After opening OpenShift console click on
Ecosystem, followed bySoftware Catalogfrom the side menu
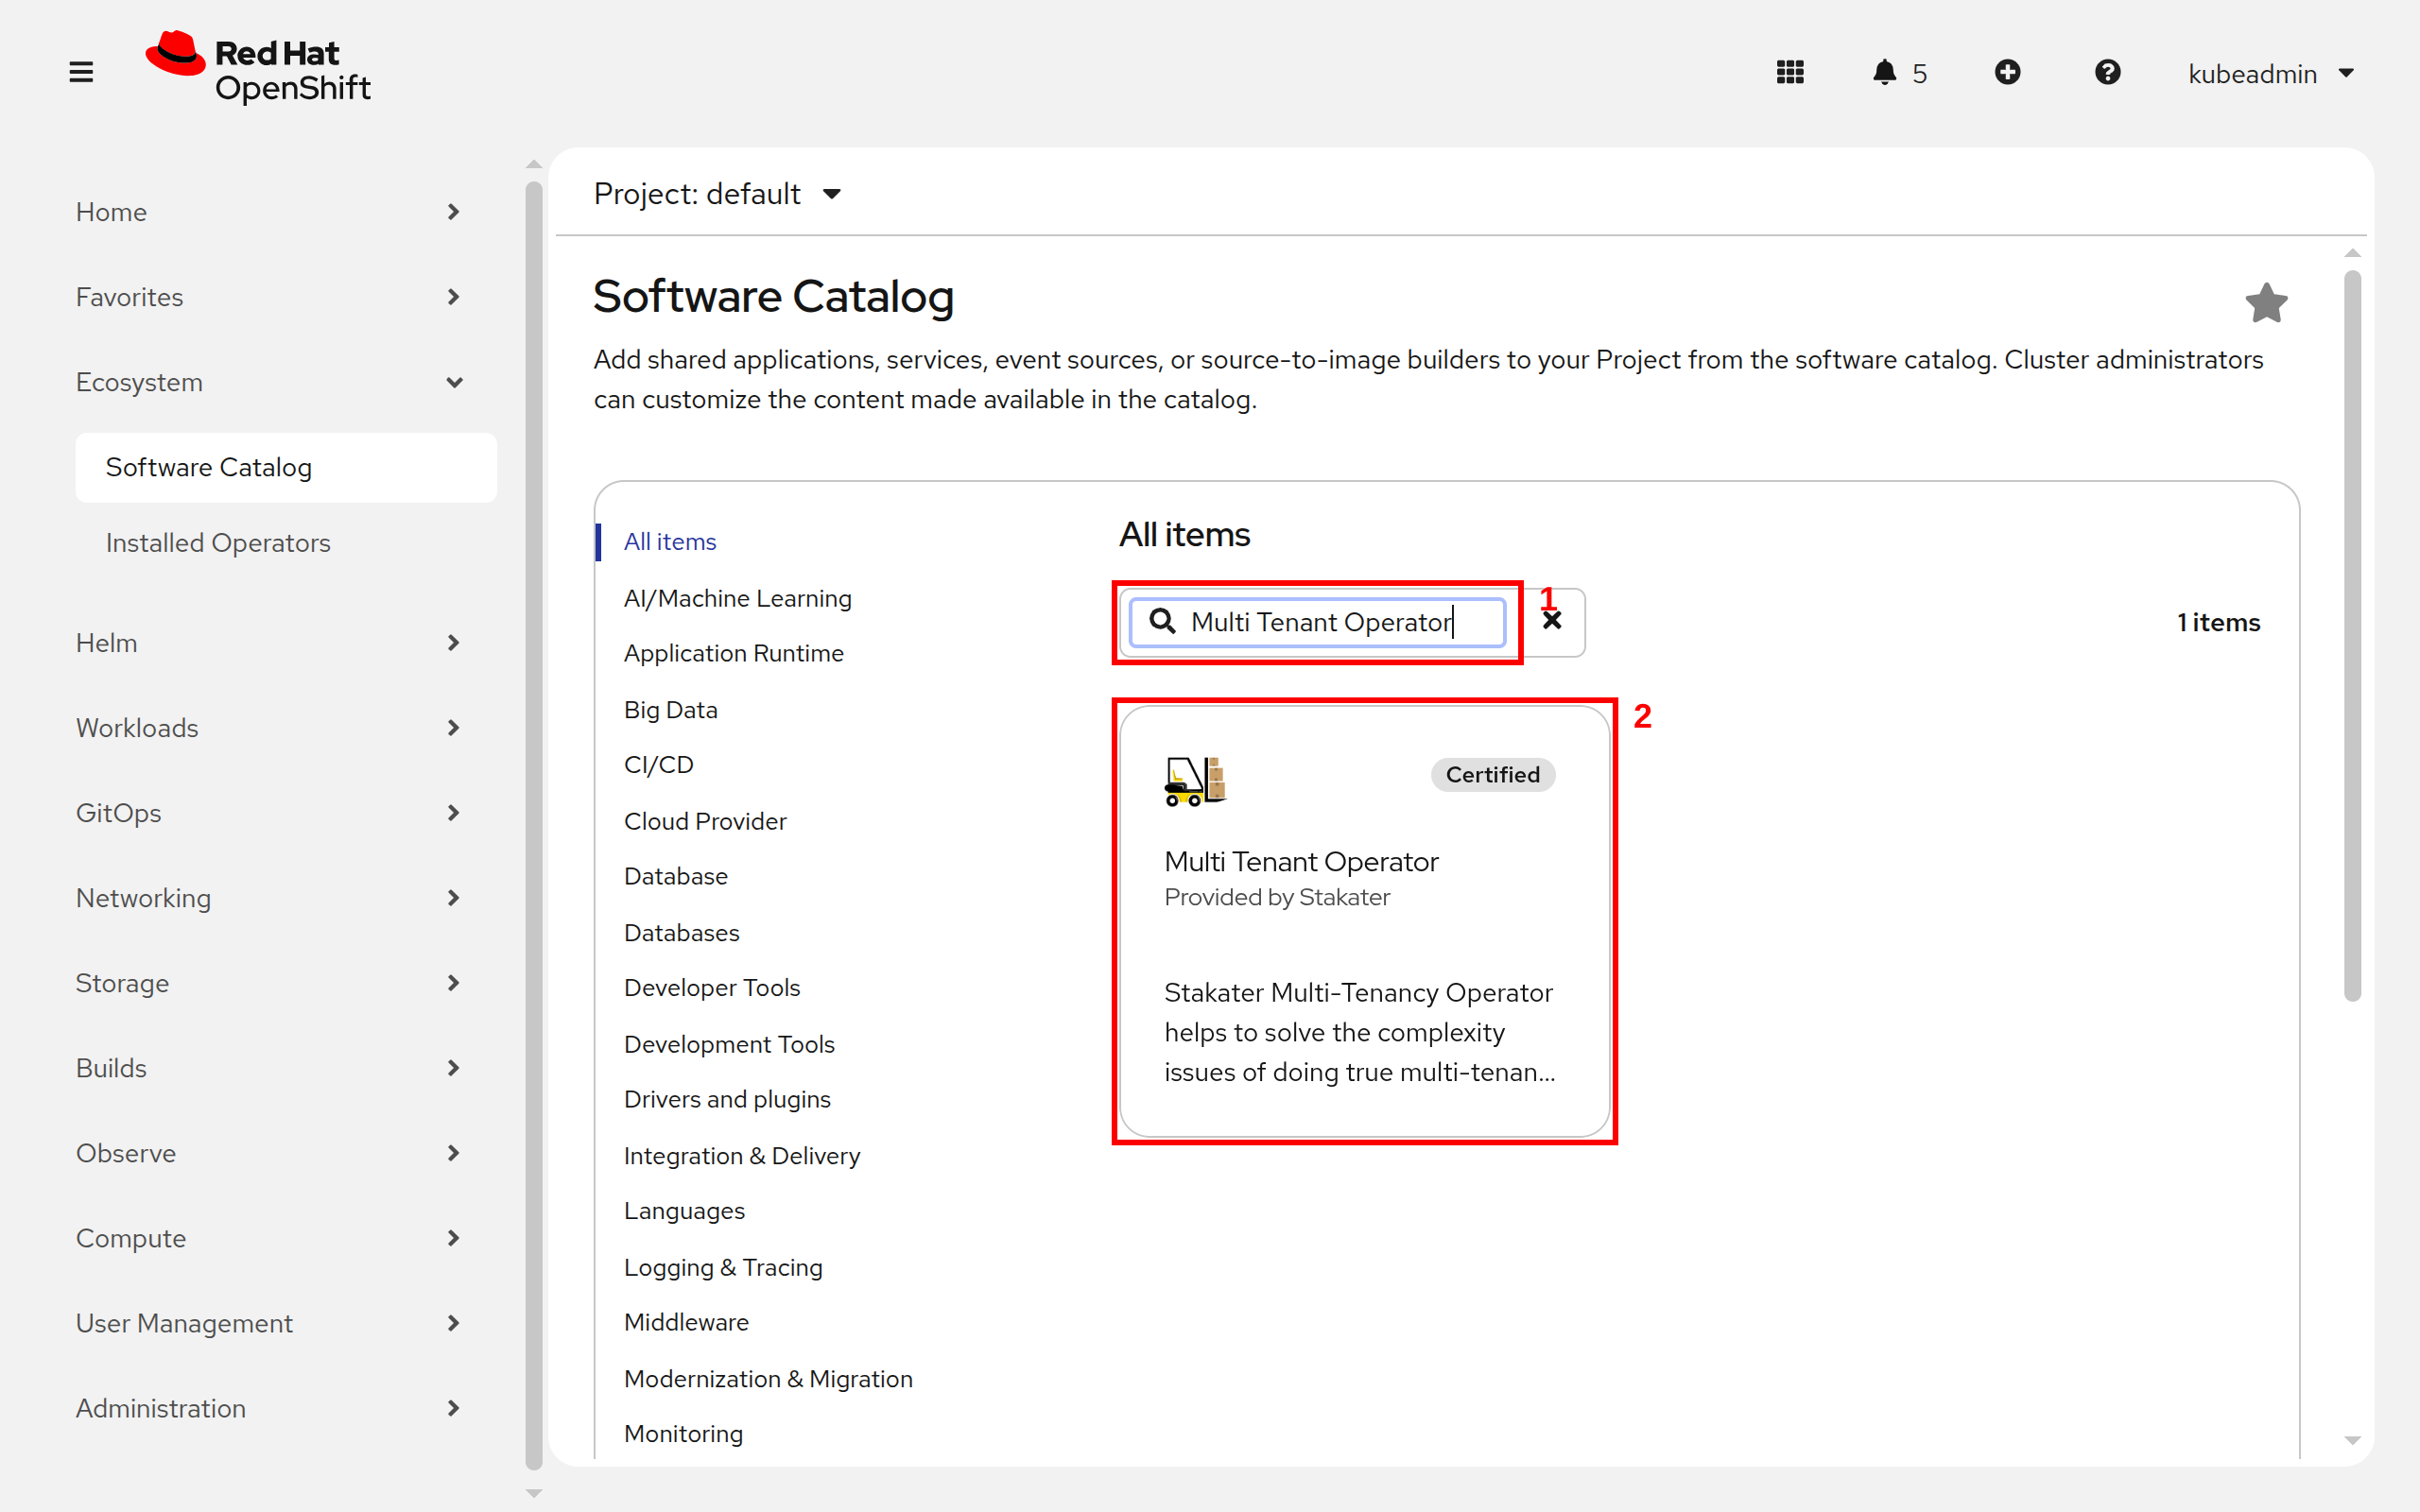
- Now search for
Multi Tenant Operatorand then click onMulti Tenant Operatortile
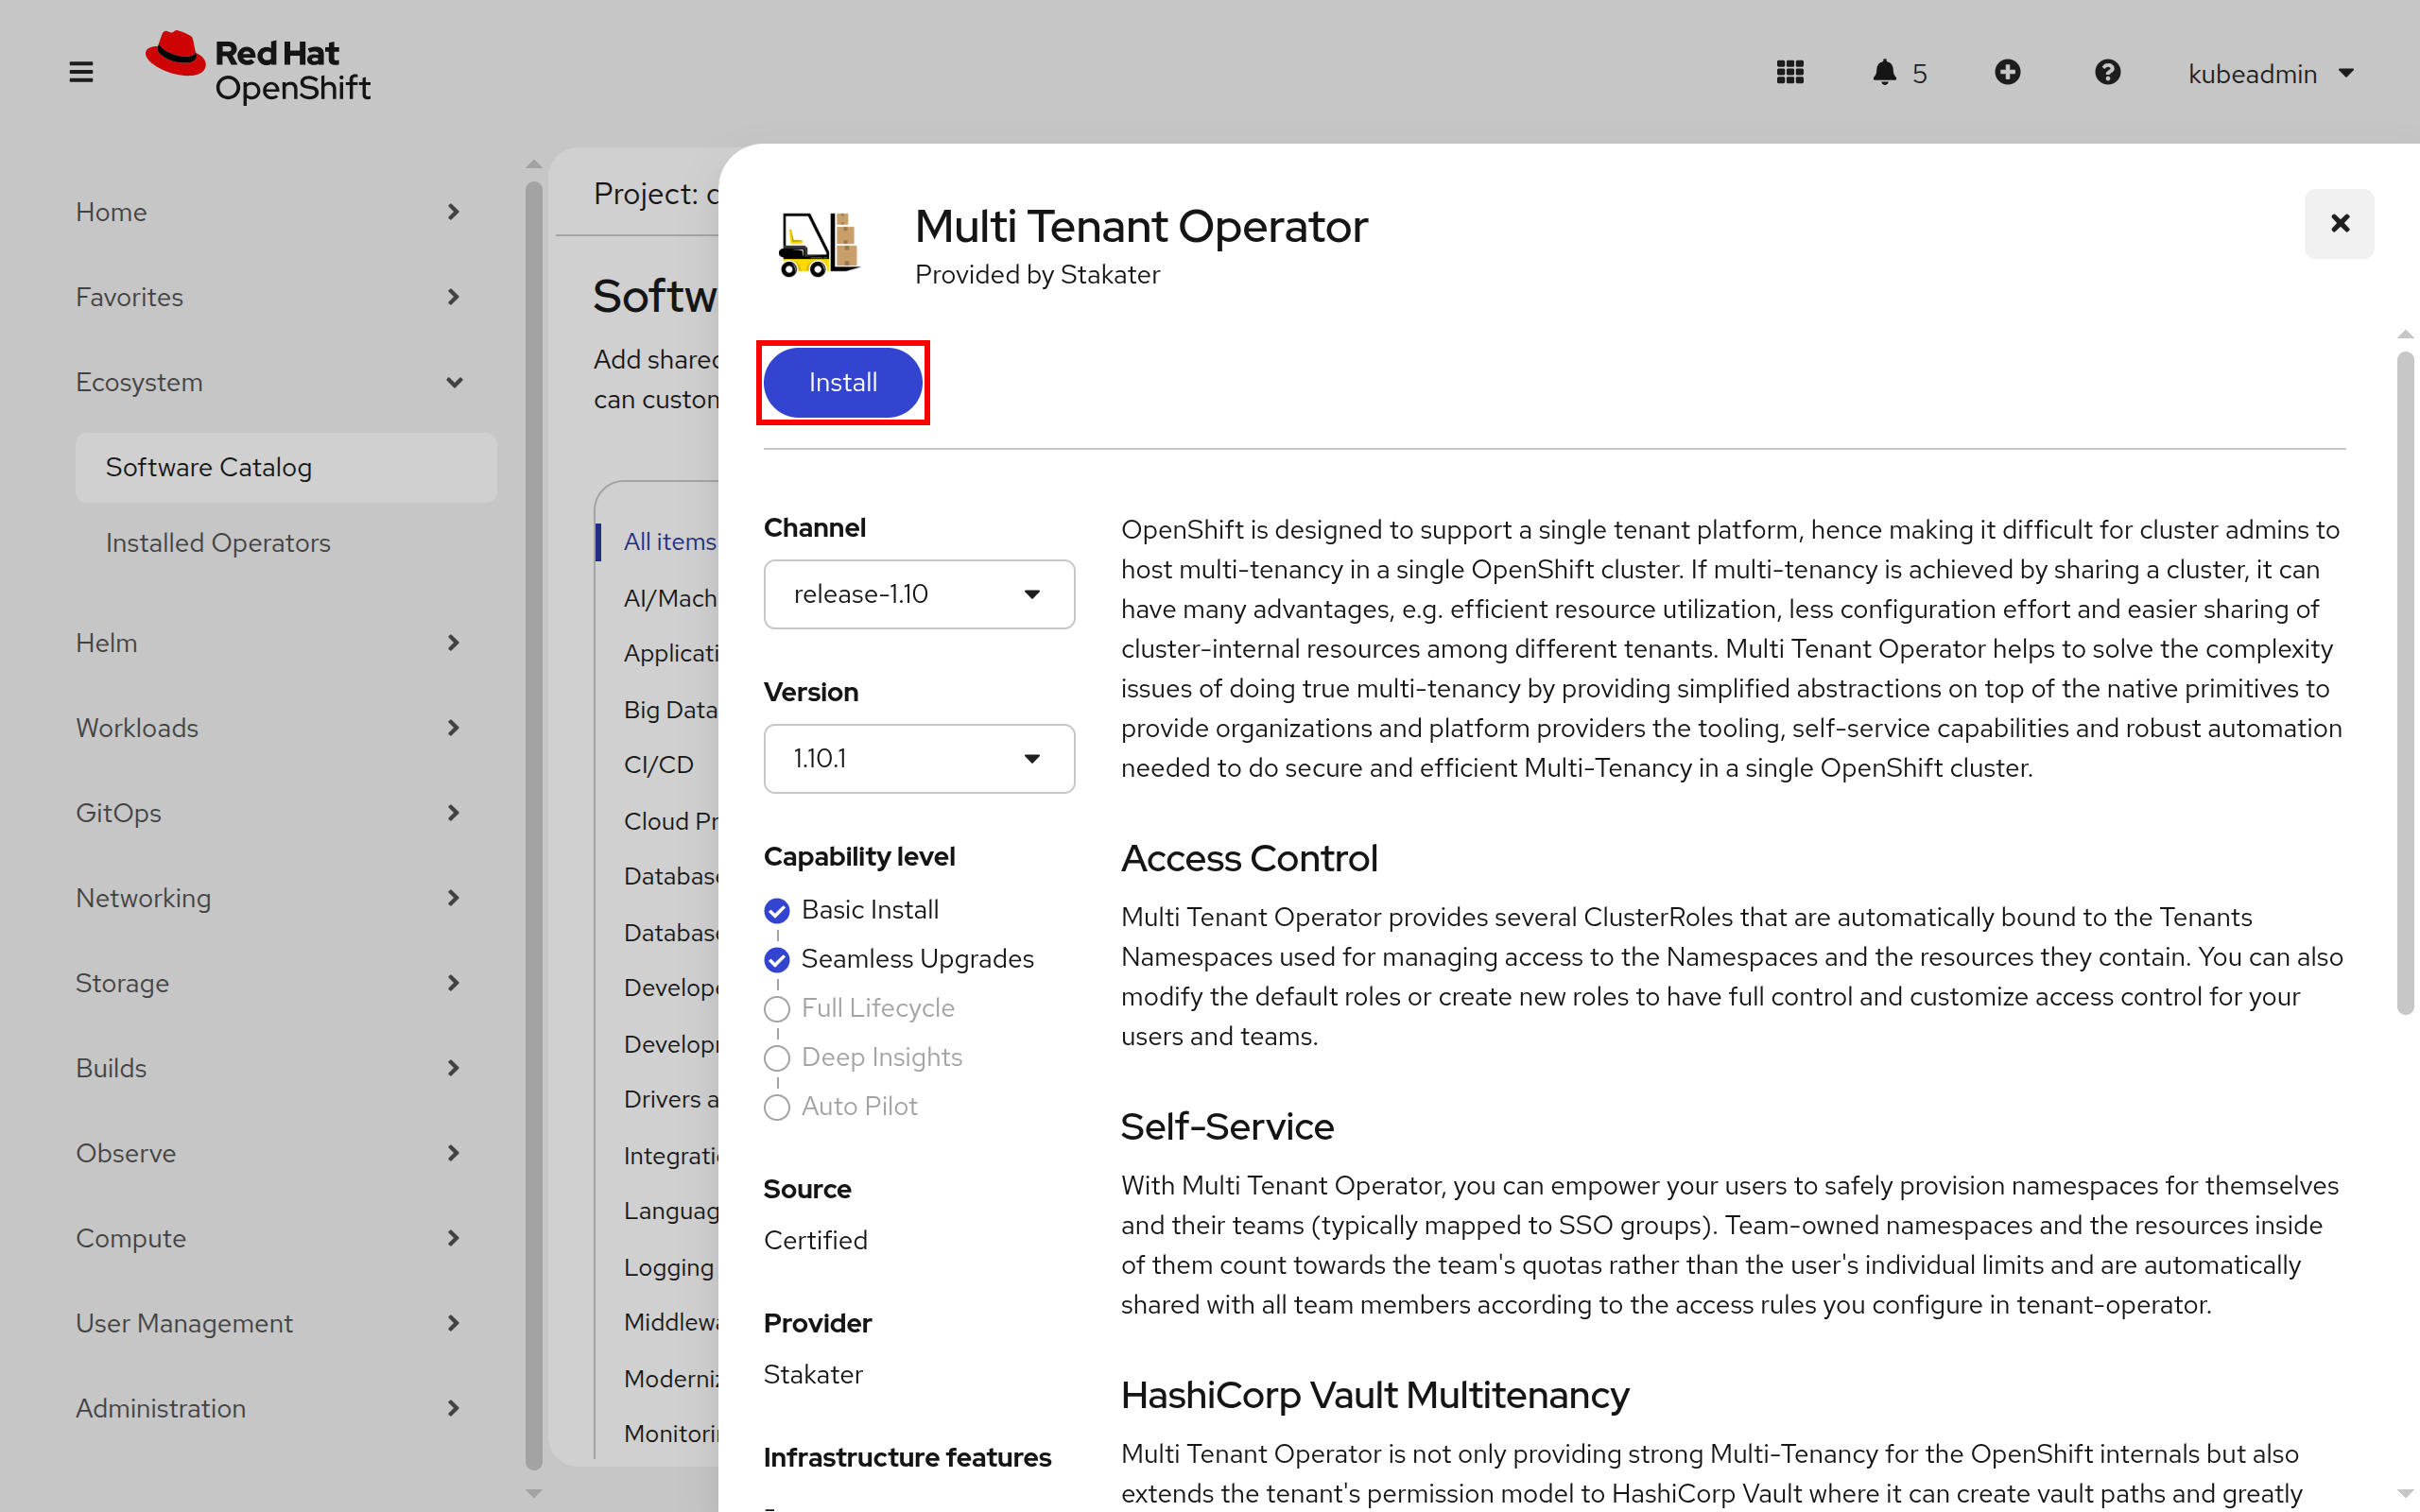
- Click on the
installbutton
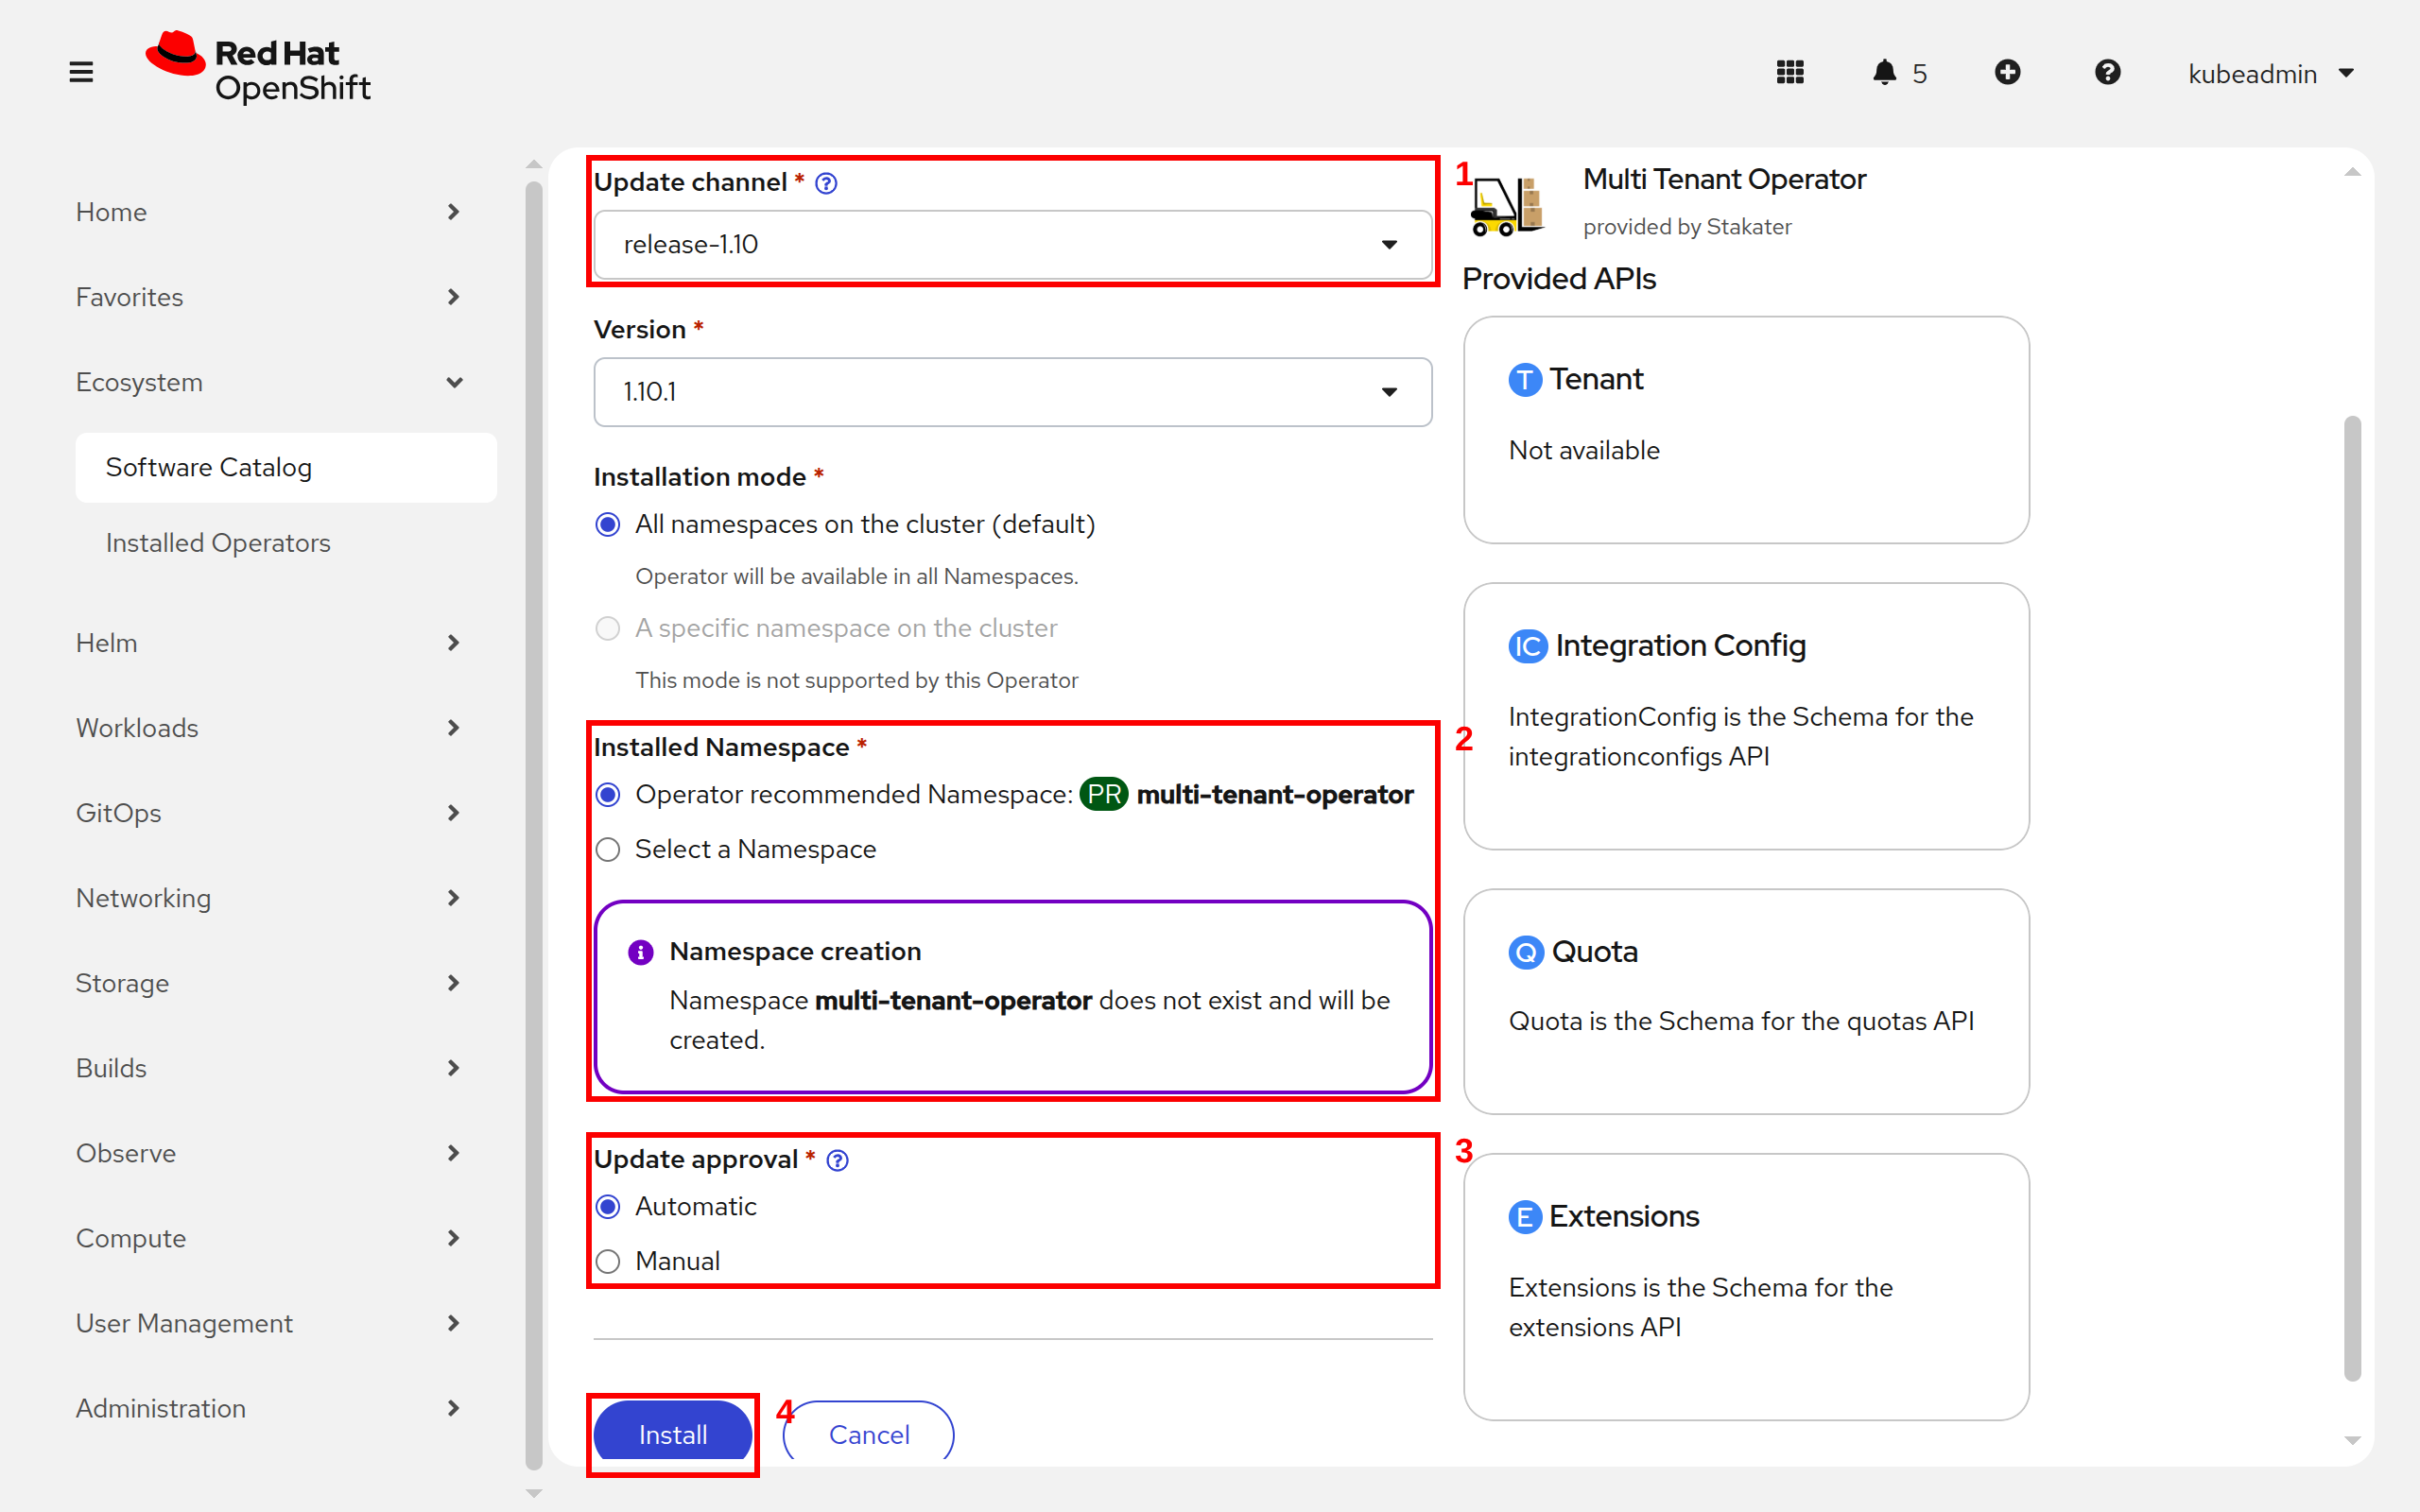
- Select
Update channel. Selectmulti-tenant-operatorto install the operator inmulti-tenant-operatornamespace underInstalled Namespace. After configuringUpdate approvalclick on theinstallbutton.
Note: Use the latest
release-1.xchannel for seamless upgrades. ForProduction EnvironmentpreferManualapproval and useAutomaticforDevelopment Environment
- Wait for the operator to be installed
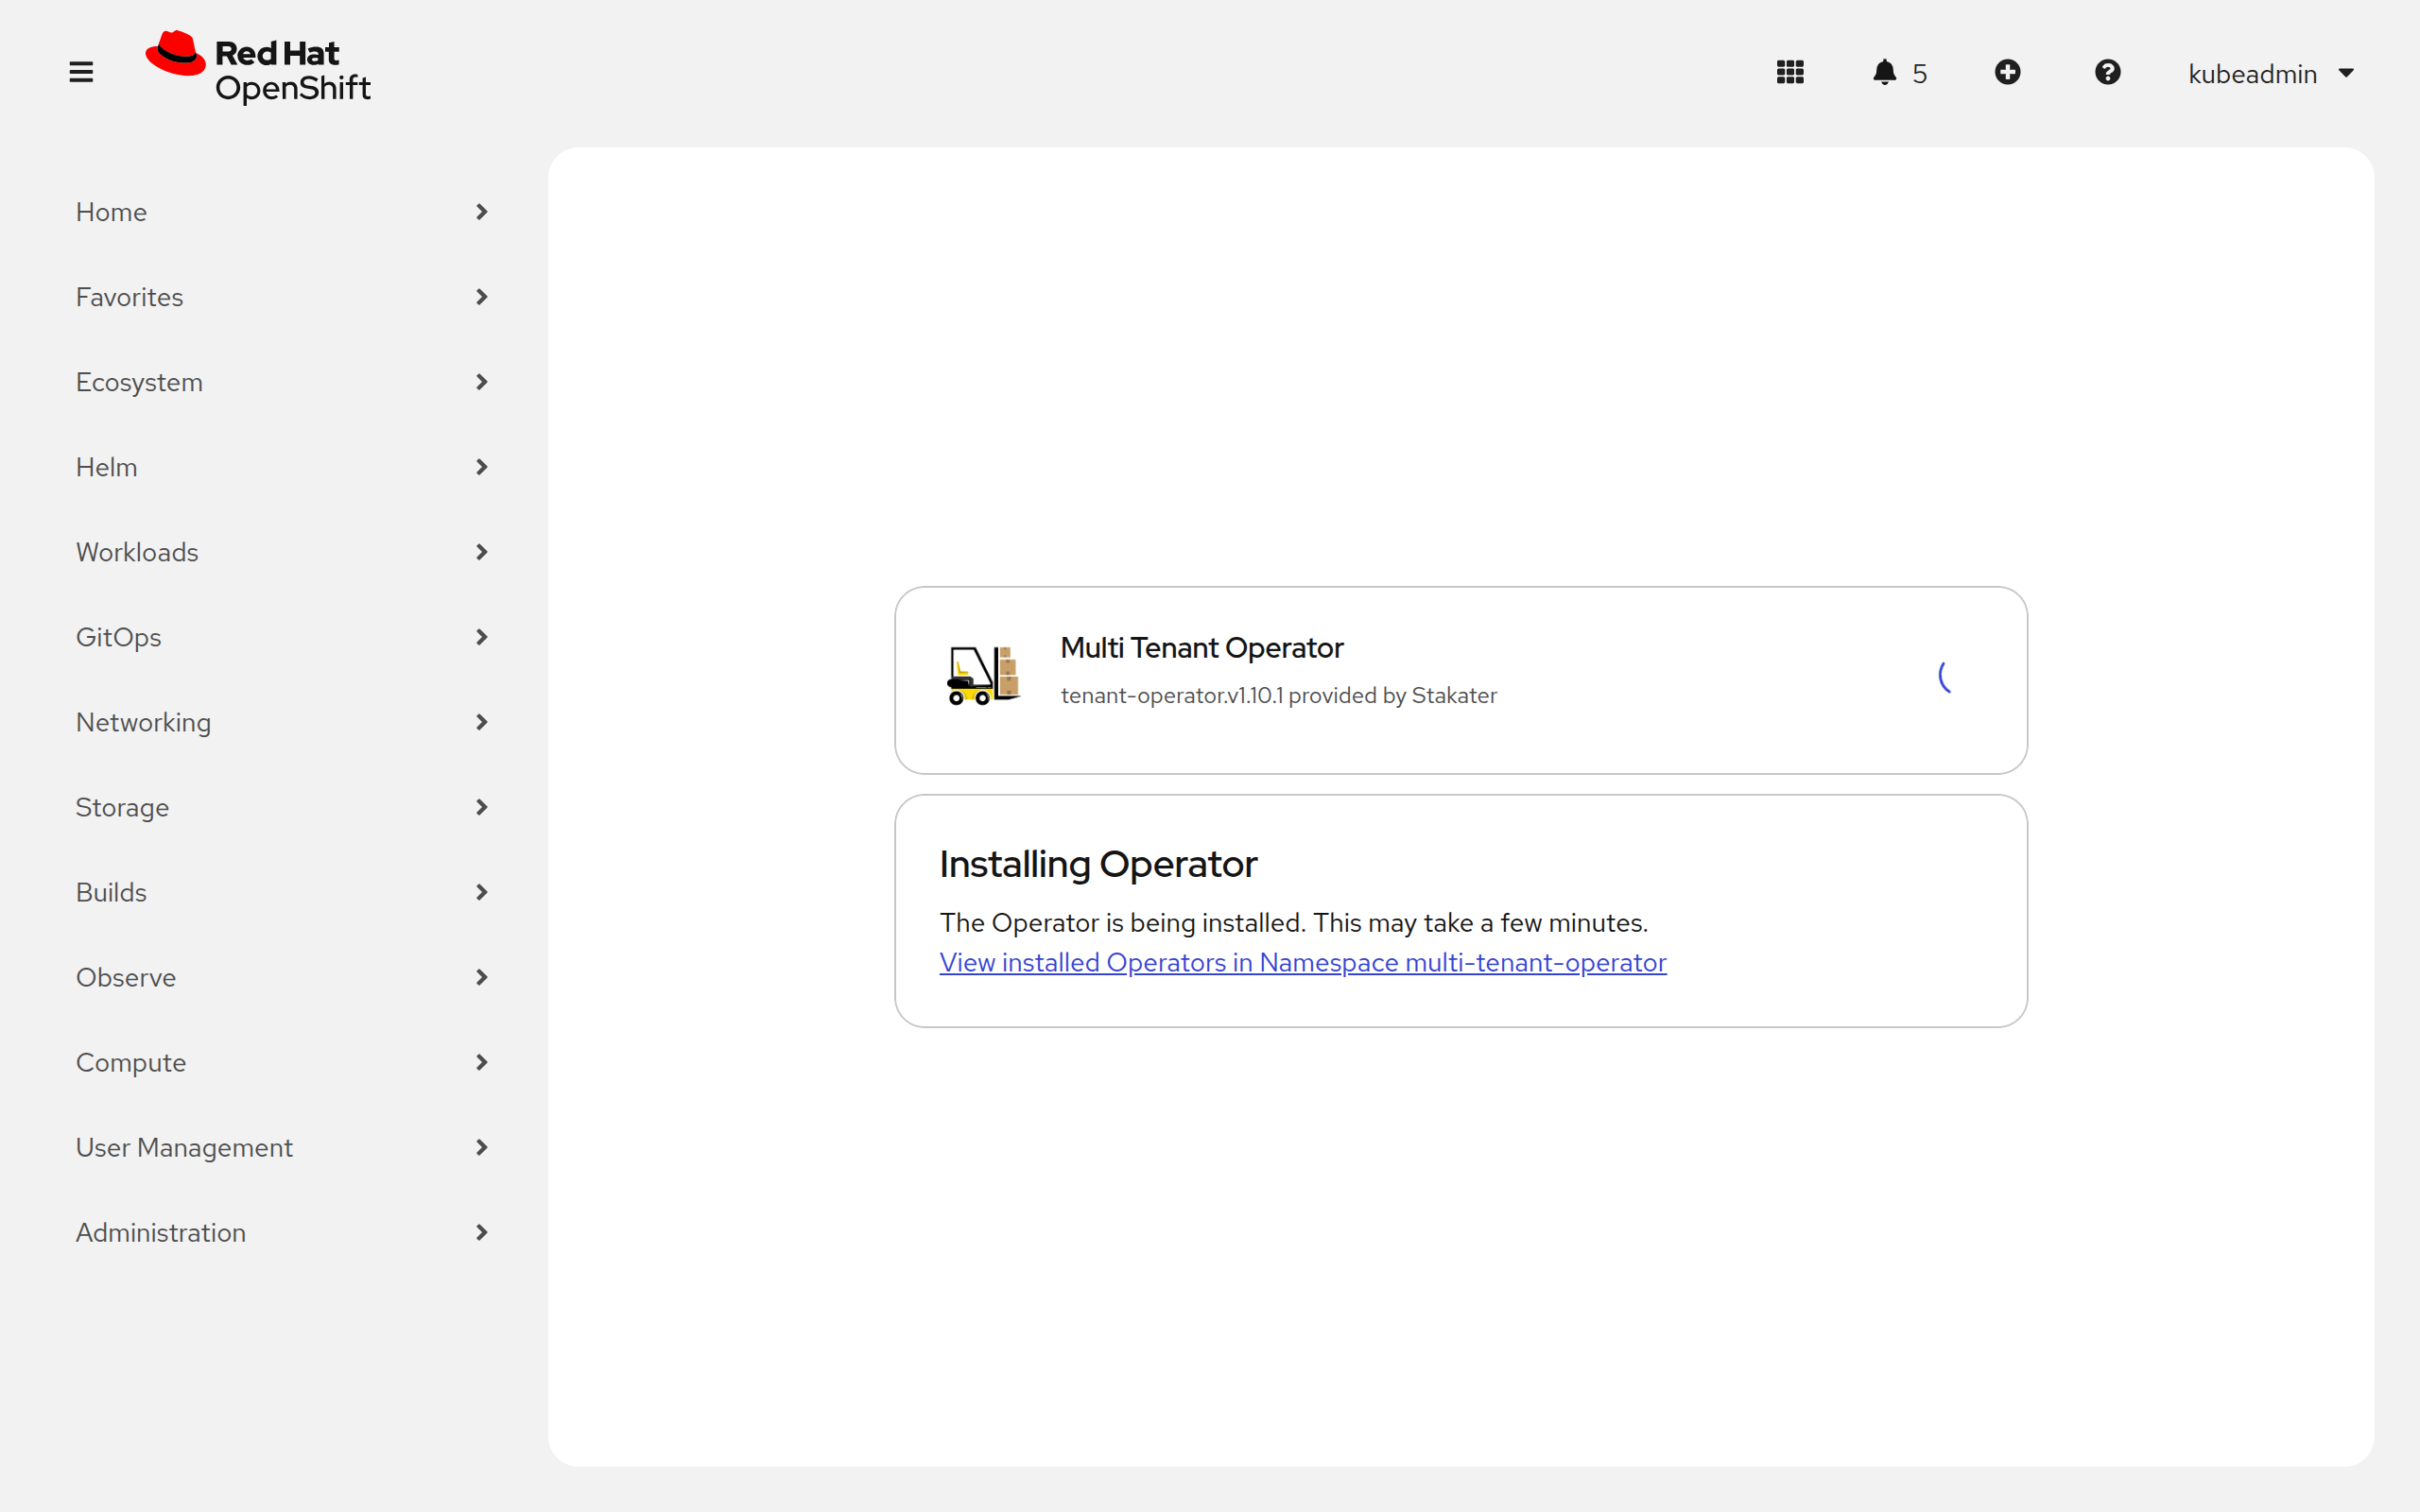
- Once successfully installed, MTO will be ready to enforce multi-tenancy in your cluster
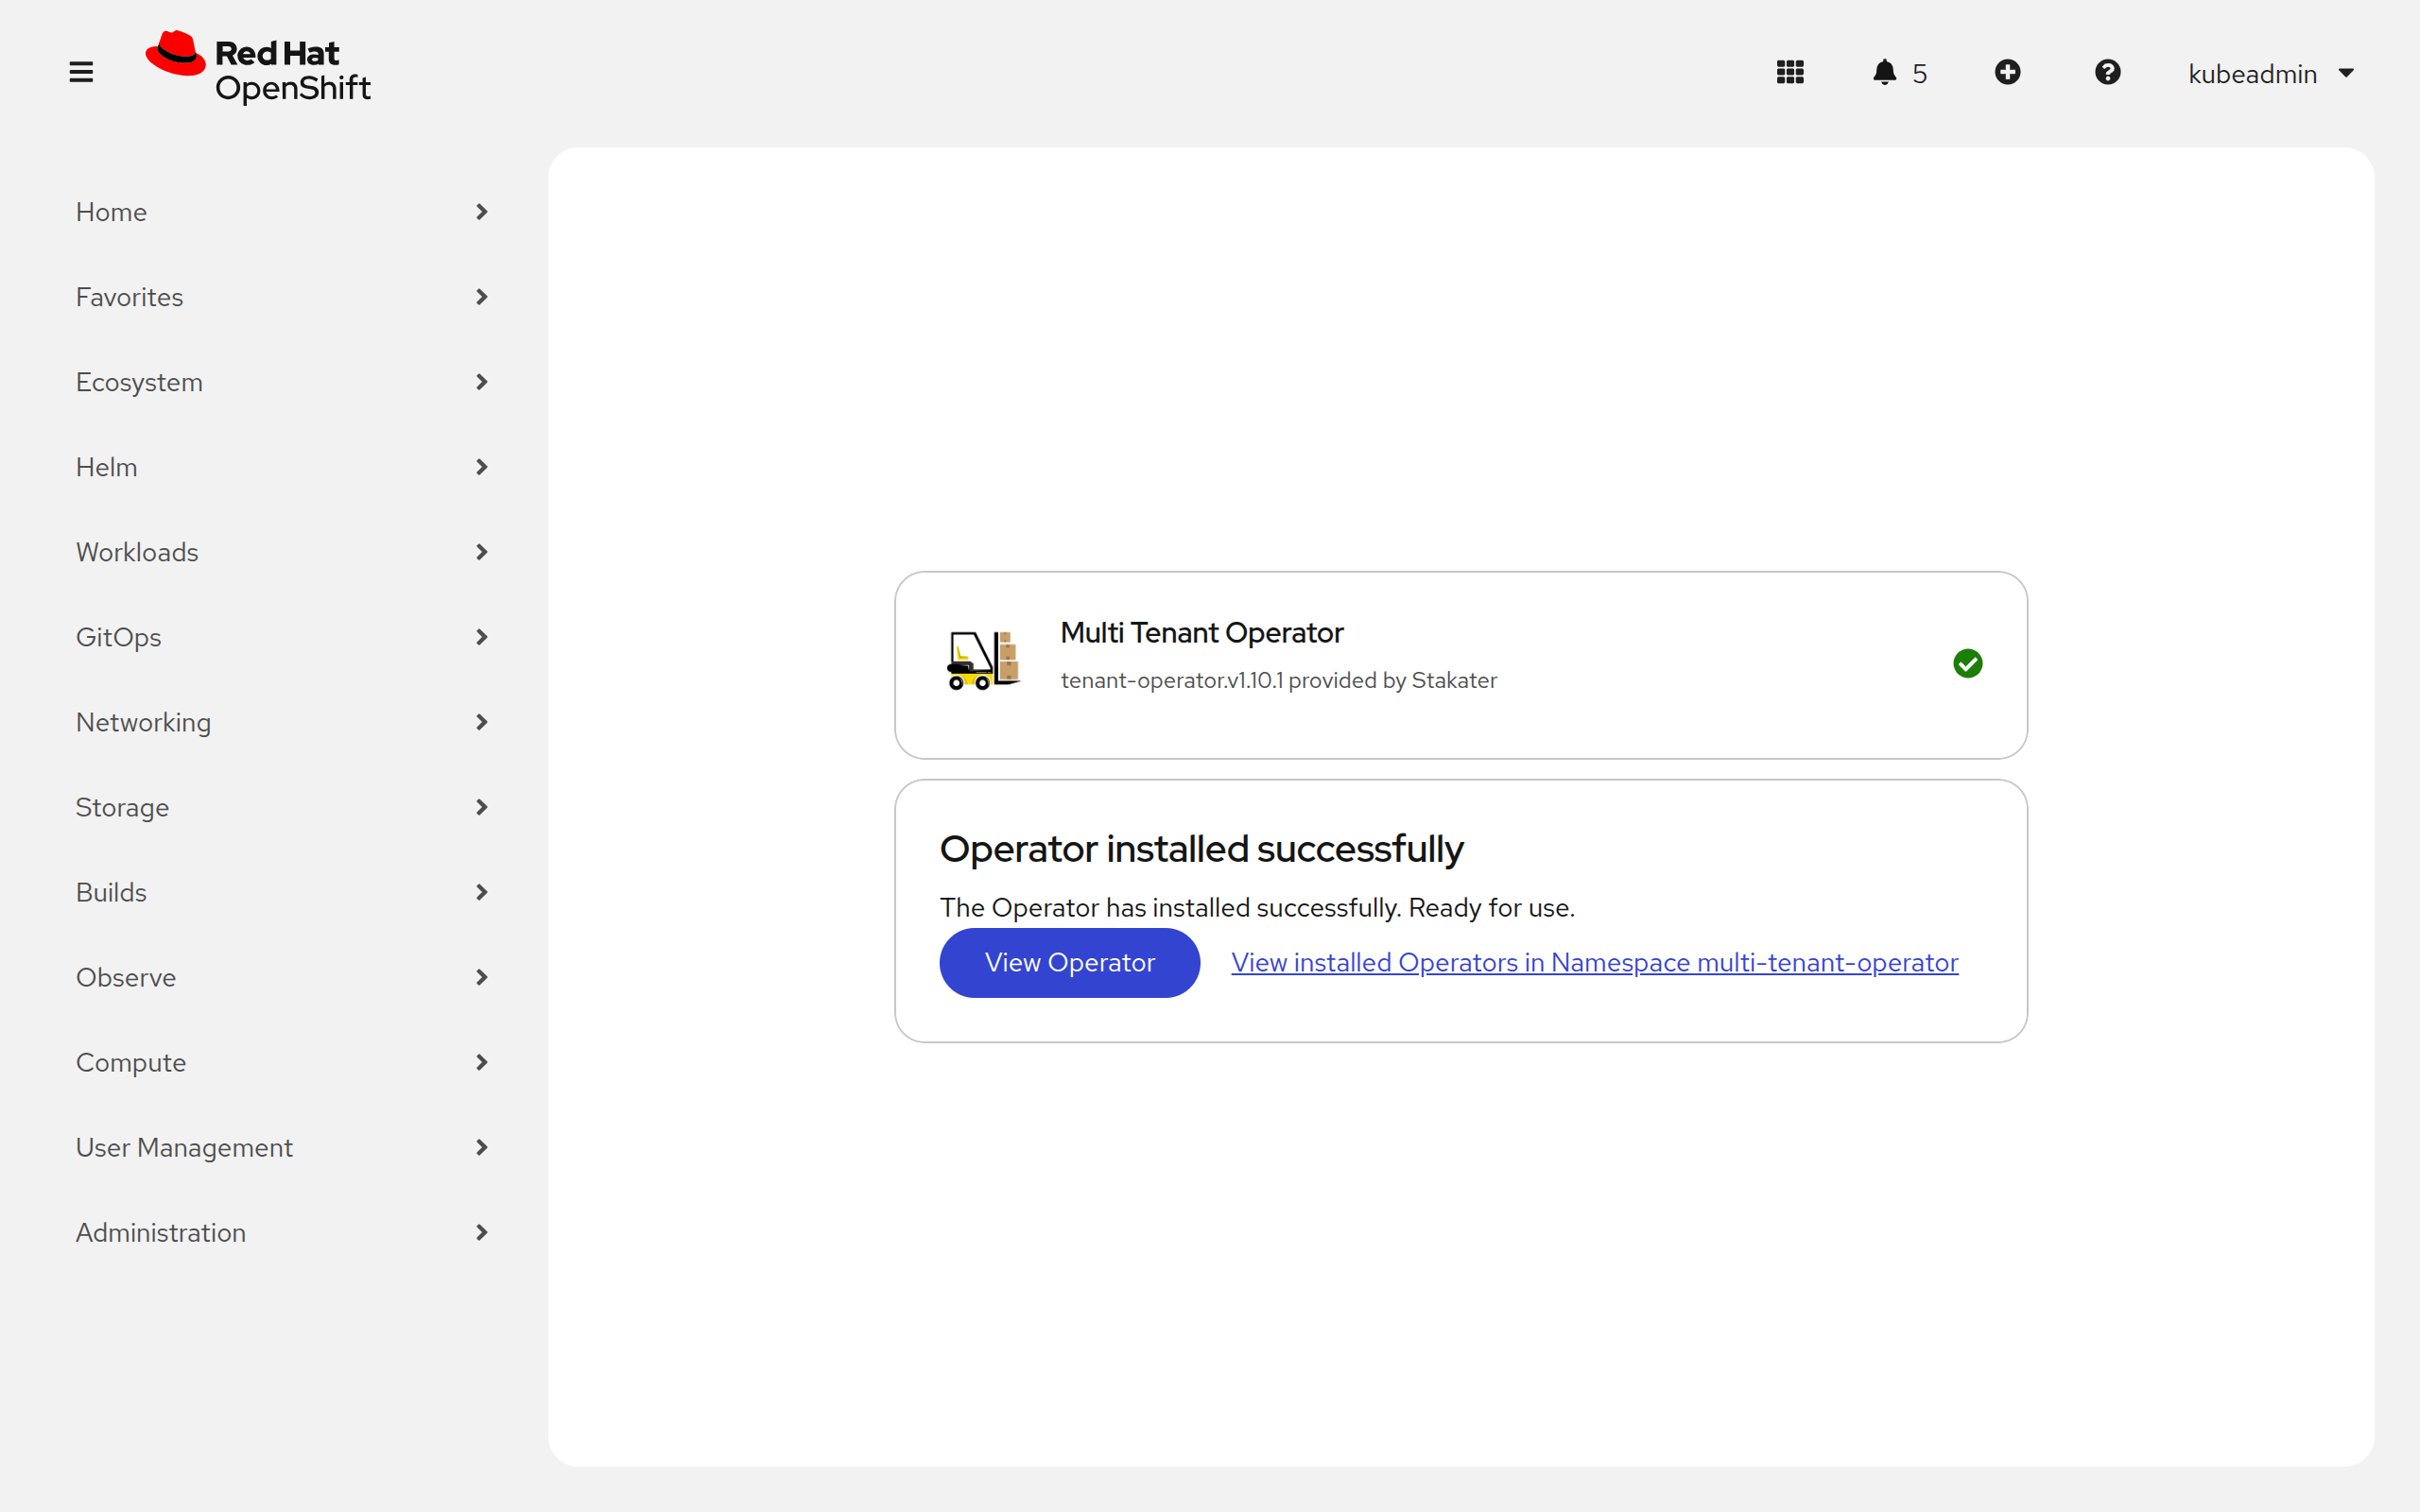
Note: MTO will be installed in
multi-tenant-operatornamespace.
Installing via CLI OR GitOps#
- Create namespace
multi-tenant-operator
oc create namespace multi-tenant-operator
namespace/multi-tenant-operator created
- Create an OperatorGroup YAML for MTO and apply it in
multi-tenant-operatornamespace.
oc create -f - << EOF
apiVersion: operators.coreos.com/v1
kind: OperatorGroup
metadata:
  name: tenant-operator
  namespace: multi-tenant-operator
EOF
operatorgroup.operators.coreos.com/tenant-operator created
- Create a subscription YAML for MTO and apply it in
multi-tenant-operatornamespace. To enable console set.spec.config.env[].ENABLE_CONSOLEtotrue. This will create a route resource, which can be used to access the Multi-Tenant-Operator console.
oc create -f - << EOF
apiVersion: operators.coreos.com/v1alpha1
kind: Subscription
metadata:
  name: tenant-operator
  namespace: multi-tenant-operator
spec:
  channel: release-1.10
  installPlanApproval: Automatic
  name: tenant-operator
  source: certified-operators
  sourceNamespace: openshift-marketplace
  startingCSV: tenant-operator.v1.10.1
EOF
subscription.operators.coreos.com/tenant-operator created
Note: To bring MTO via GitOps, add the above files in GitOps repository.
- After creating the
subscriptioncustom resource open OpenShift console and click onEcosystem, followed byInstalled Operatorsfrom the side menu
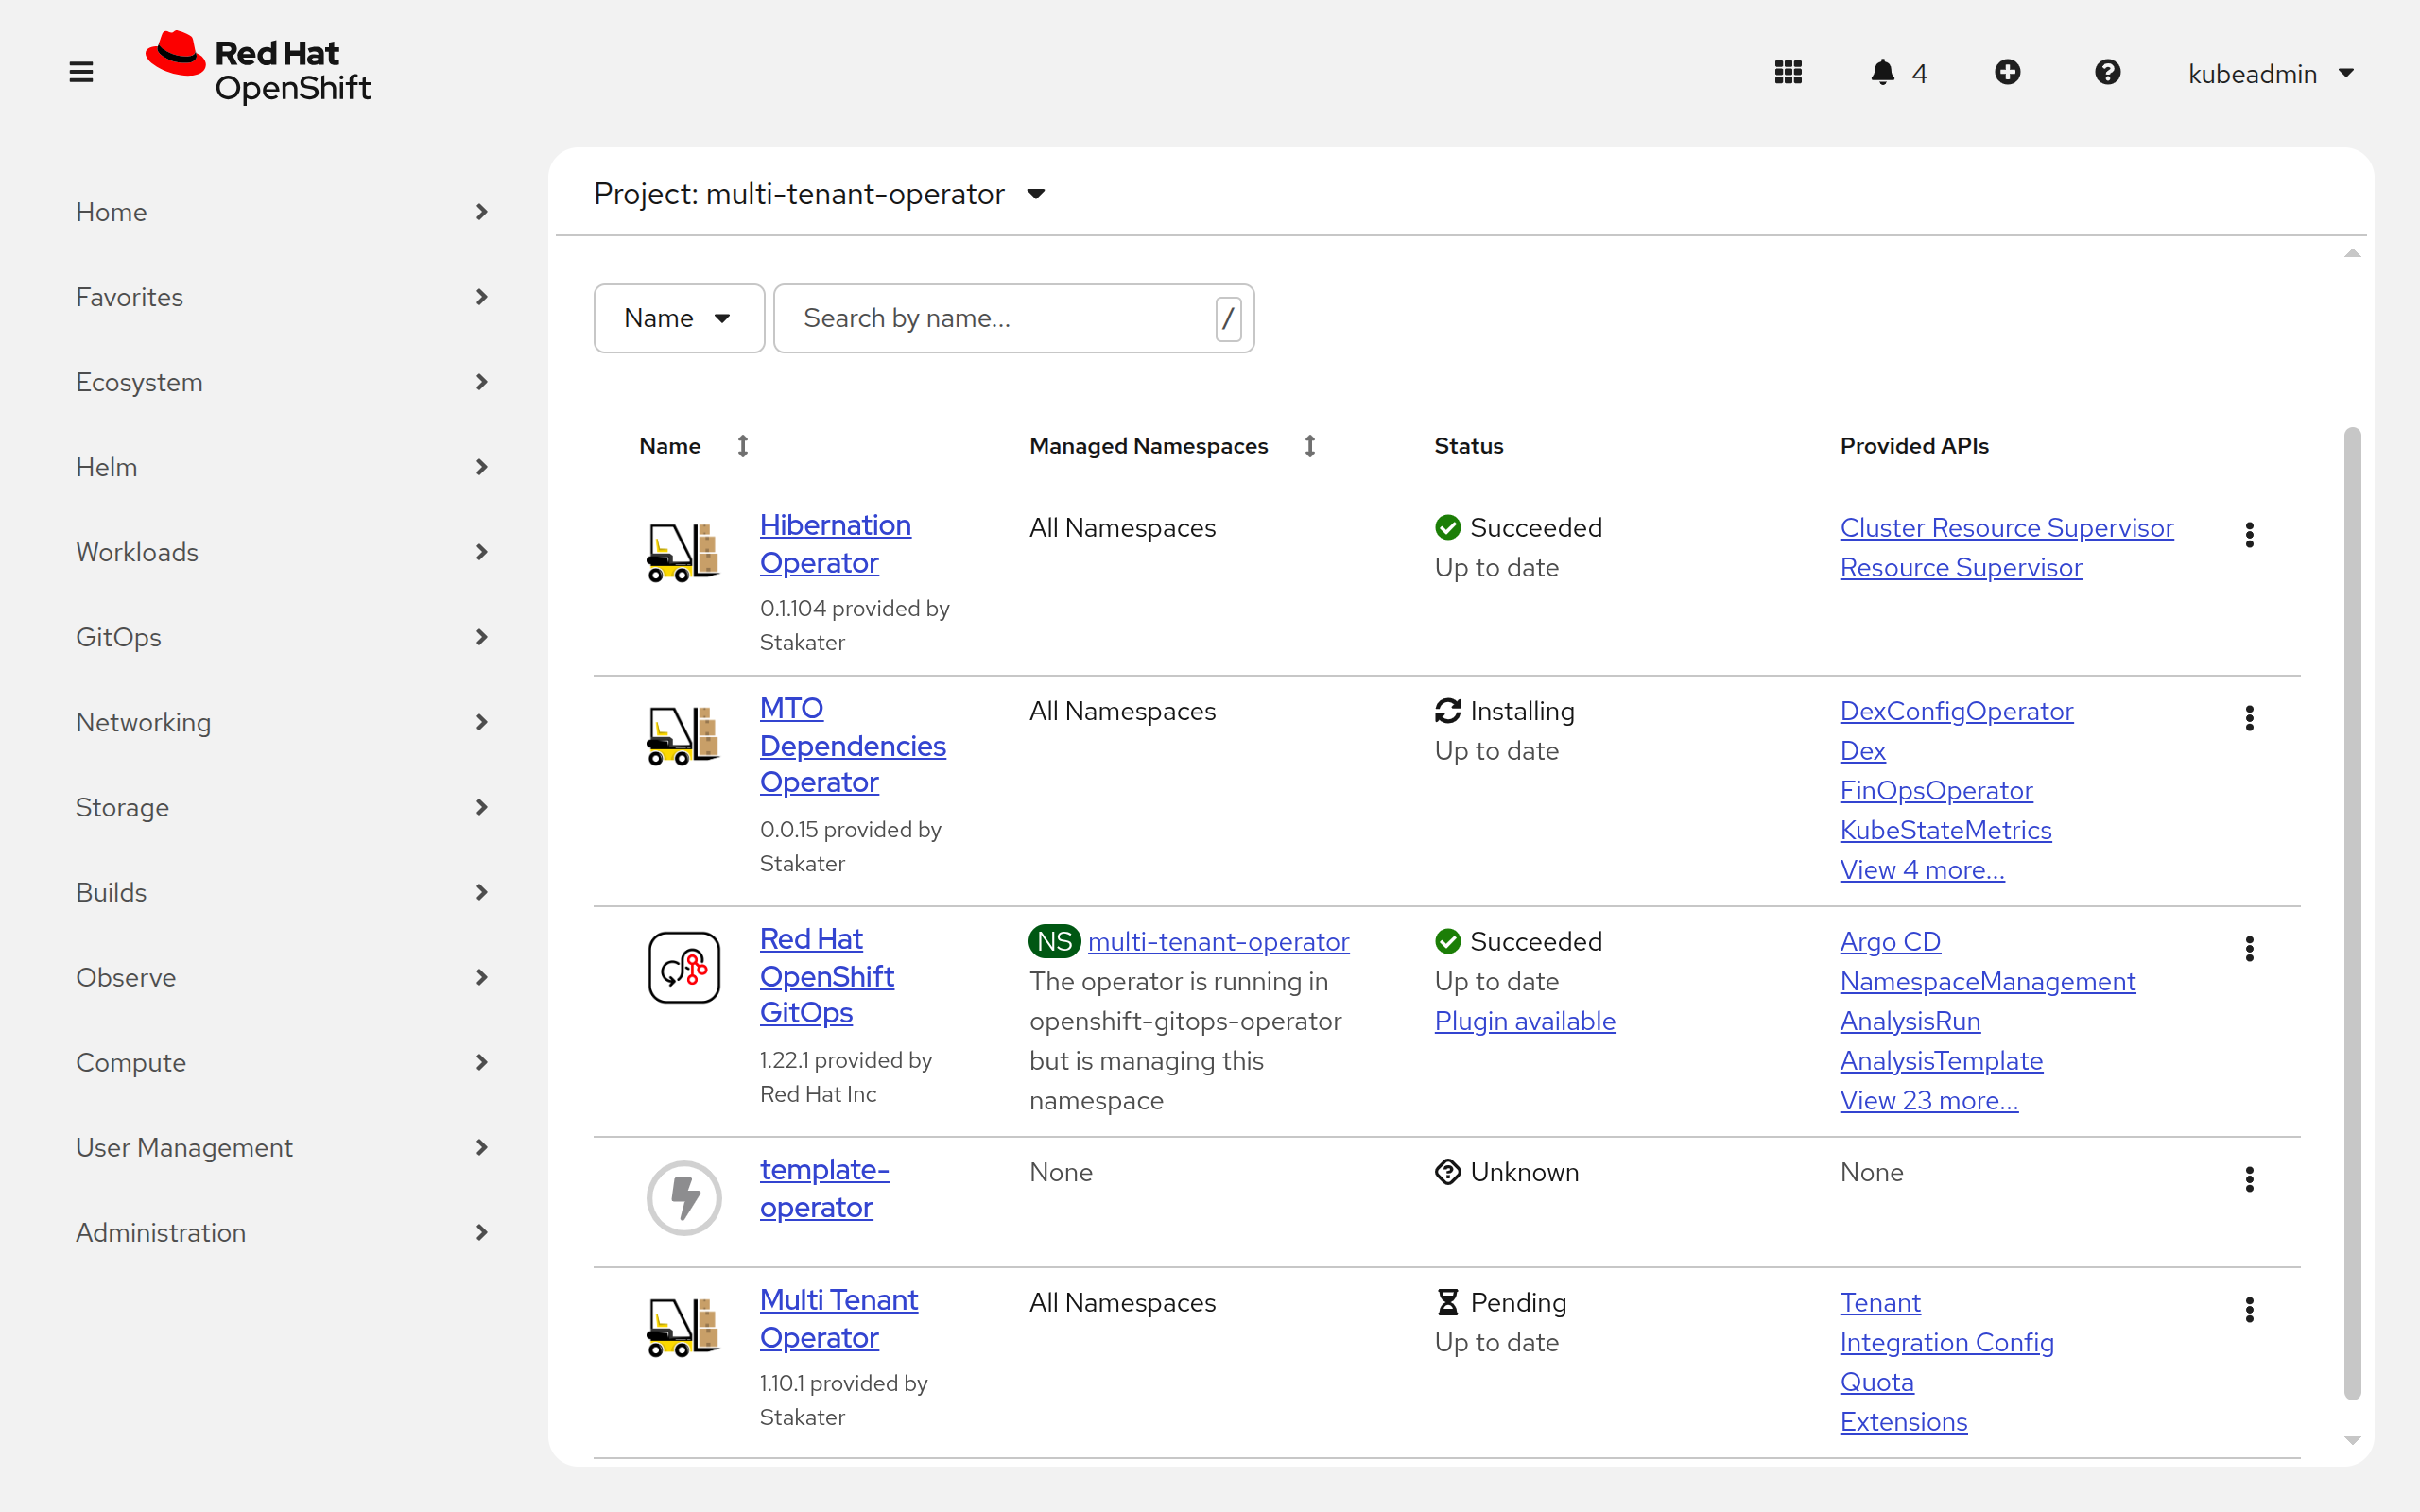
- Wait for the installation to complete
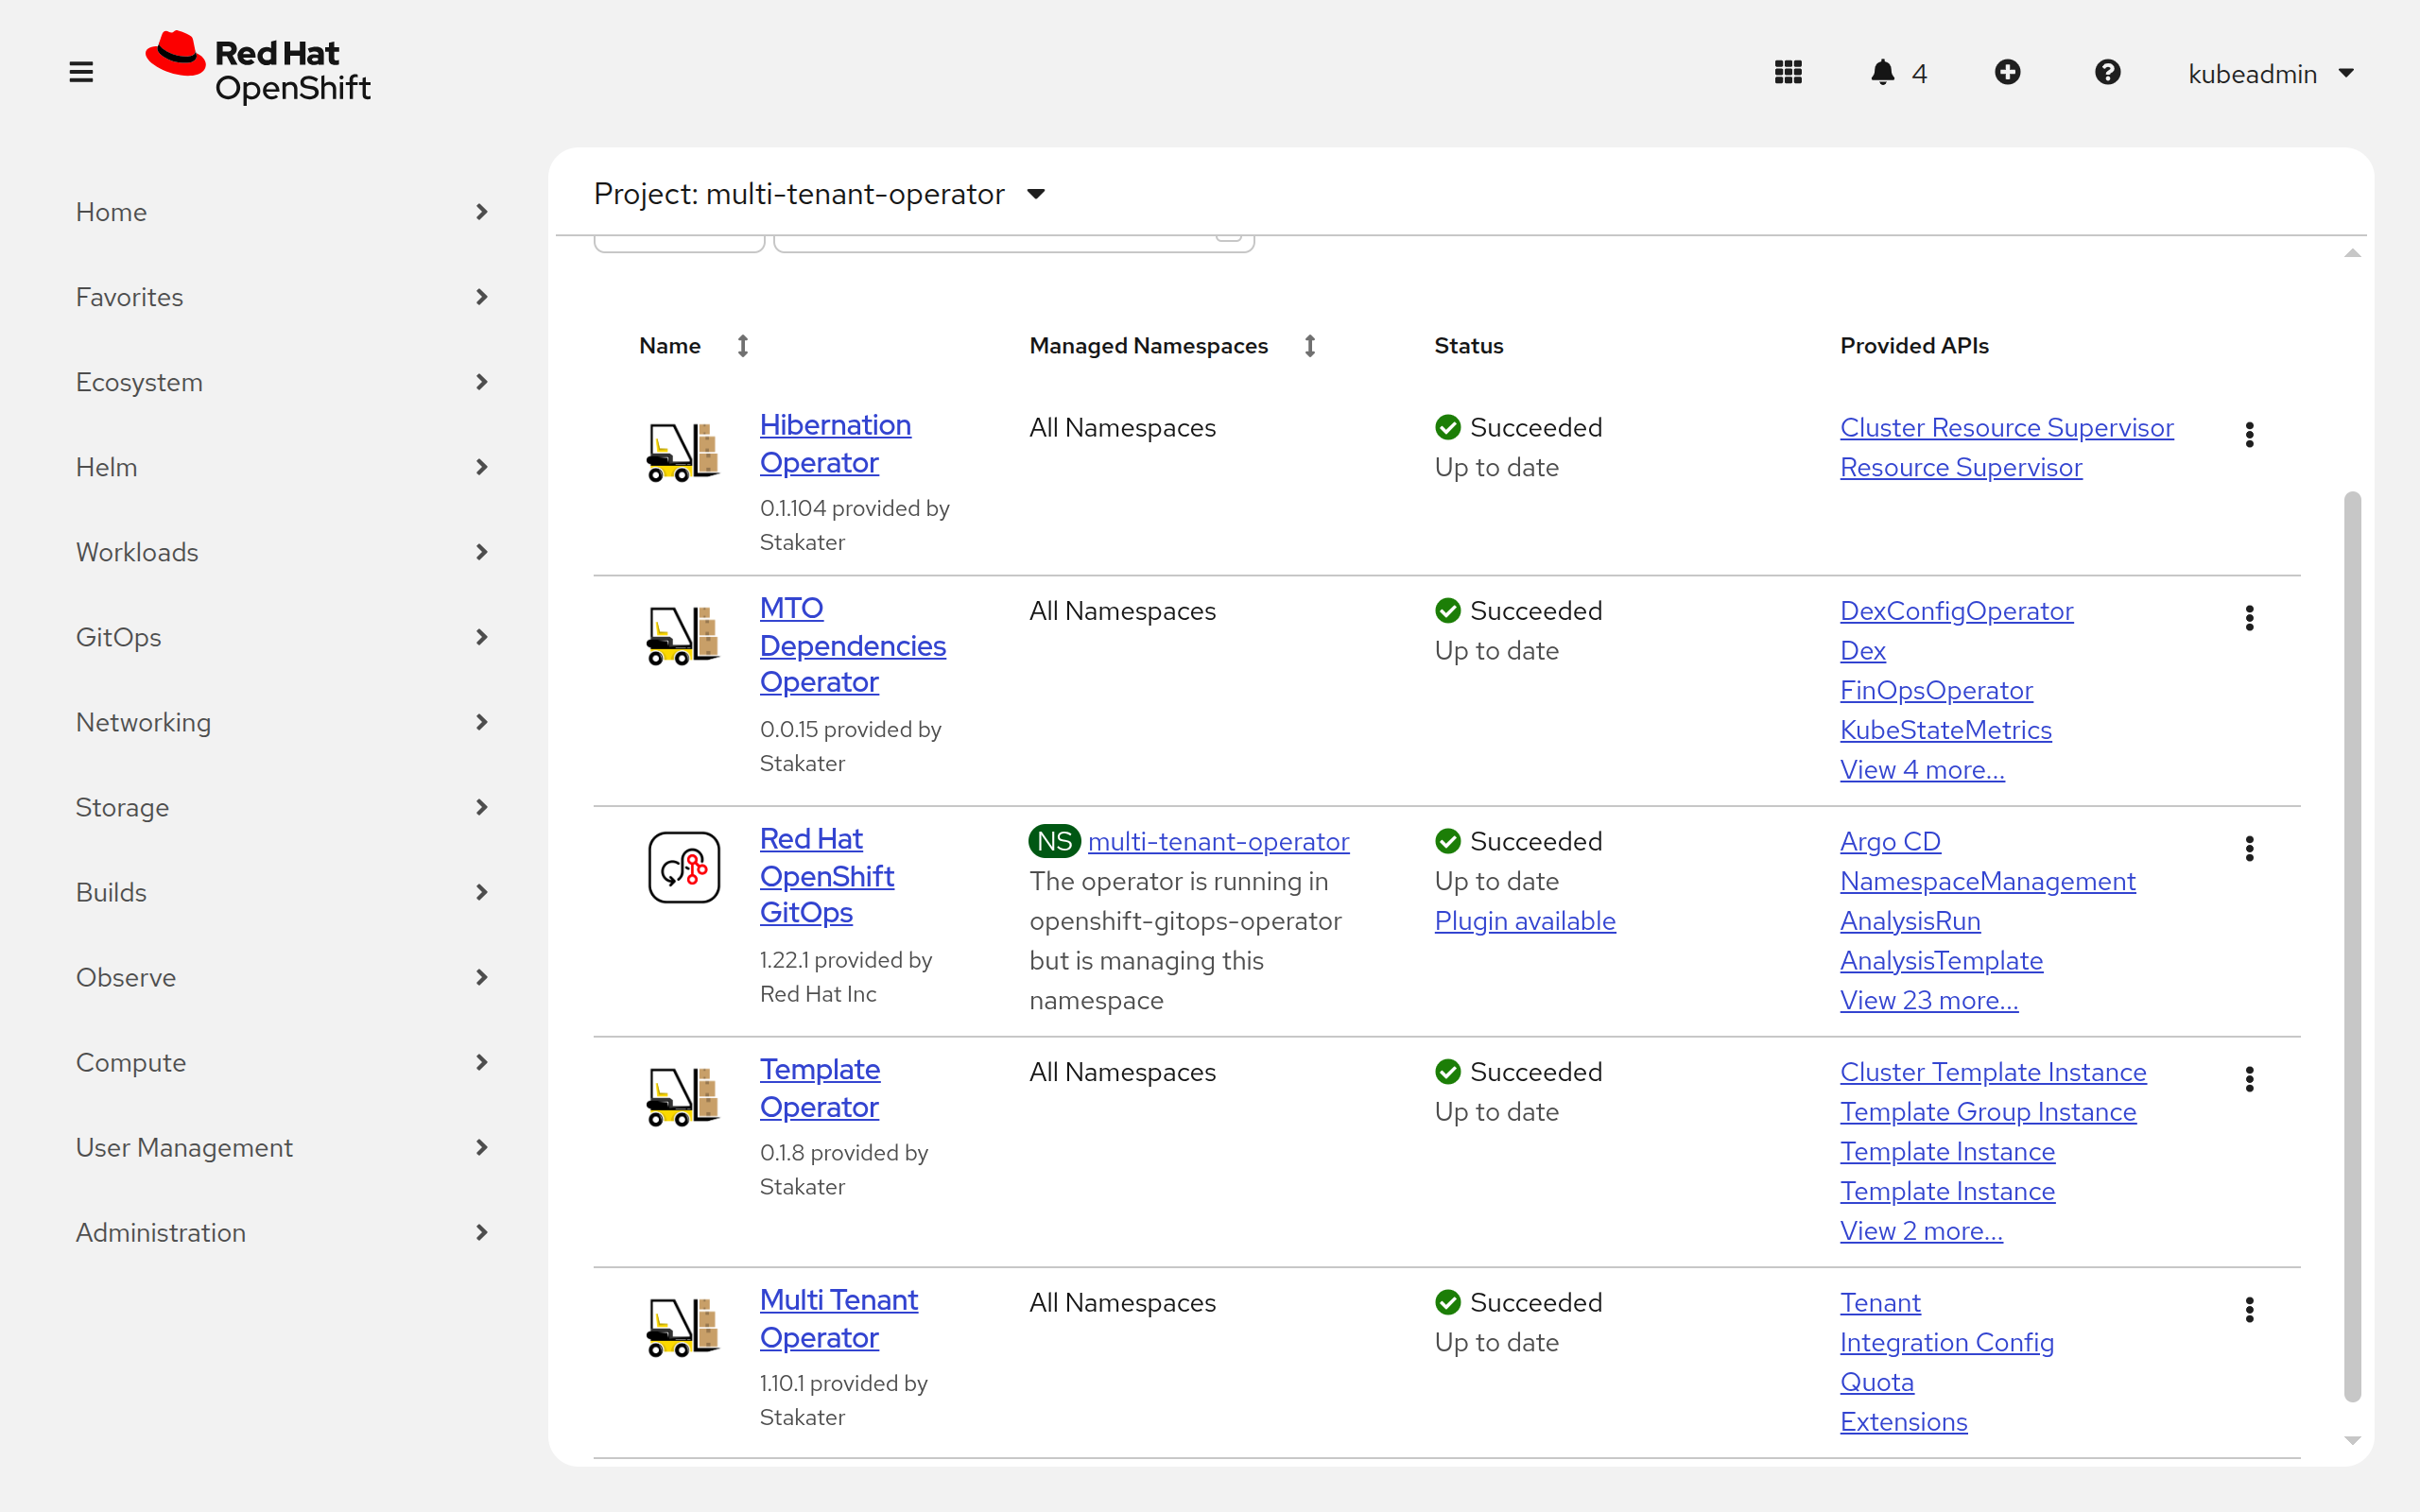
- Once the installation is complete click on
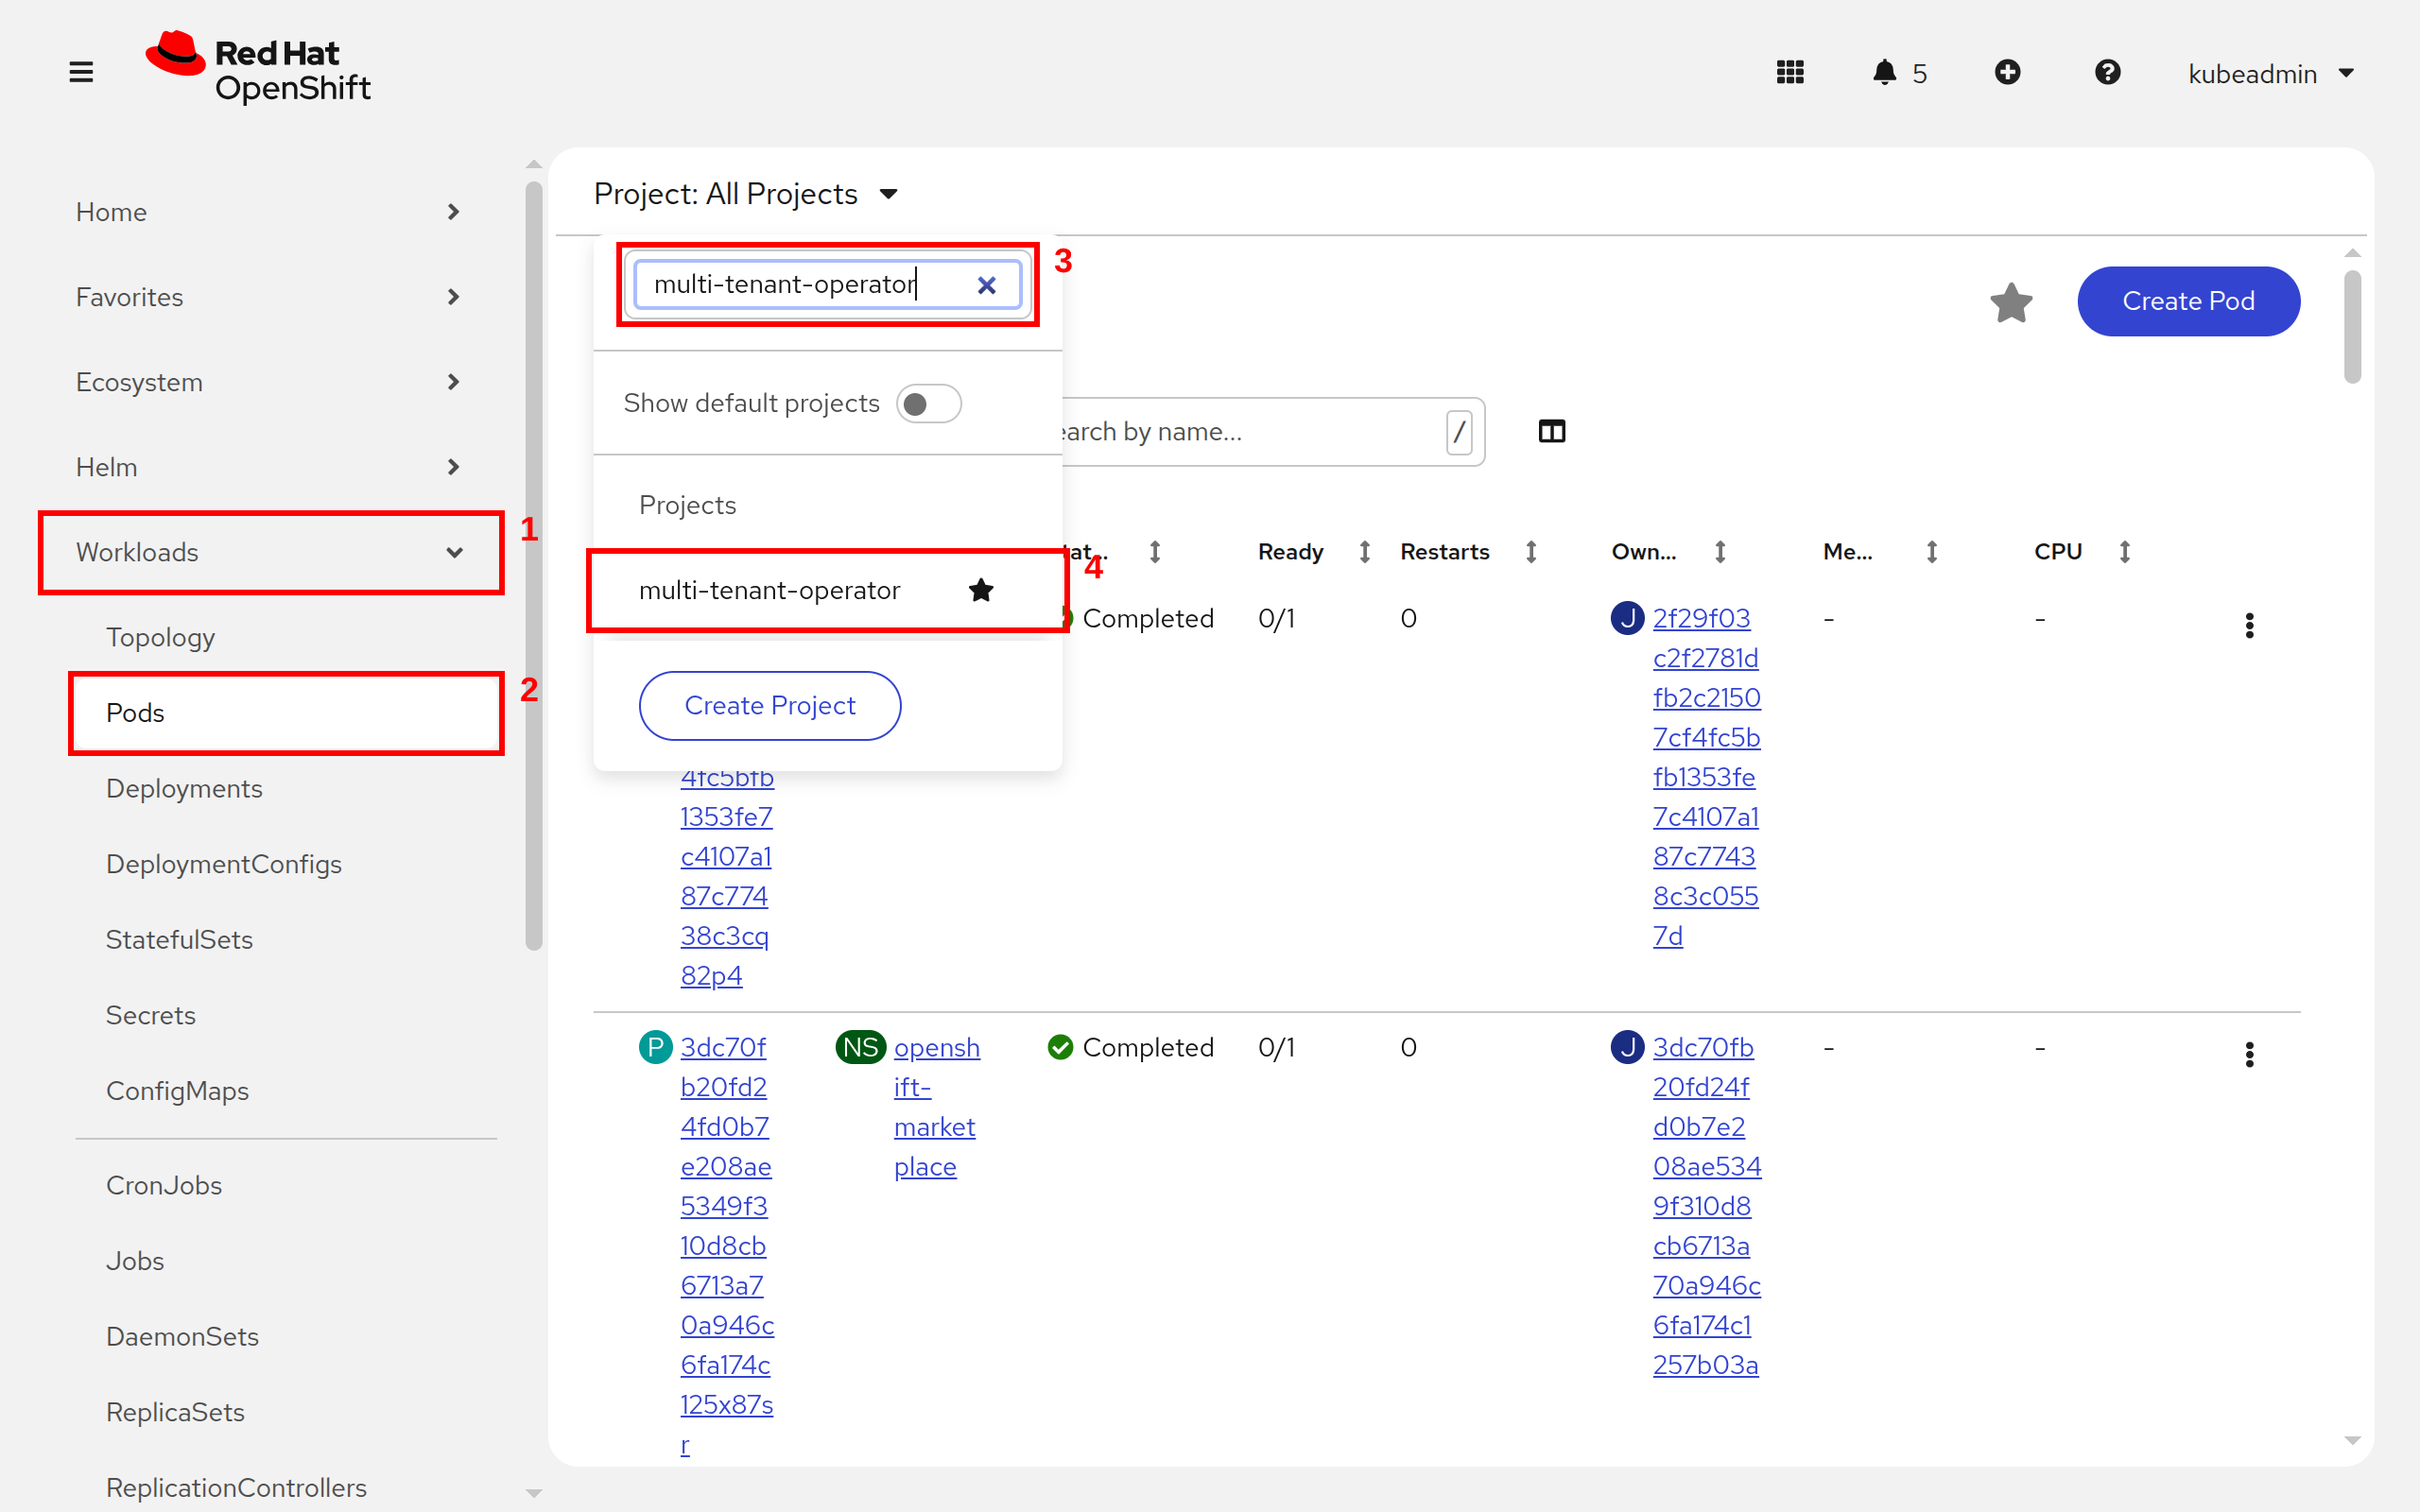
Workloads, followed byPodsfrom the side menu and selectmulti-tenant-operatorproject
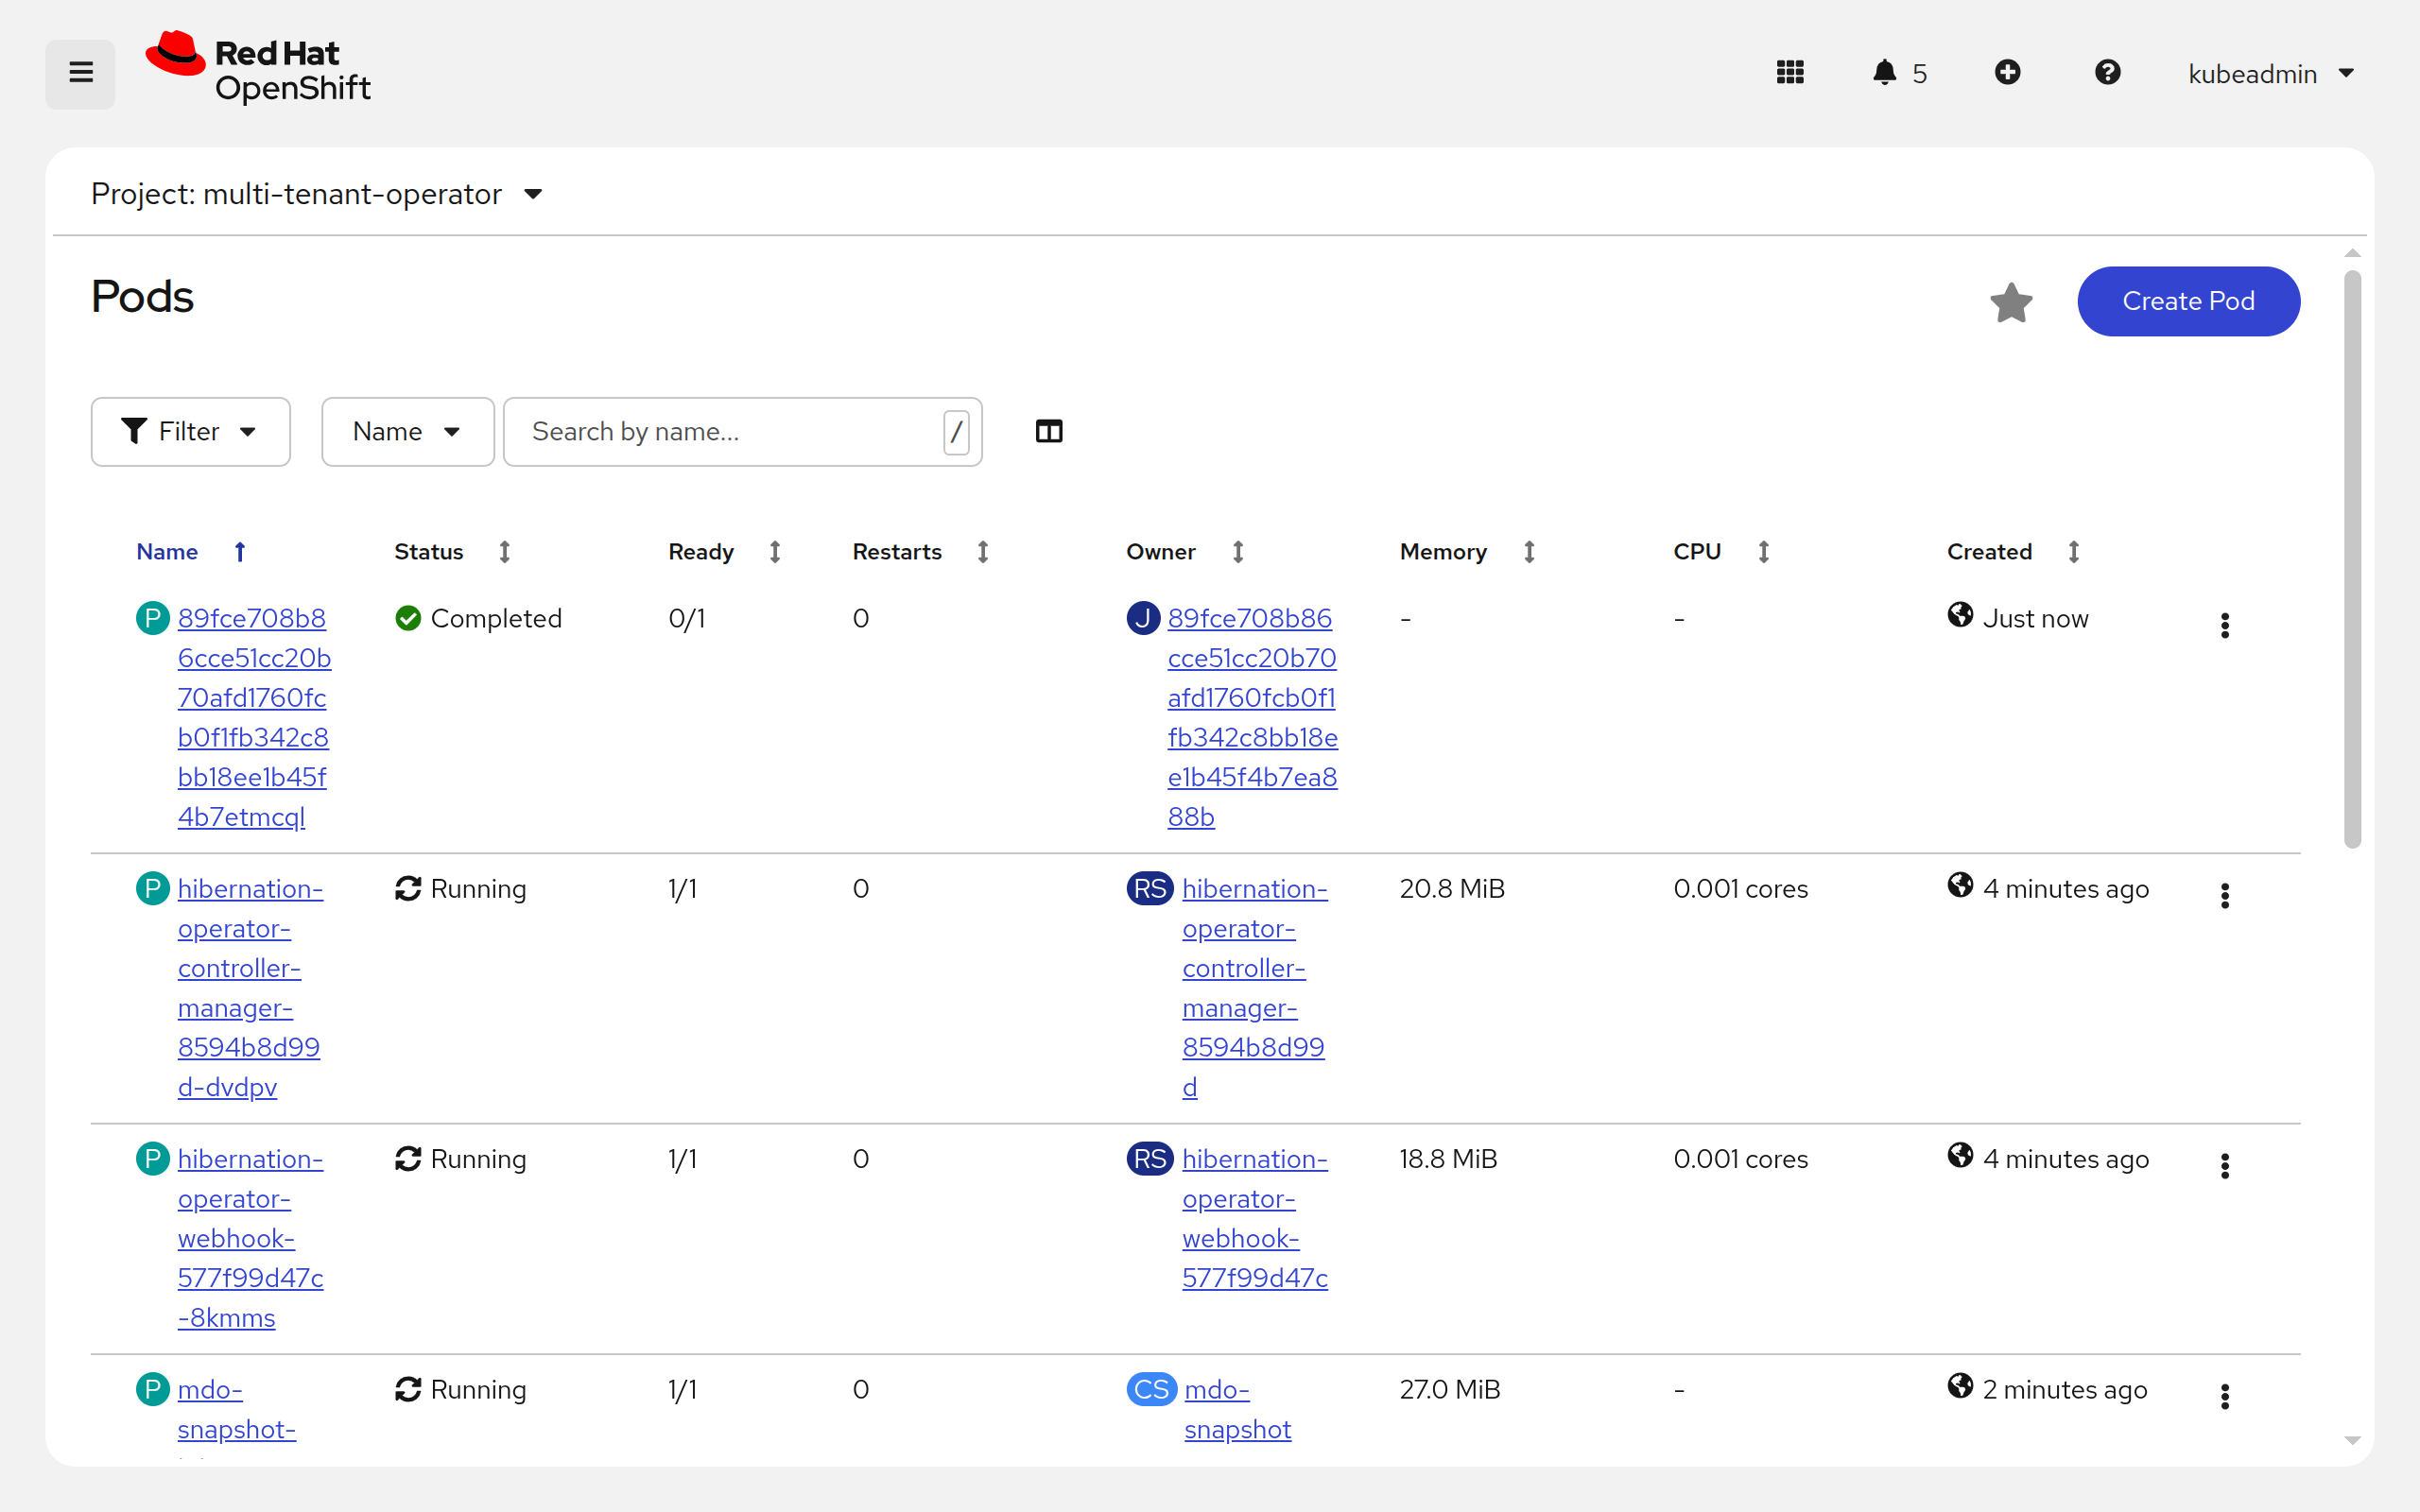
- Once pods are up and running, MTO will be ready to enforce multi-tenancy in your cluster
For more details and configurations check out IntegrationConfig.
Enabling Console#
To enable console GUI for MTO, go to Search -> IntegrationConfig -> tenant-operator-config and make sure the following fields are set to true:
spec:
  components:
    console: true
    showback: true
Note: If your
InstallPlanapproval is set toManualthen you will have to manually approve theInstallPlanfor MTO to be installed.
Manual Approval#
-
Open OpenShift console and click on
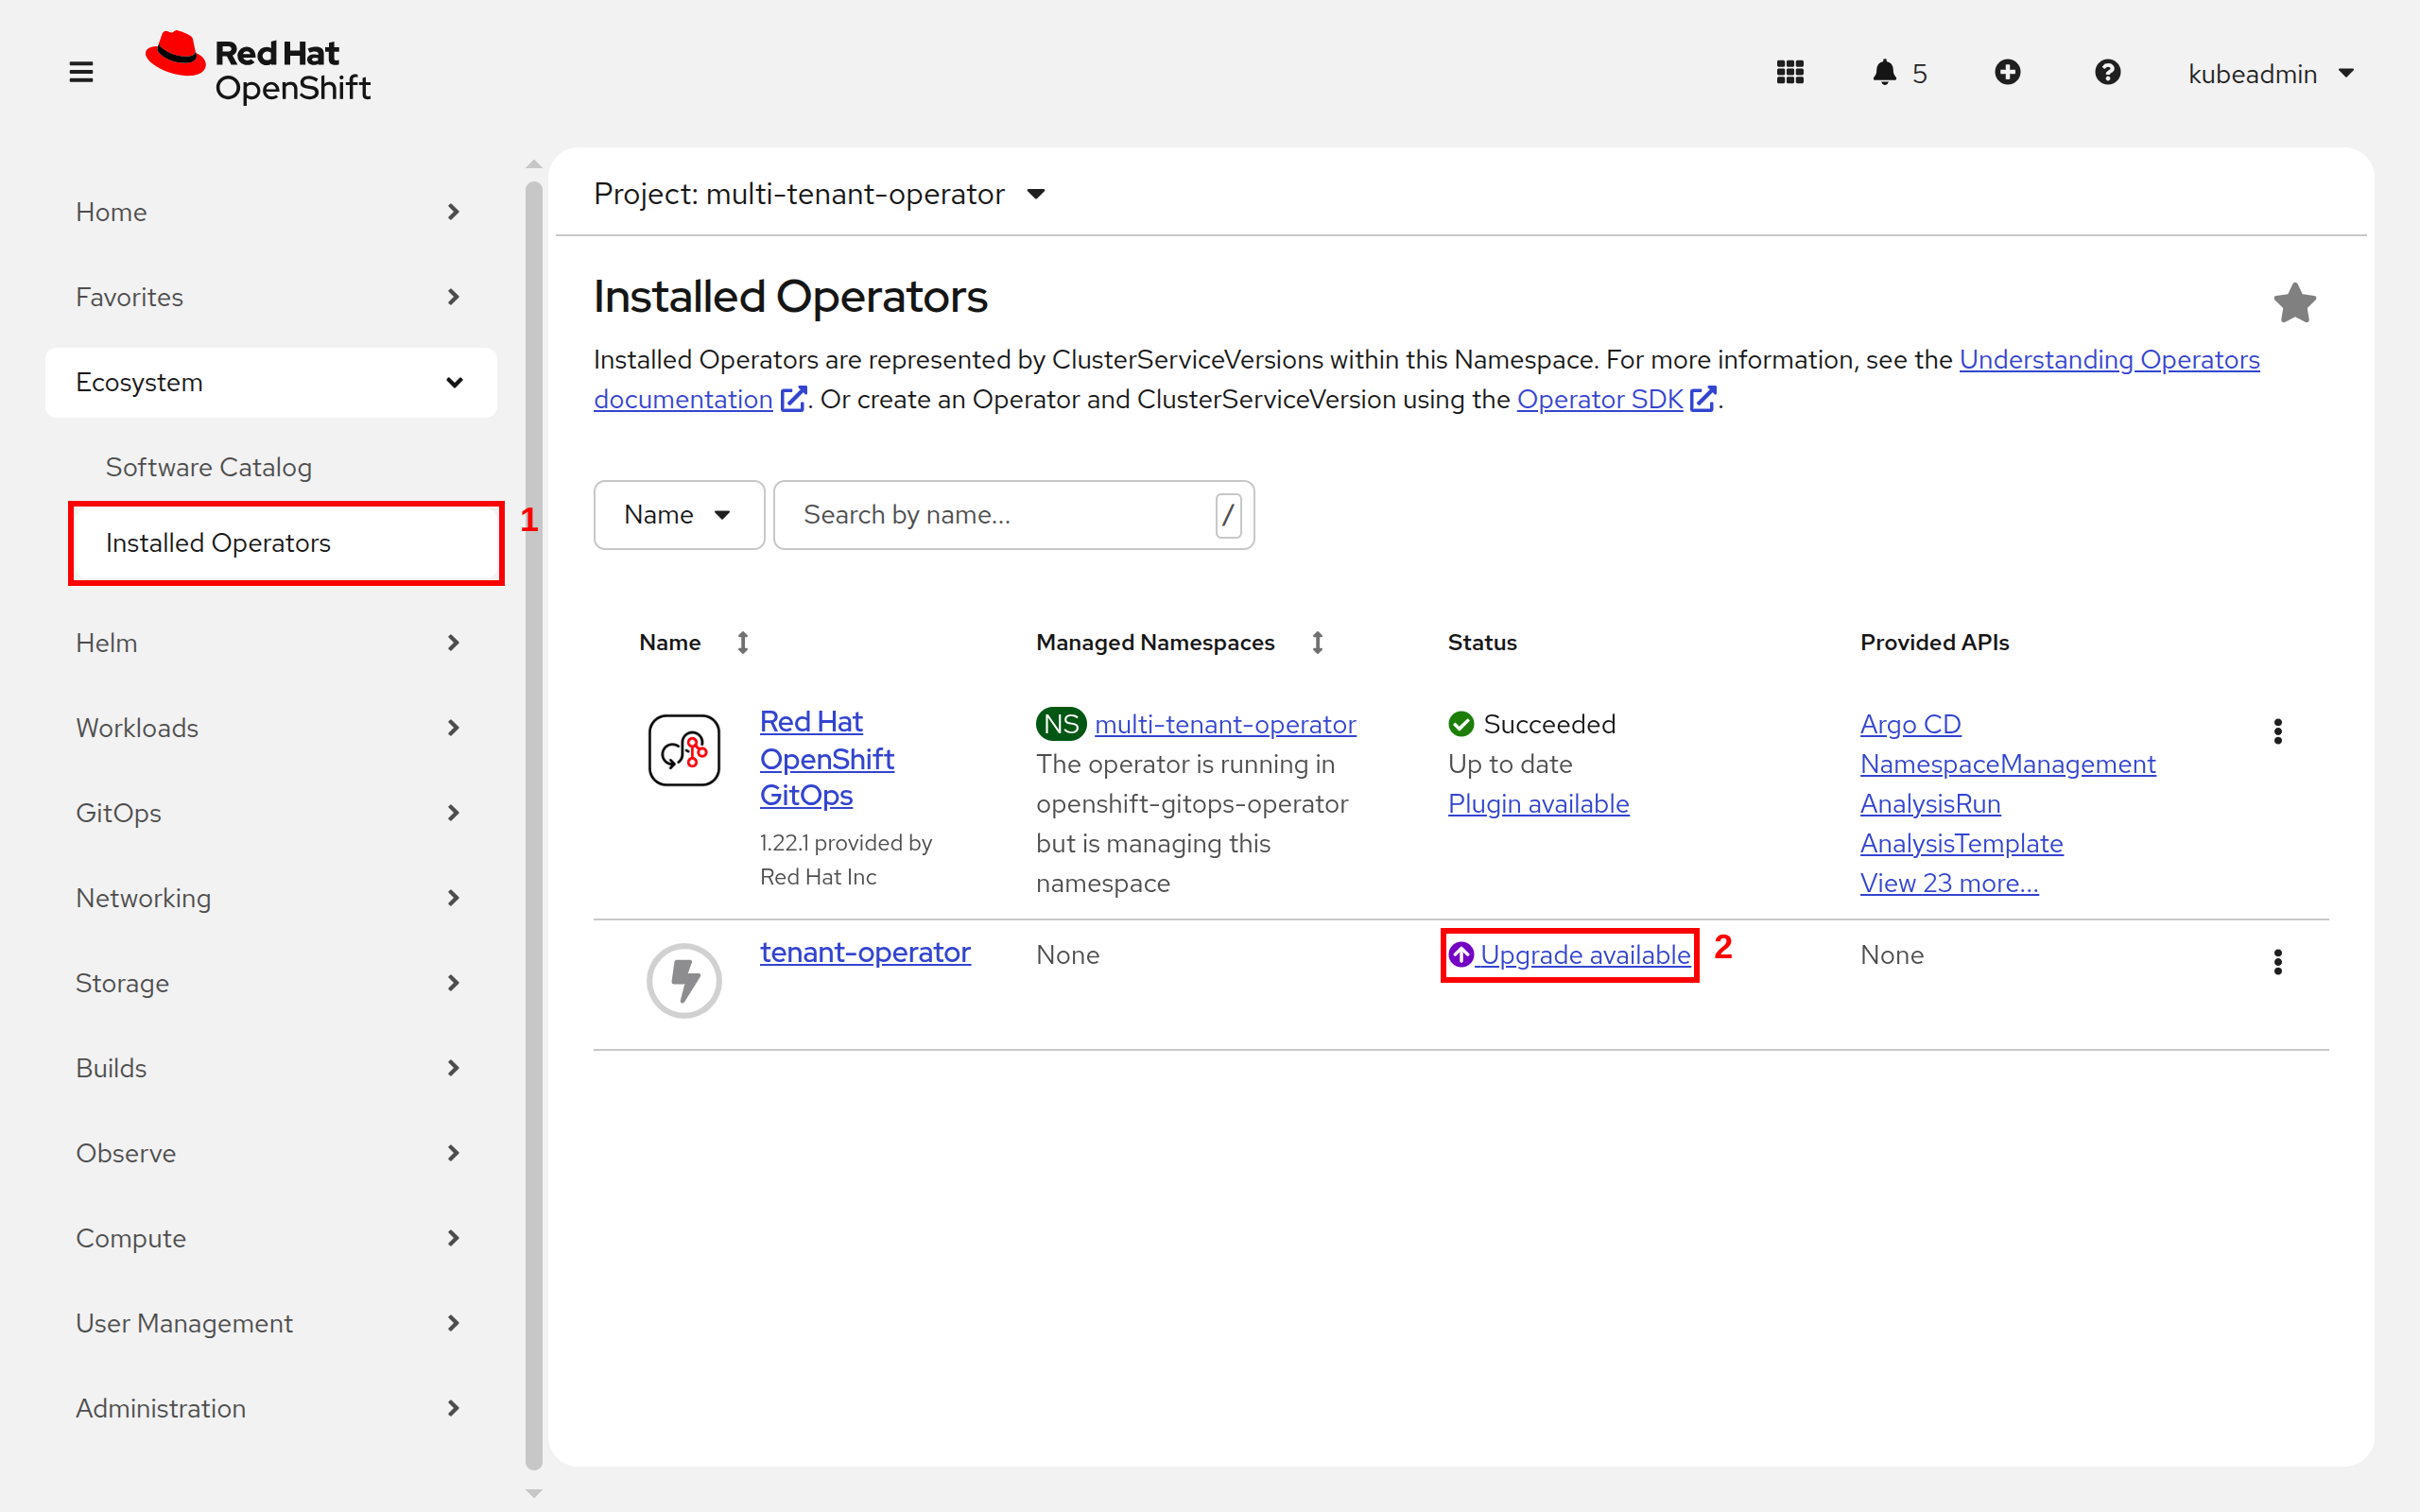
Ecosystem, followed byInstalled Operatorsfrom the side menu. -
Now click on
Upgrade availablein front oftenant-operator.
- Now click on
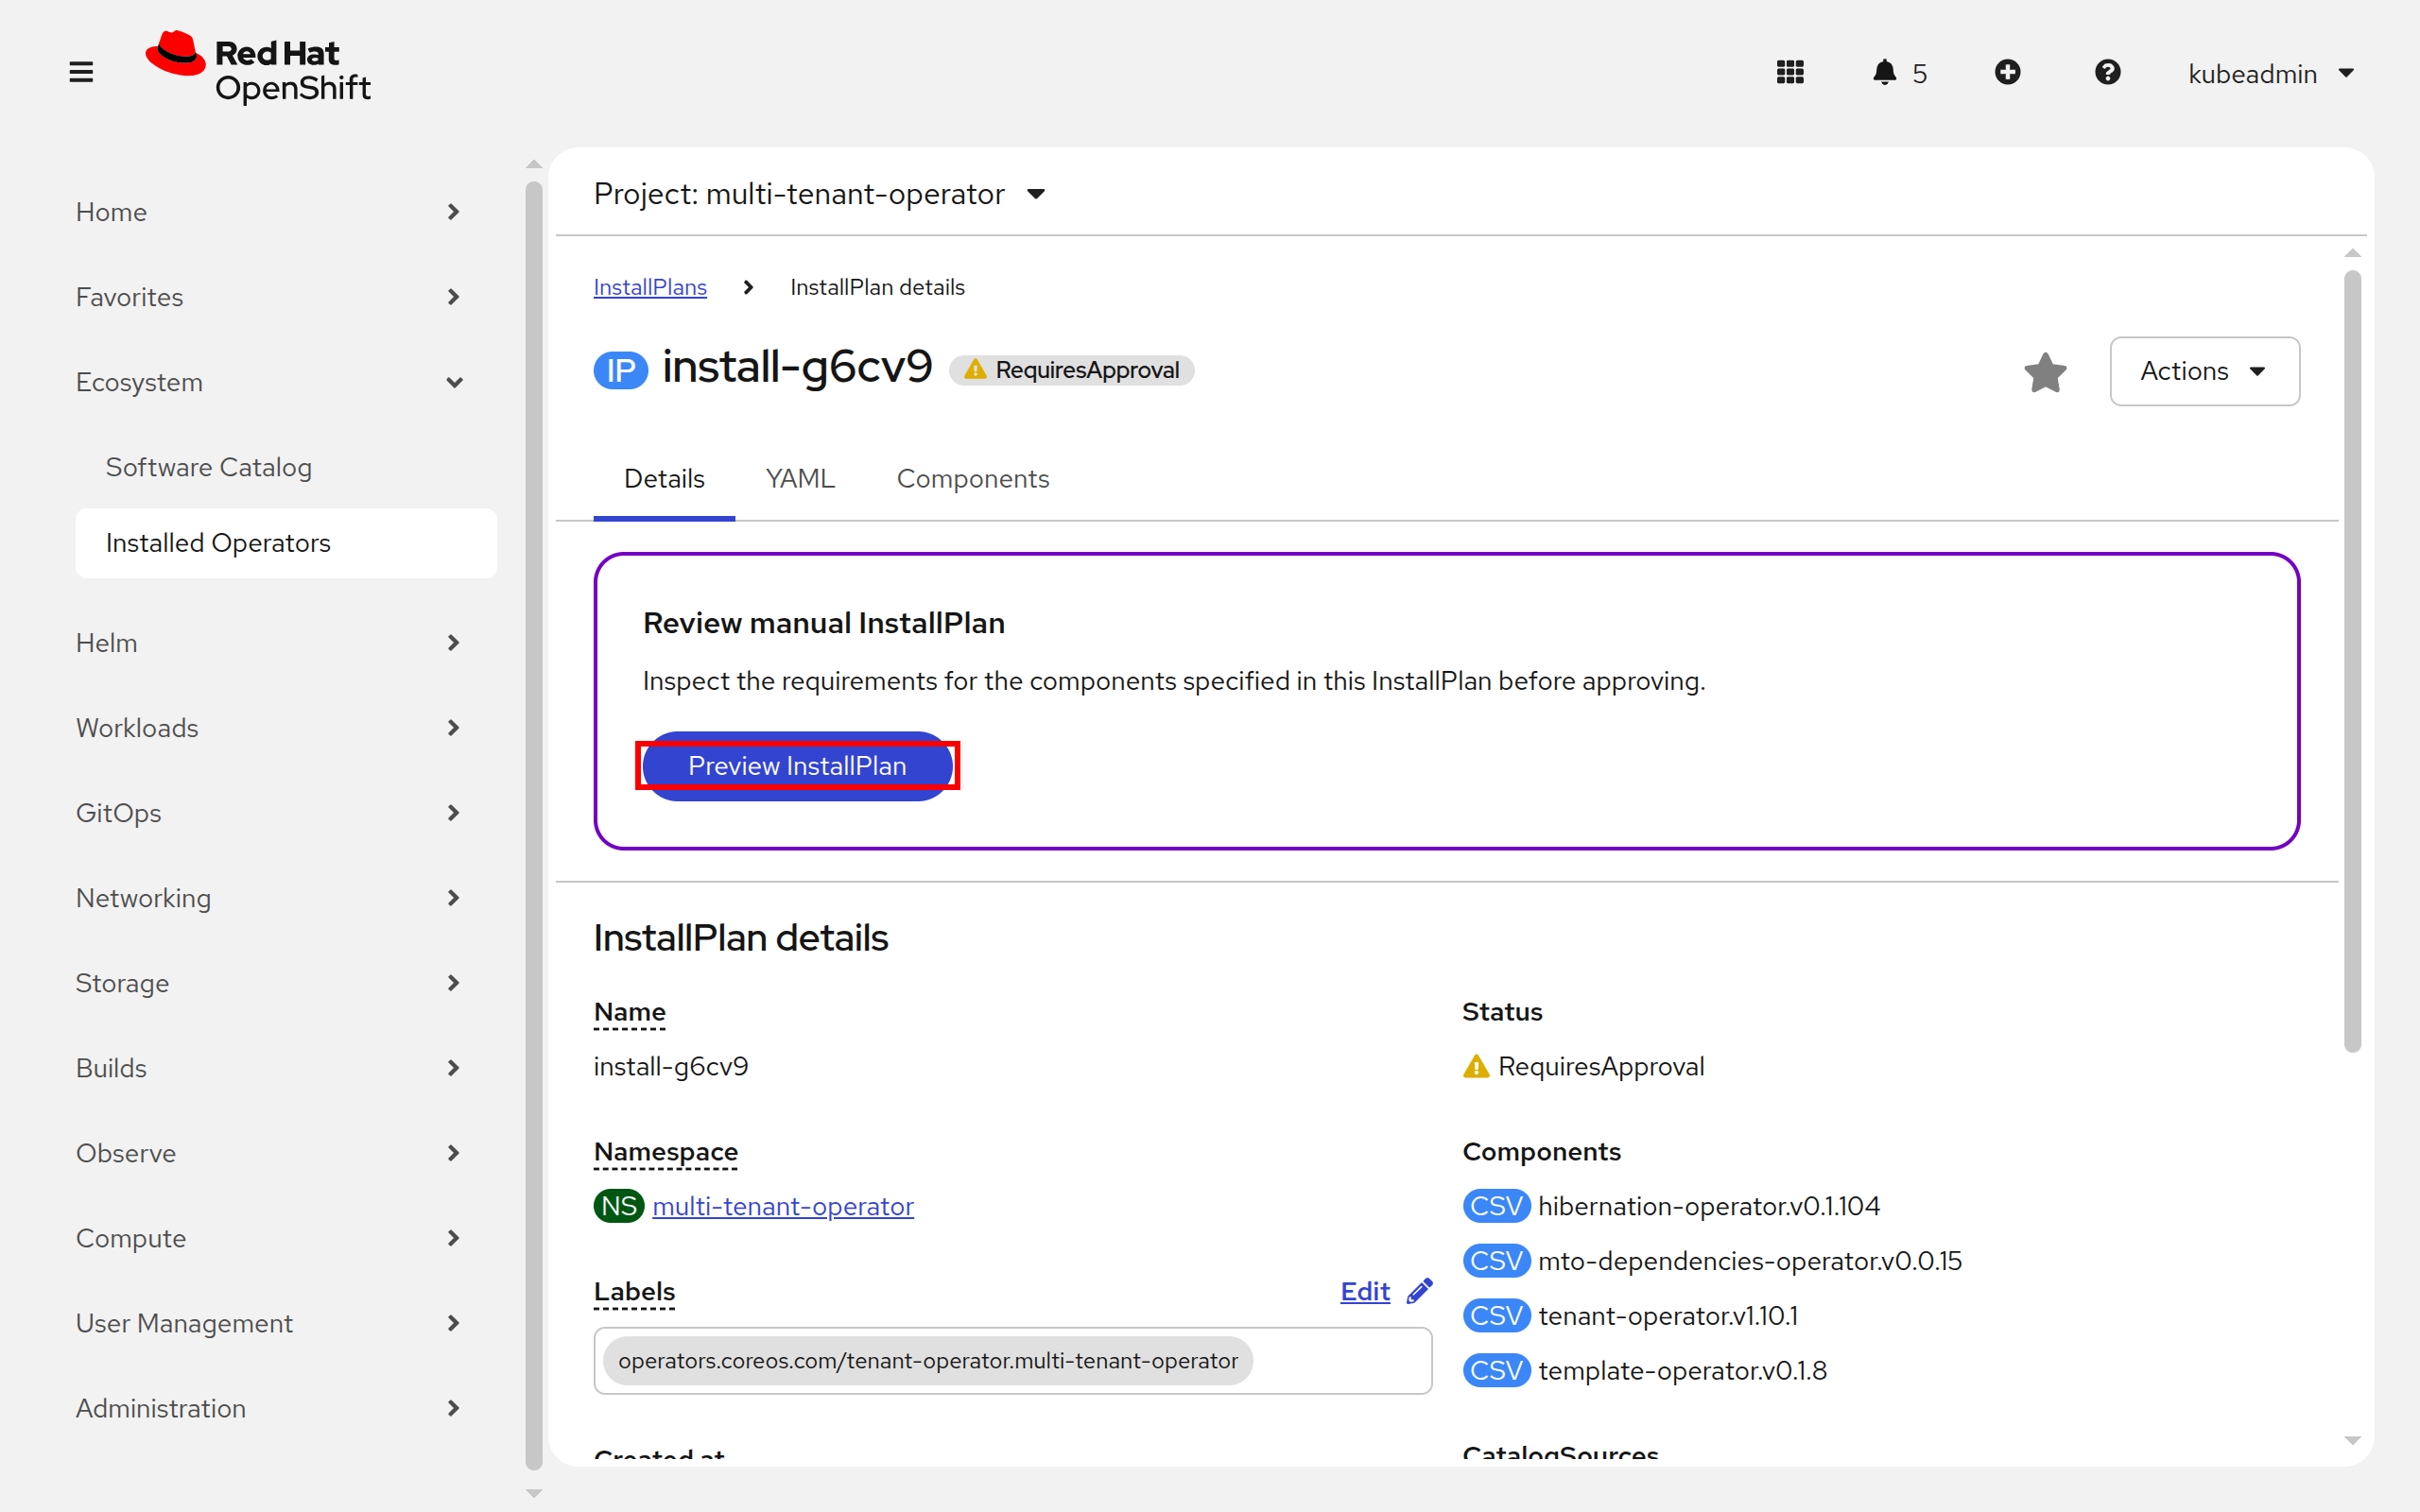
Preview InstallPlanon top.
- Now click on
Approvebutton.
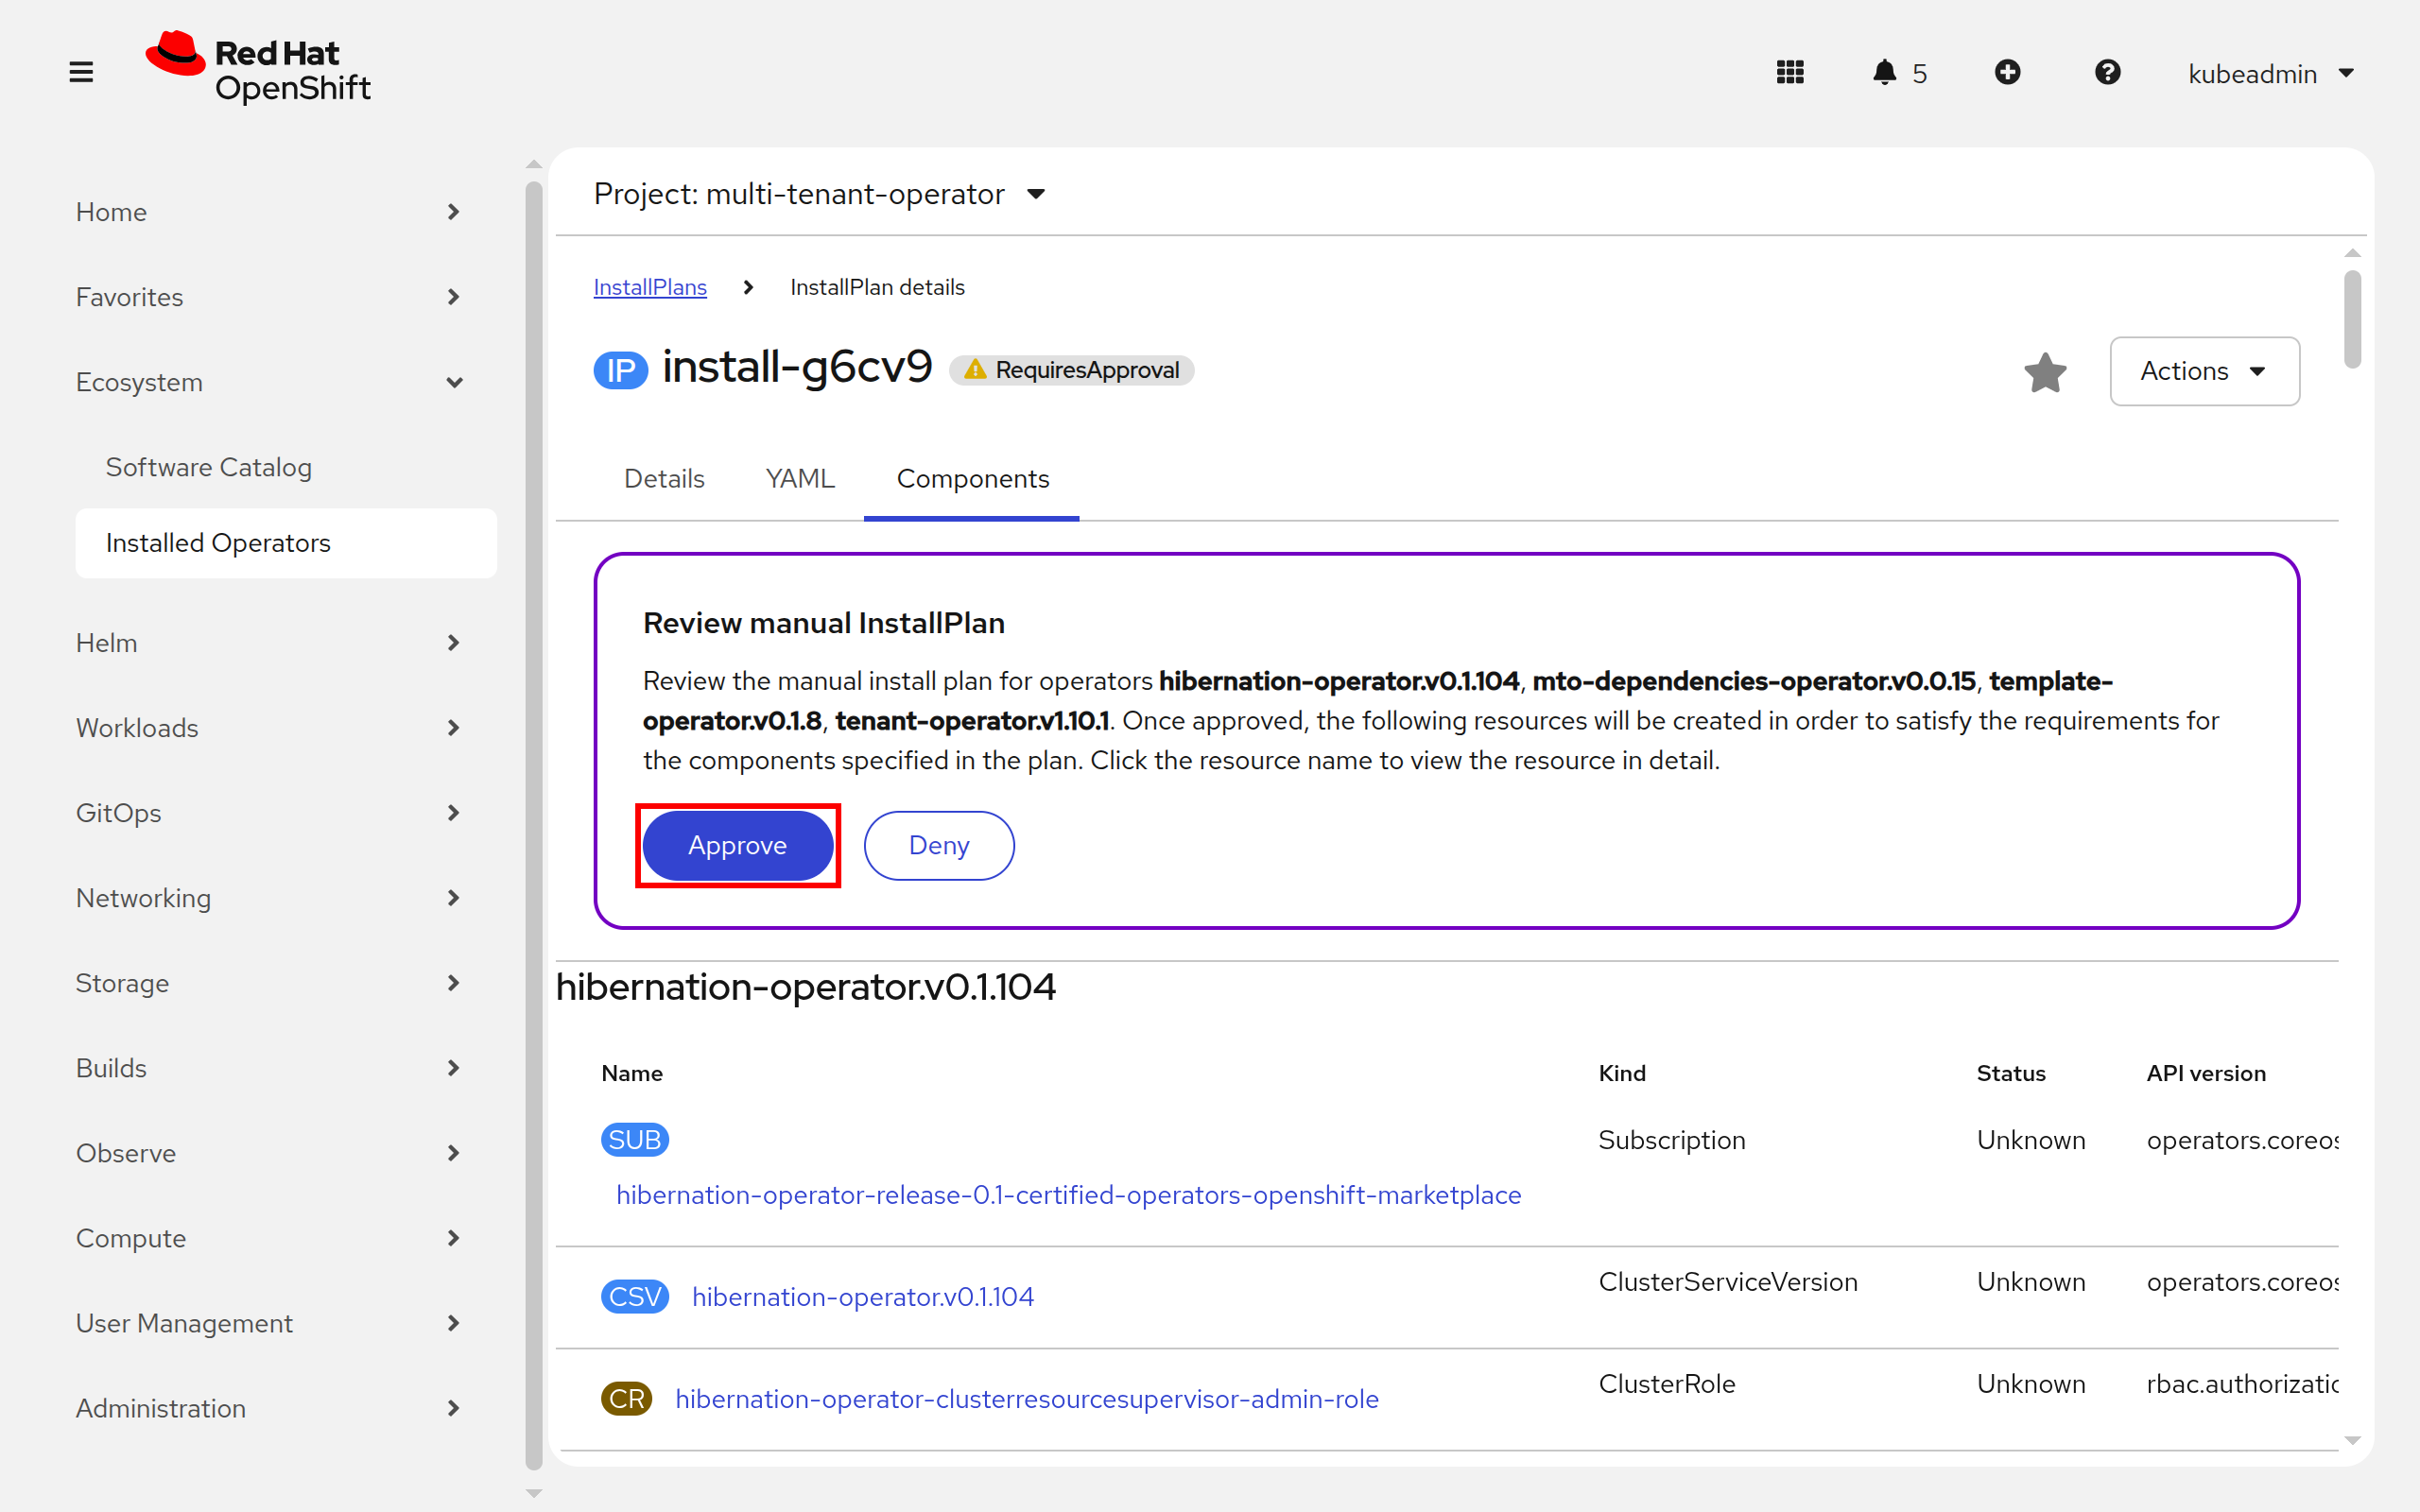
- Now the
InstallPlanwill be approved, and MTO will be installed.
Console Admin Access#
MTO ships with a default admin user, mto, that you can log in to the console with. It is not privileged out of the box, so add its email to the privileged users in the IntegrationConfig to give it administrator access:
oc patch integrationconfigs.tenantoperator.stakater.com tenant-operator-config \
  -n multi-tenant-operator --type=merge --patch '{
    "spec": {
        "accessControl": {
            "privileged": {
                "users": [
                    "mto@stakater.com"
                ]
            }
        }
    }
}'
Users listed under spec.accessControl.privileged can see every tenant and namespace in the console, along with the IntegrationConfig itself. For the other console roles, see Configuration.
The mto account exists so you can sign in before an identity provider is connected. Remove it before the cluster goes to production; see Remove the default admin login.
Uninstall via Software Catalog UI#
You can uninstall MTO by following these steps:
-
Decide whether to retain tenant namespaces and ArgoCD AppProjects. Set
spec.namespaces.onDeletePurgeNamespacestofalseon every tenant whose namespaces you want to keep, andargoCD.onDeletePurgeAppProjecttofalseon itsExtensionsresource for every AppProject you want to keep. See Delete a Tenant and Uninstalling MTO. -
After making the required changes open OpenShift console and click on
Ecosystem, followed byInstalled Operatorsfrom the side menu
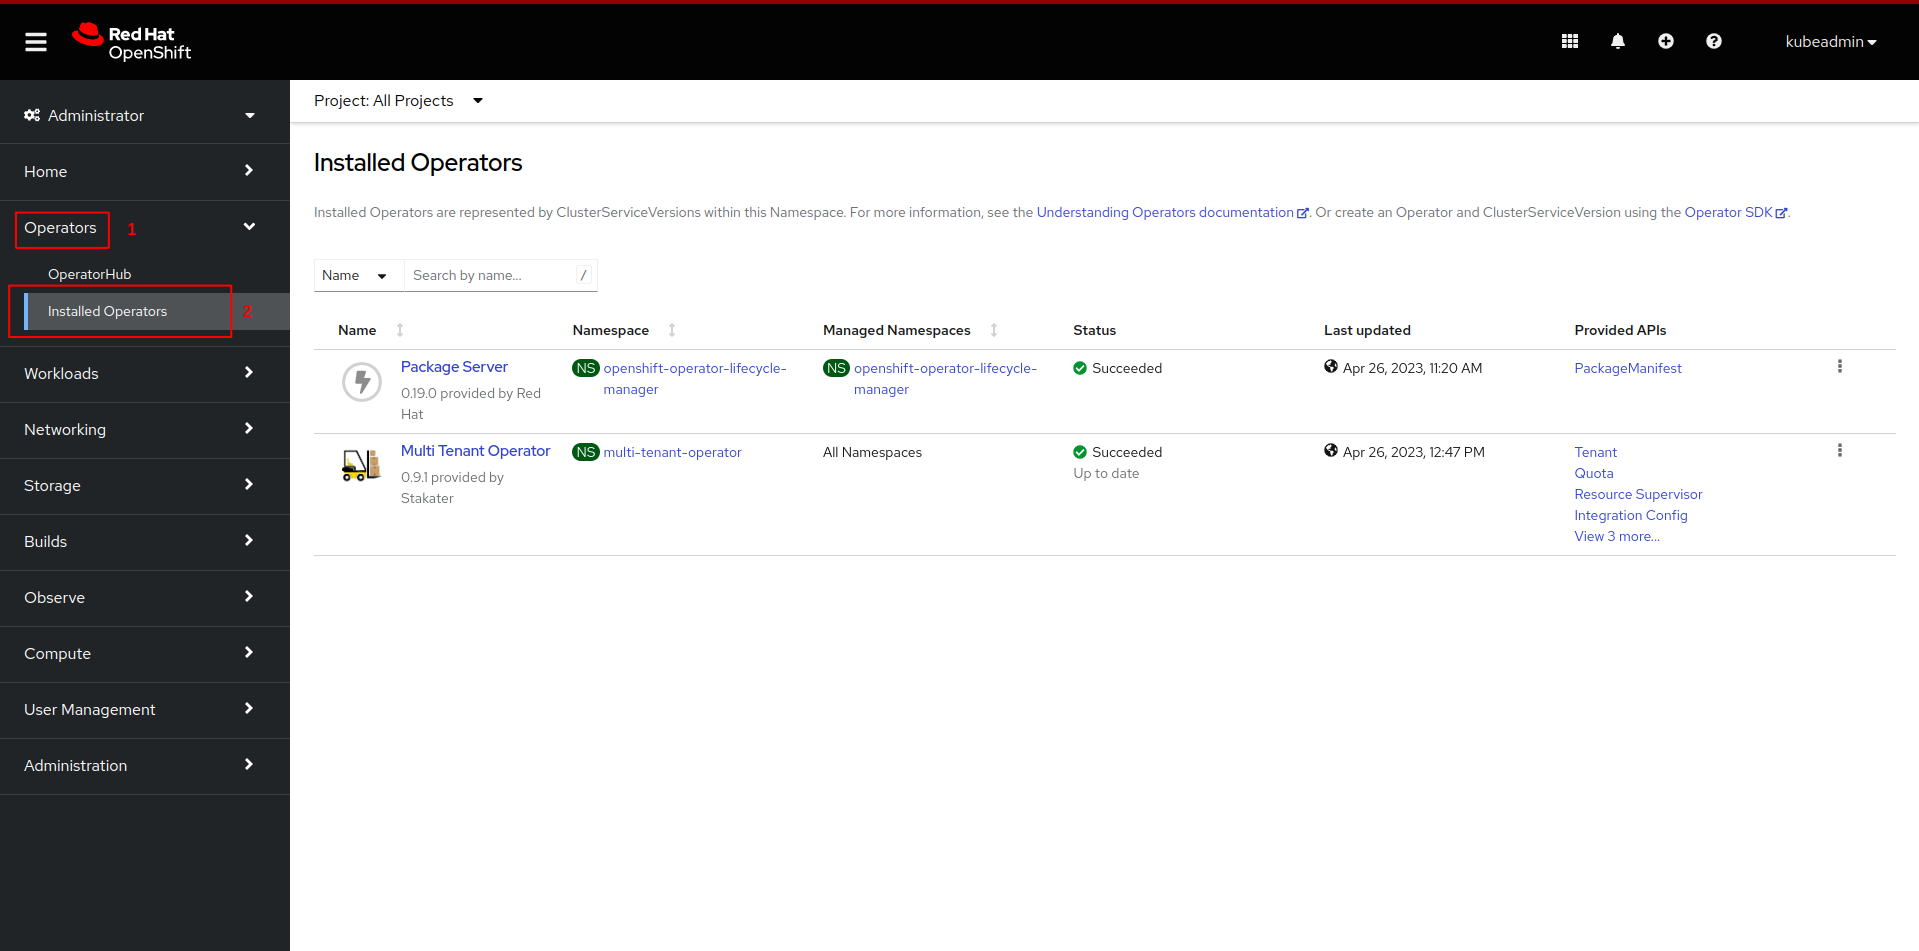
- Now click on uninstall and confirm uninstall.
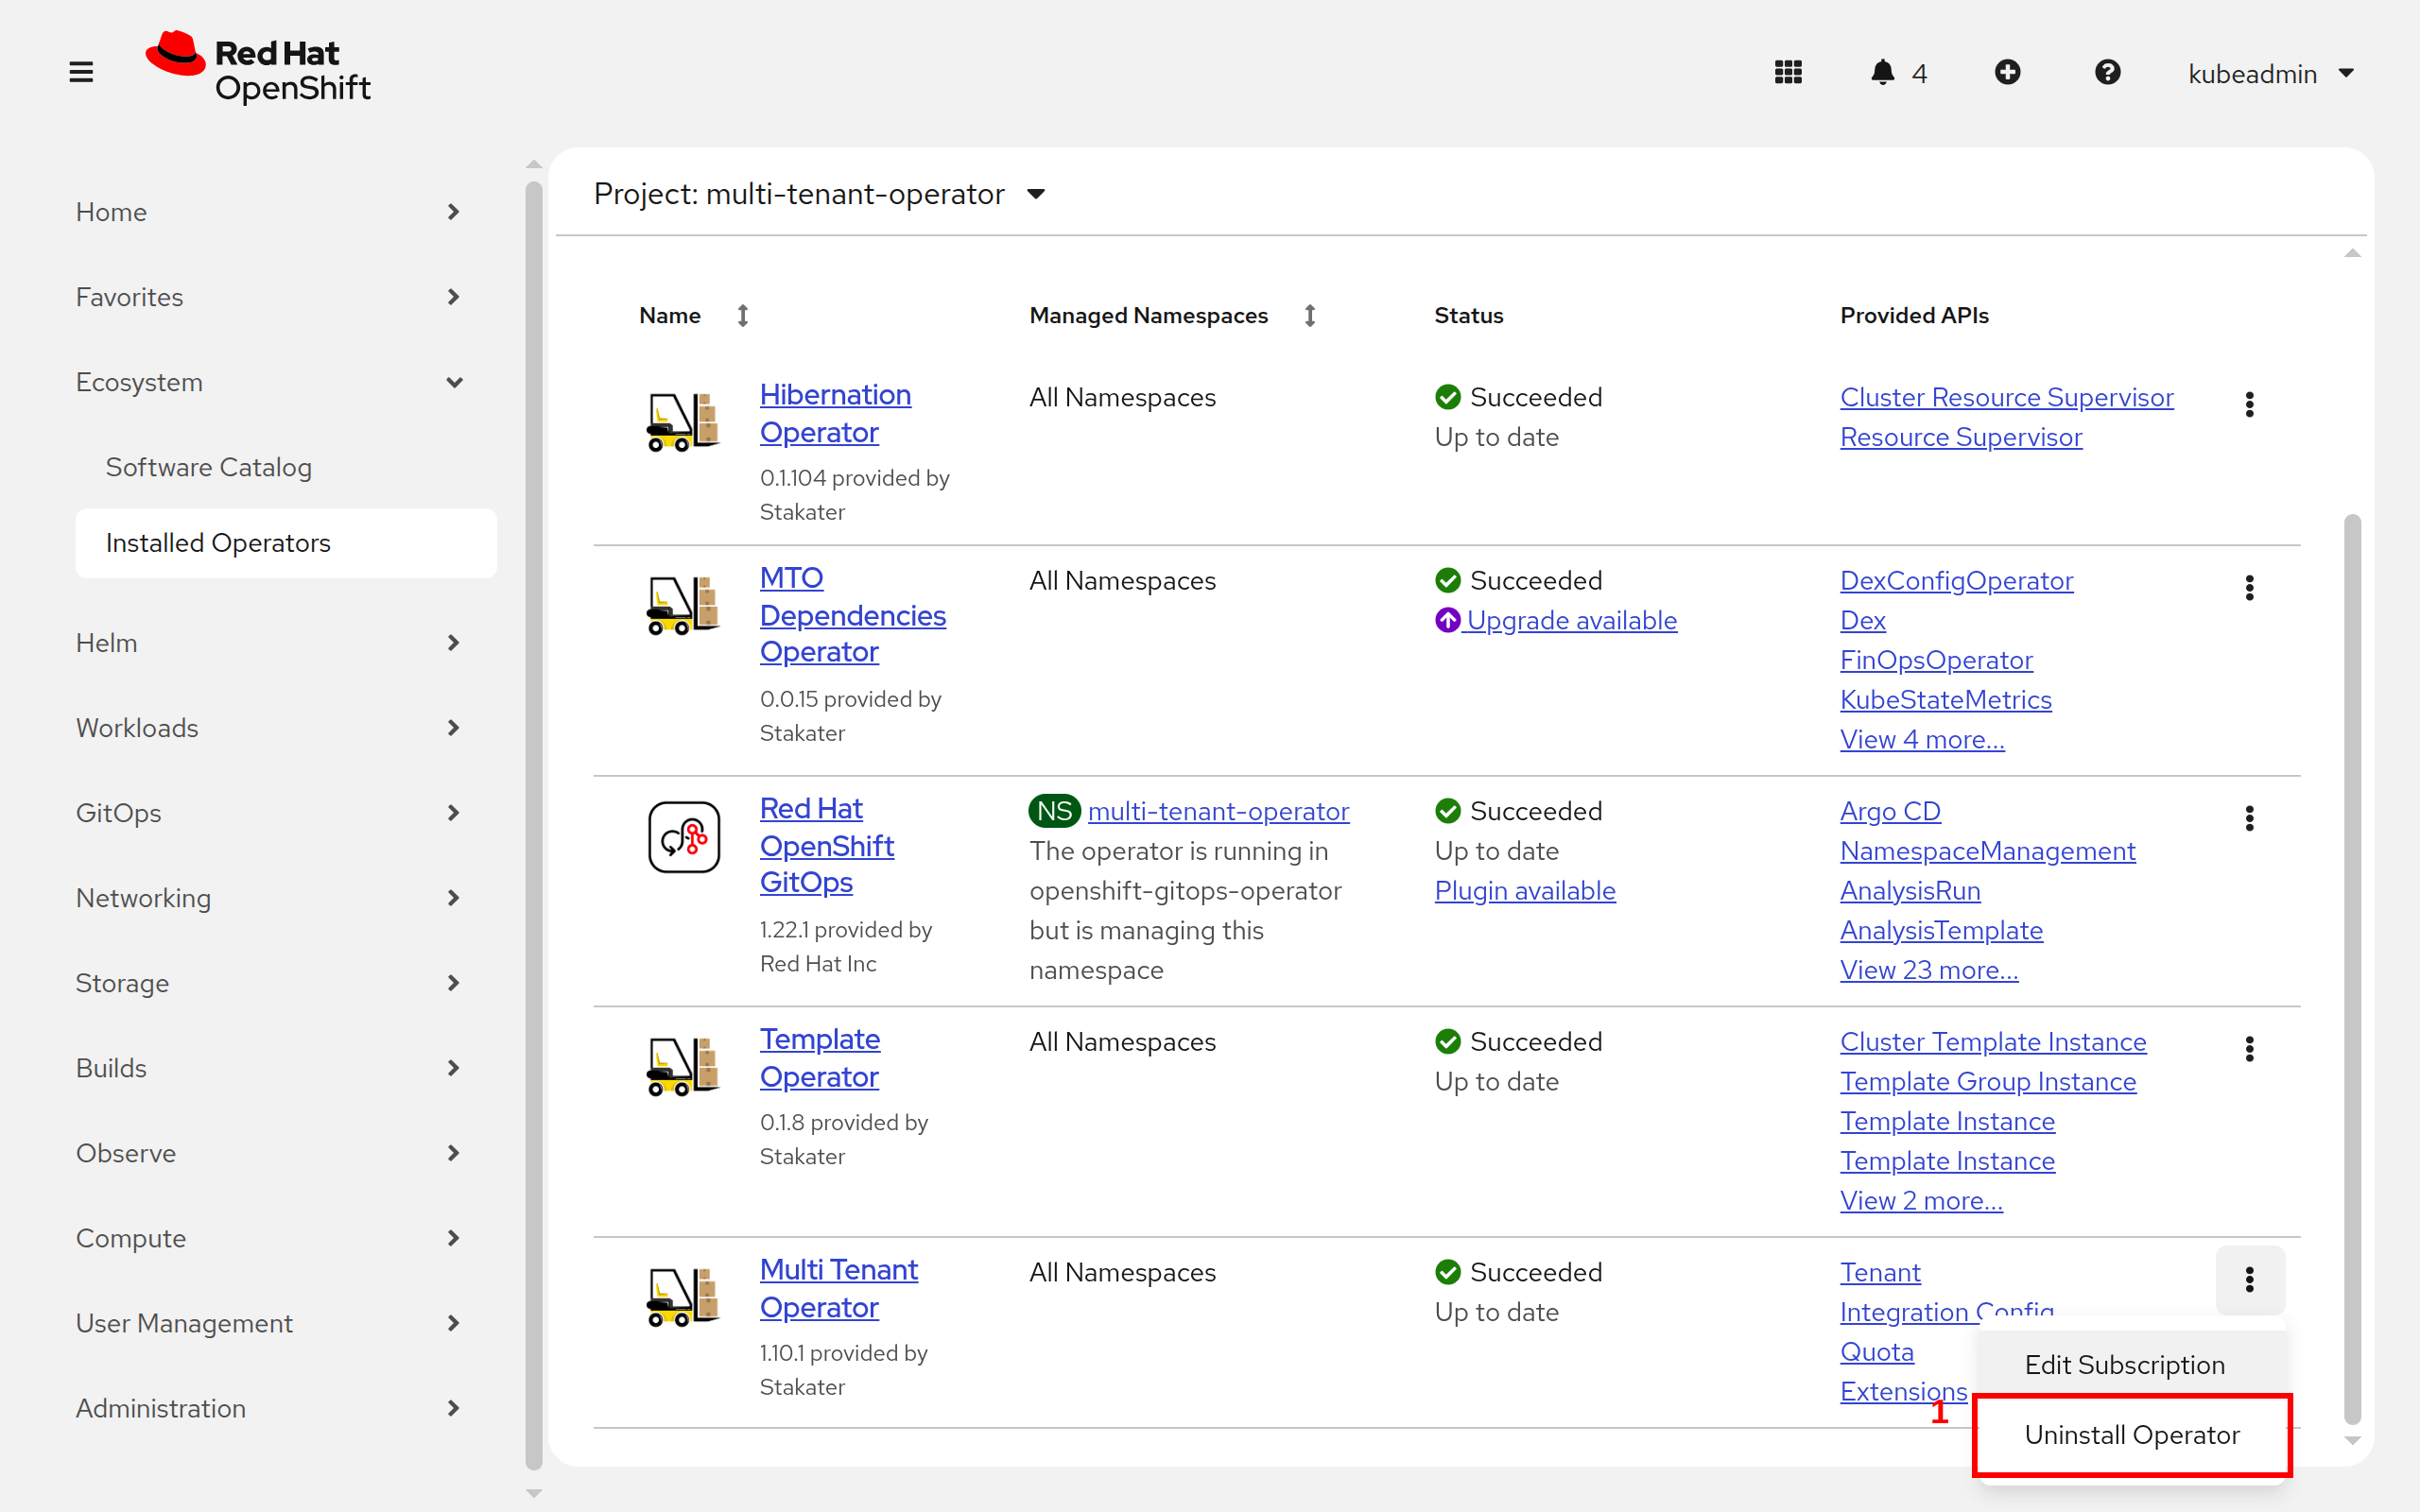
-
Now the operator has been uninstalled.
-
Optional:you can also manually remove MTO's CRDs and its resources from the cluster.
Notes#
- For details on licensing of MTO please refer Pricing.
- For more details on how to use MTO please refer Tenant tutorial.
- For details on how to extend your MTO manager ClusterRole please refer extend-default-clusterroles.