Deploy your Application#
There are multiple ways to deploy your Application on the Cluster.
-
For development with tilt follow the below tutorial. Use tilt for deploying the application on test clusters.
This is the recommended local development workflow
-
For Deployment via GitOps, follow this guide for Deploying the Application with GitOps
This is the recommended production workflow
Objective#
- Learn local development for testing and developing applications on local/lab clusters.
Key Results#
- Deploy the application with tilt.
- Deploy the dependency of the application.
Tutorial#
In this guide, we will deploy an application with tilt and namespace in the remote OpenShift cluster
-
Clone this sample repo Nordmart-review
-
You should have a namespace in remote/local cluster; If you are in SAAP then enable sandbox namespace/project/environment for your tenant; you can read more here
-
Log in to the cluster via
OpenShift CLI, and copy the login command from yourusernametab as discussed in the previous tutorial. -
Switch project to sandbox namespace/project/environment
-
Log in to OpenShift internal docker registry
First, get the OpenShift internal docker registry URL and set in the HOST variable name
NOTE: Ask Customer Admin or Cluster Admin to provide you with the OpenShift internal registry route
Then login into the docker registry with the following command:
If you get this error
x509: certificate signed by unknown authoritythen you need to update your/etc/docker/daemon.jsonfile and add the insecure registry -
(Optional) Add Helm chart repos
If you reference Helm charts from the private registry then you first need to add it
-
Update Helm dependencies.
-
Go through the Tiltfile of the application
-
Check the
local_resourcesection in the Tiltfile -
Create
tilt_options.jsonfileRemove
.templatefrom the file namedtilt_options.json.template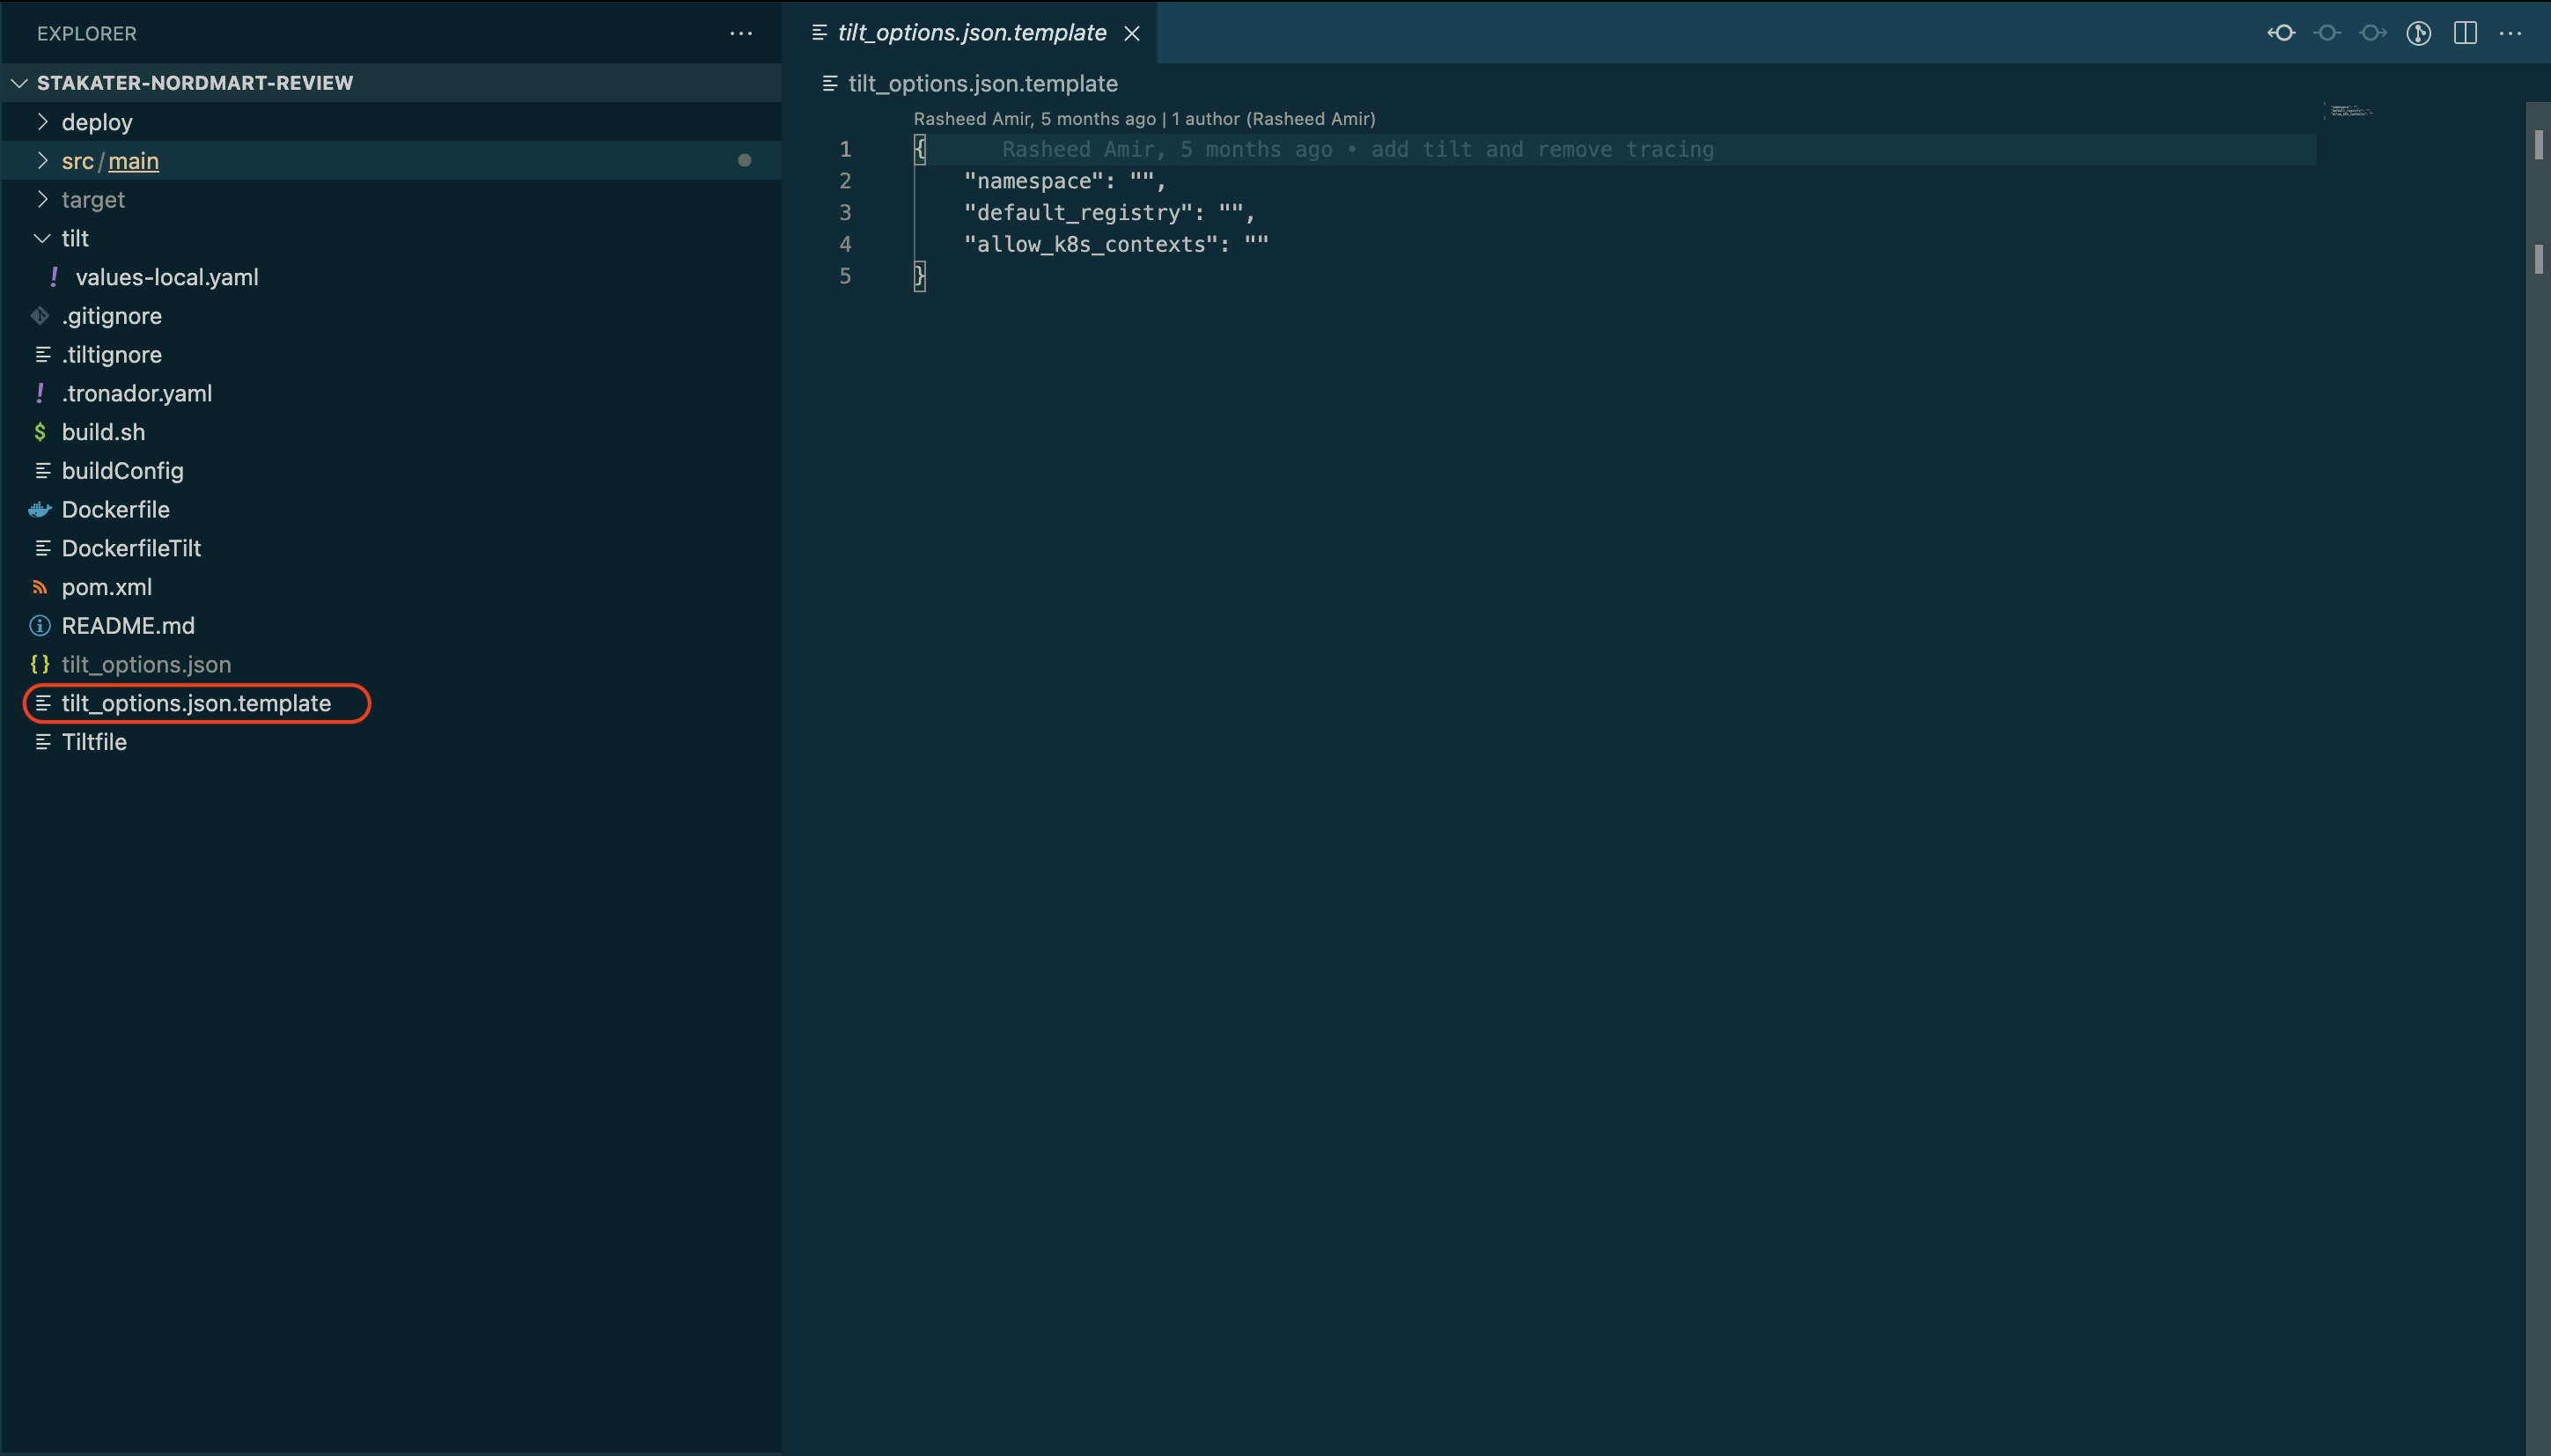
And then fill up all three things
namespace: your sandbox environment namedefault_registry: the OpenShift internal registry route (you have set in step # 6 in HOST above) and then add your namespace name after/-
allow_k8s_contexts: given you are logged in the cluster; then runoc config current-contextto get the value forallow_k8s_contextse.g.
-
Go through the
.gitigoreand check tilt and Helm specific ignores -
Go through
.tiltignore. -
Go through
values-local.yamlin atiltfolder in the base application directory.values-local.yamlshould contain the following content. Make sure that the replica count should always be 1.application: deployment: imagePullSecrets: null # Tilt live update only supports one replica replicas: 1 image: tag: nullIn our application setup, we have a dependency on MongoDB for storing and managing data. As part of our deployment process, we will ensure that both the application
APInamedreviewandMongoDBnamedreview-mongodbare deployed together to confirm proper functioning. This dependency ensures that the application can seamlessly interact with the database and access the necessary data. To understand more about application architecture, visit here. -
To add
mongodbdependency, add this YAML to yourdeploy/values.yamlfile.mongodb: fullnameOverride: review-mongodb # Name for the MongoDB deployment updateStrategy: # Specify the update strategy for MongoDB pods type: Recreate resources: # Define resource limits and requests for MongoDB limits: memory: 1Gi cpu: 0.5 requests: memory: 128Mi cpu: 0.1 auth: # Enable authentication for MongoDB enabled: true existingSecret: review-mongodb-creds # Reference an external secret for MongoDB credentials (created via Vault) podSecurityContext: # Disable or enable if you require pod-level security context settings for MongoDB enabled: false containerSecurityContext: # Disable or enable if you require container-level security context settings for MongoDB enabled: falseIt should look like this:
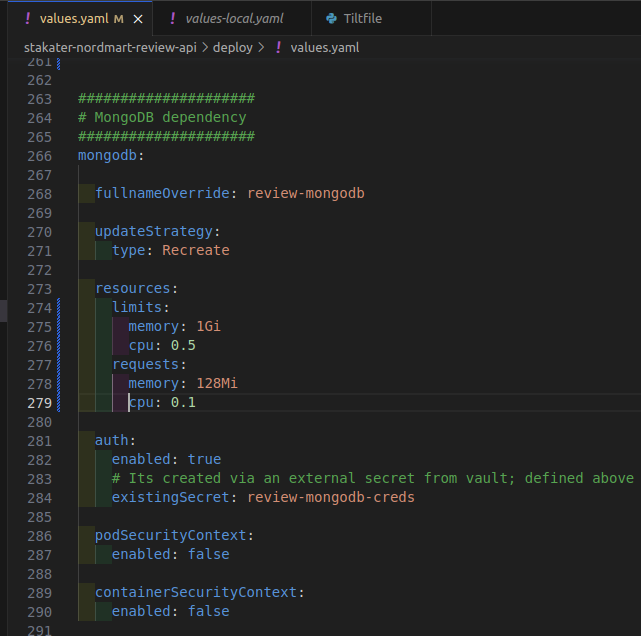
Note
The indentation should be followed as
mongodb. So you can defineMongoDB valuesas a separate entity, because we are going to deploy a separate pod named,review-mongodb. -
Validate that the
reviewapplication is not running already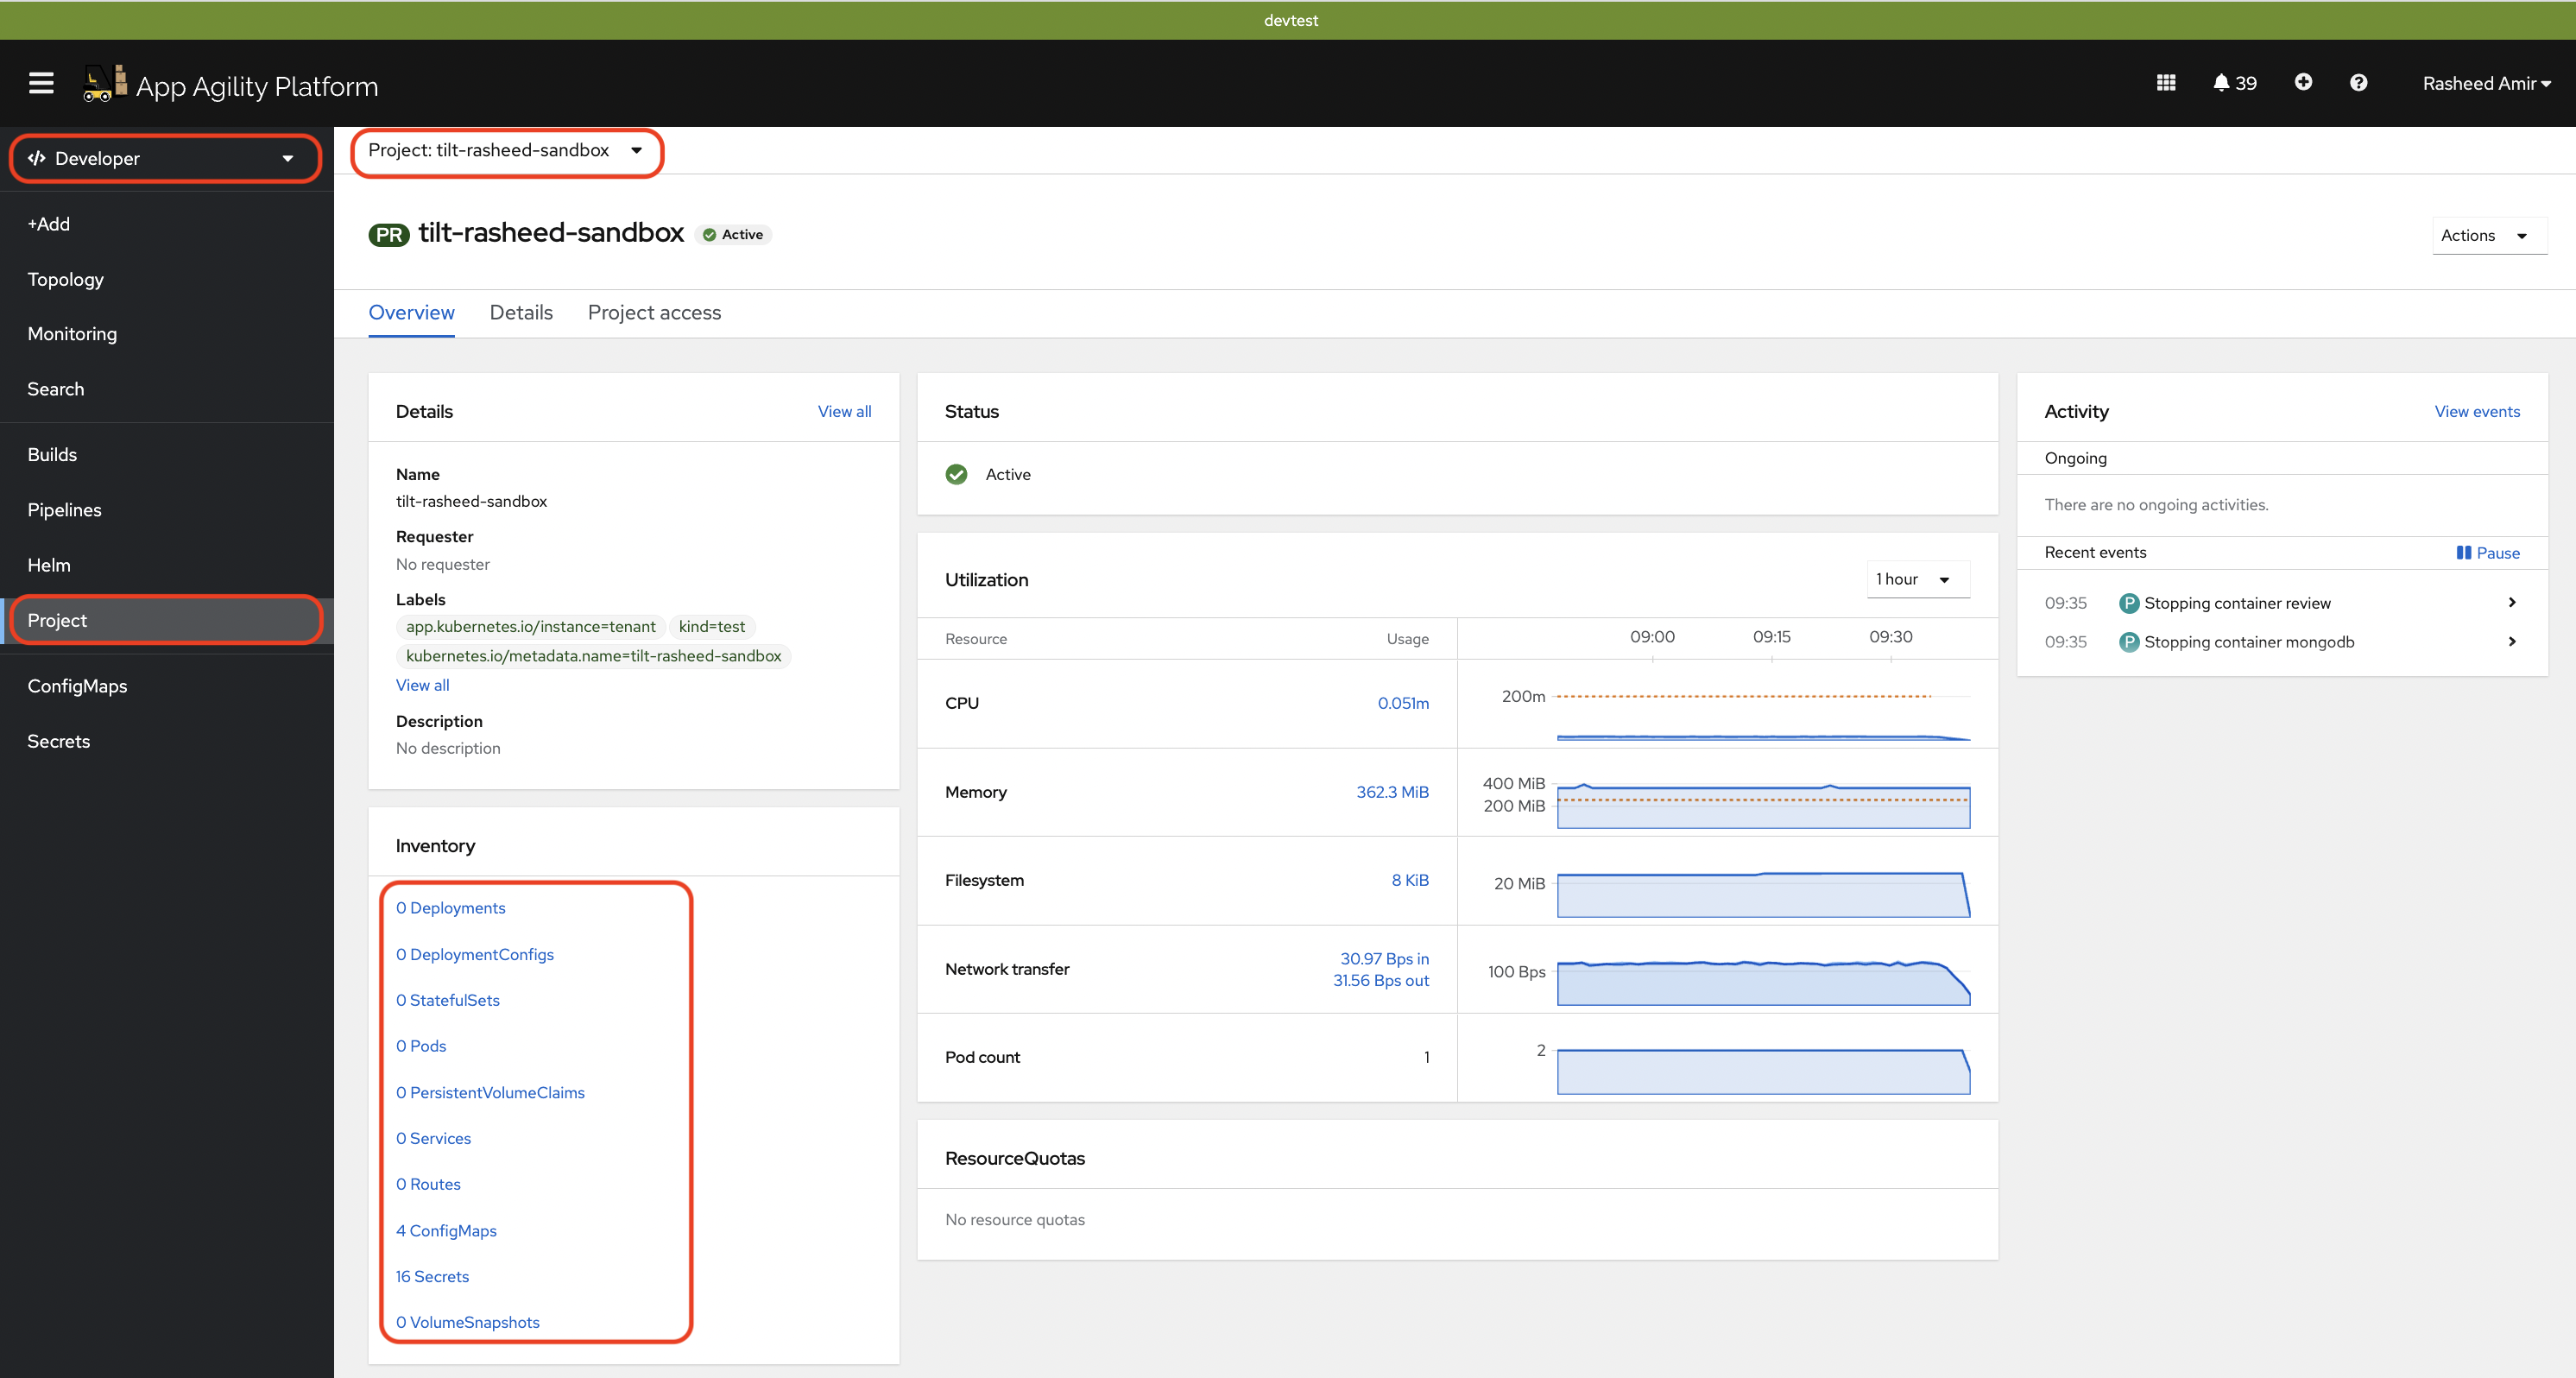
-
Save the
values.yamlfile and runtilt upat the base directory of your repository.
Open the tilt browser; just hit the space
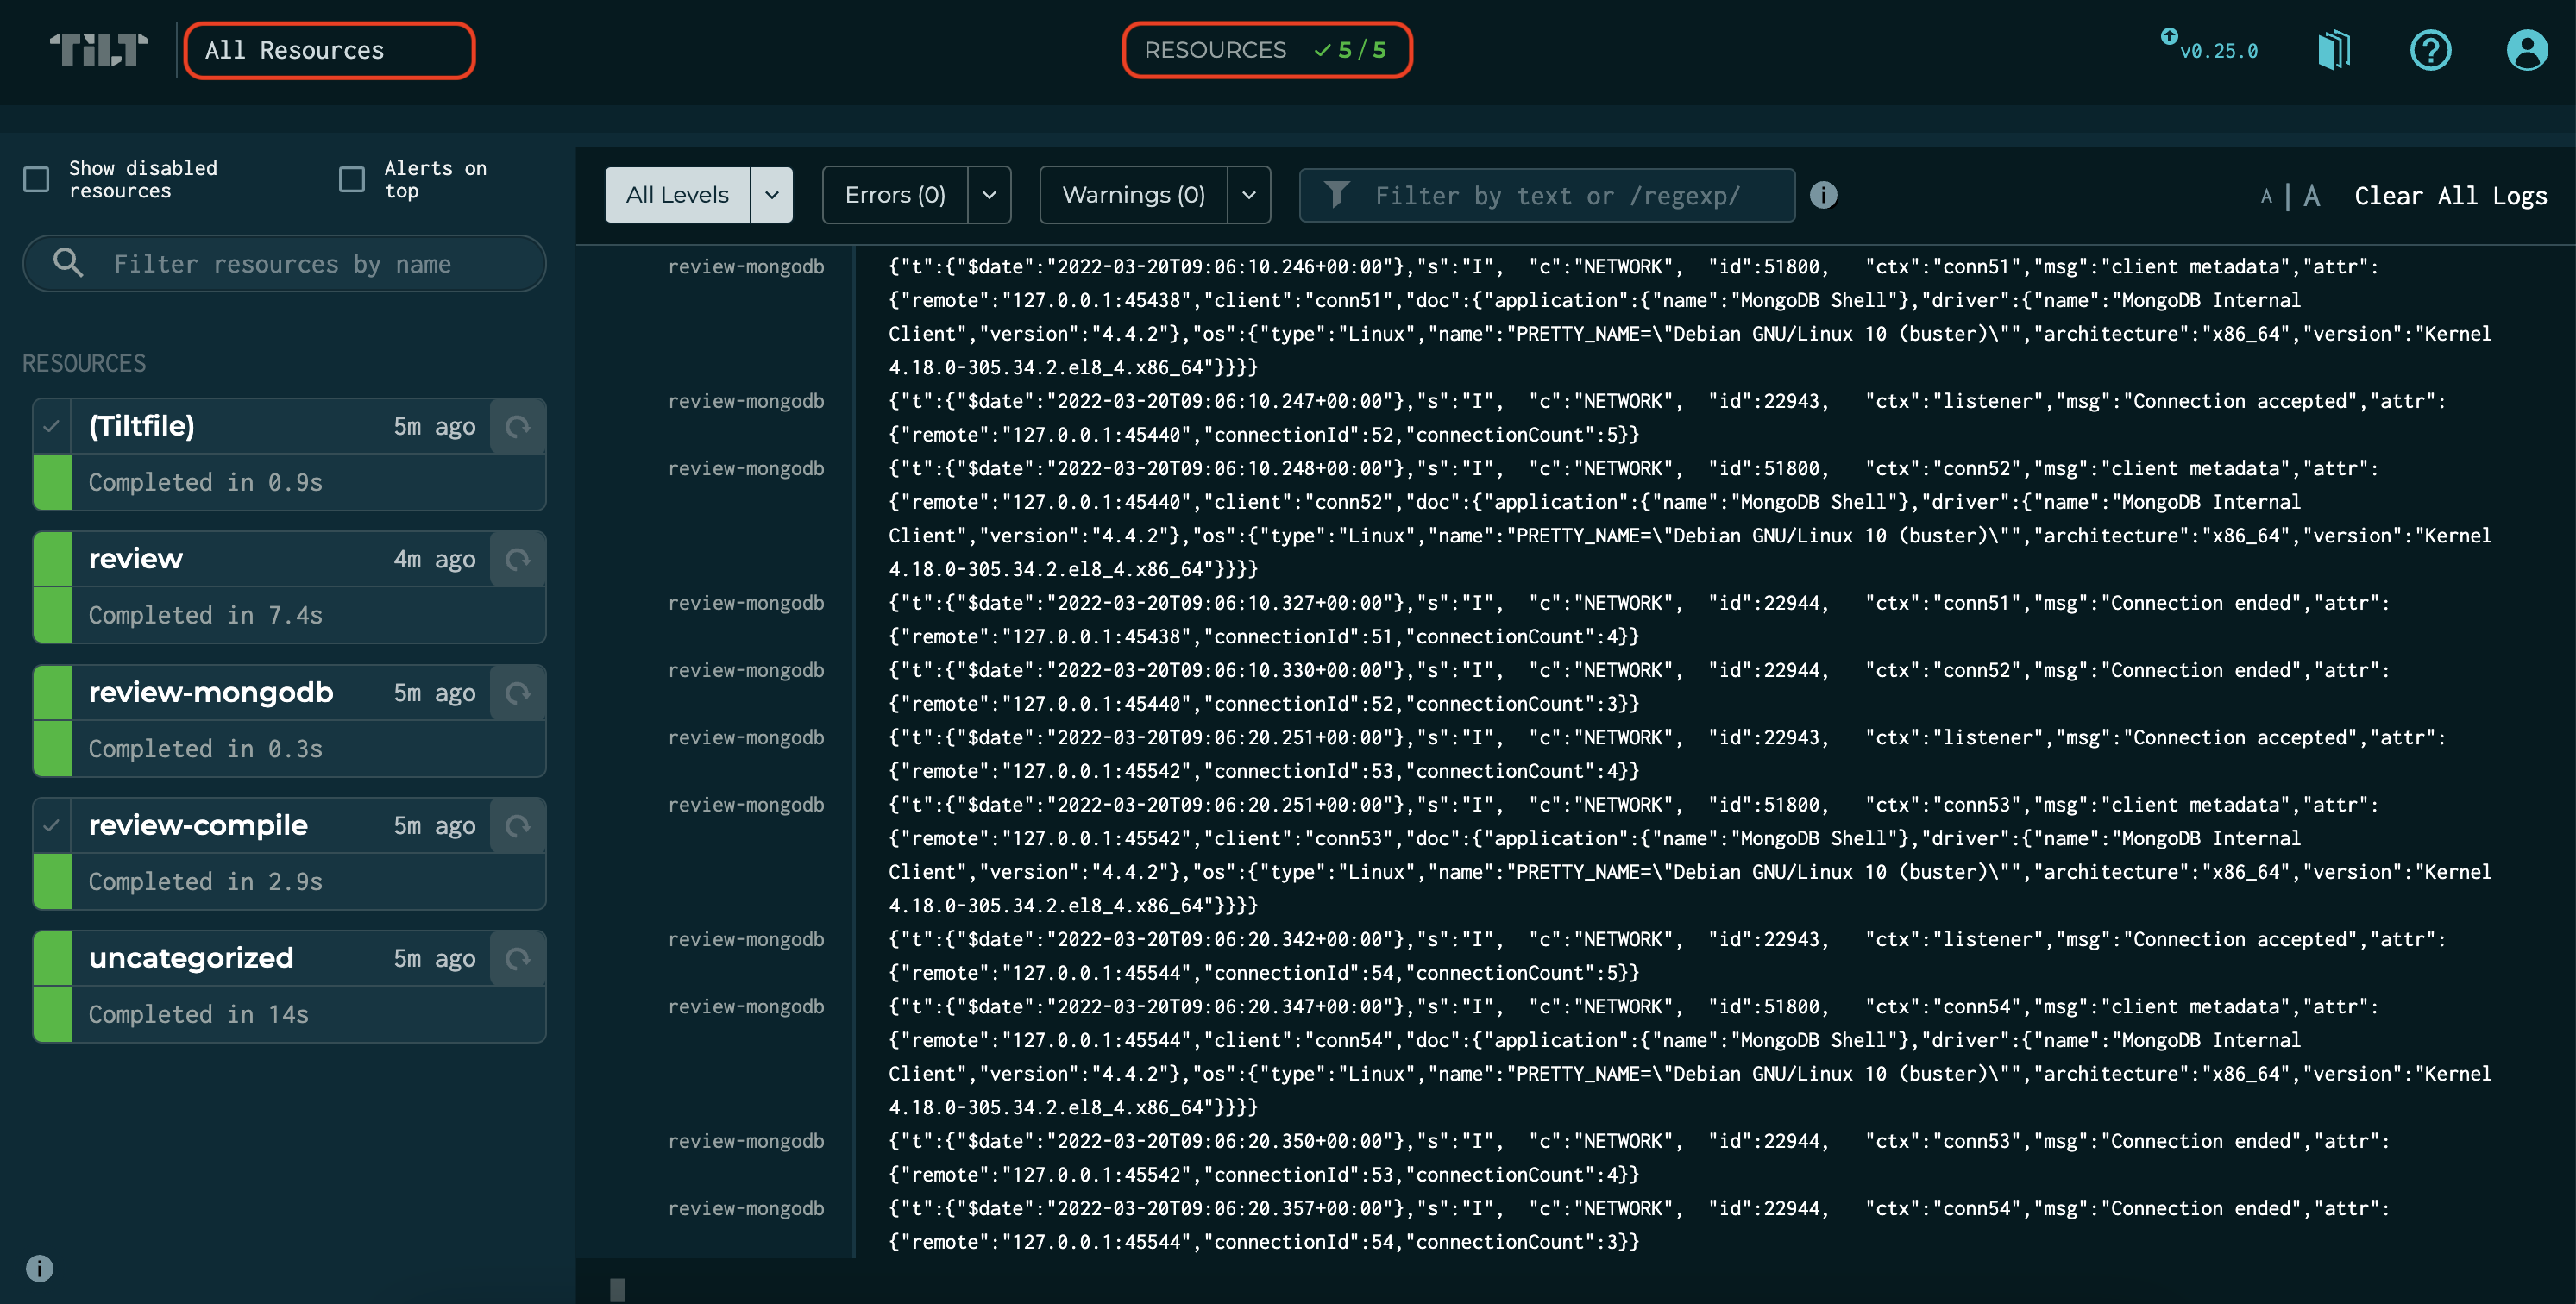
If everything is green then the application will be deployed in the cluster. By this we mean two pods will and 2 deployments will be created.
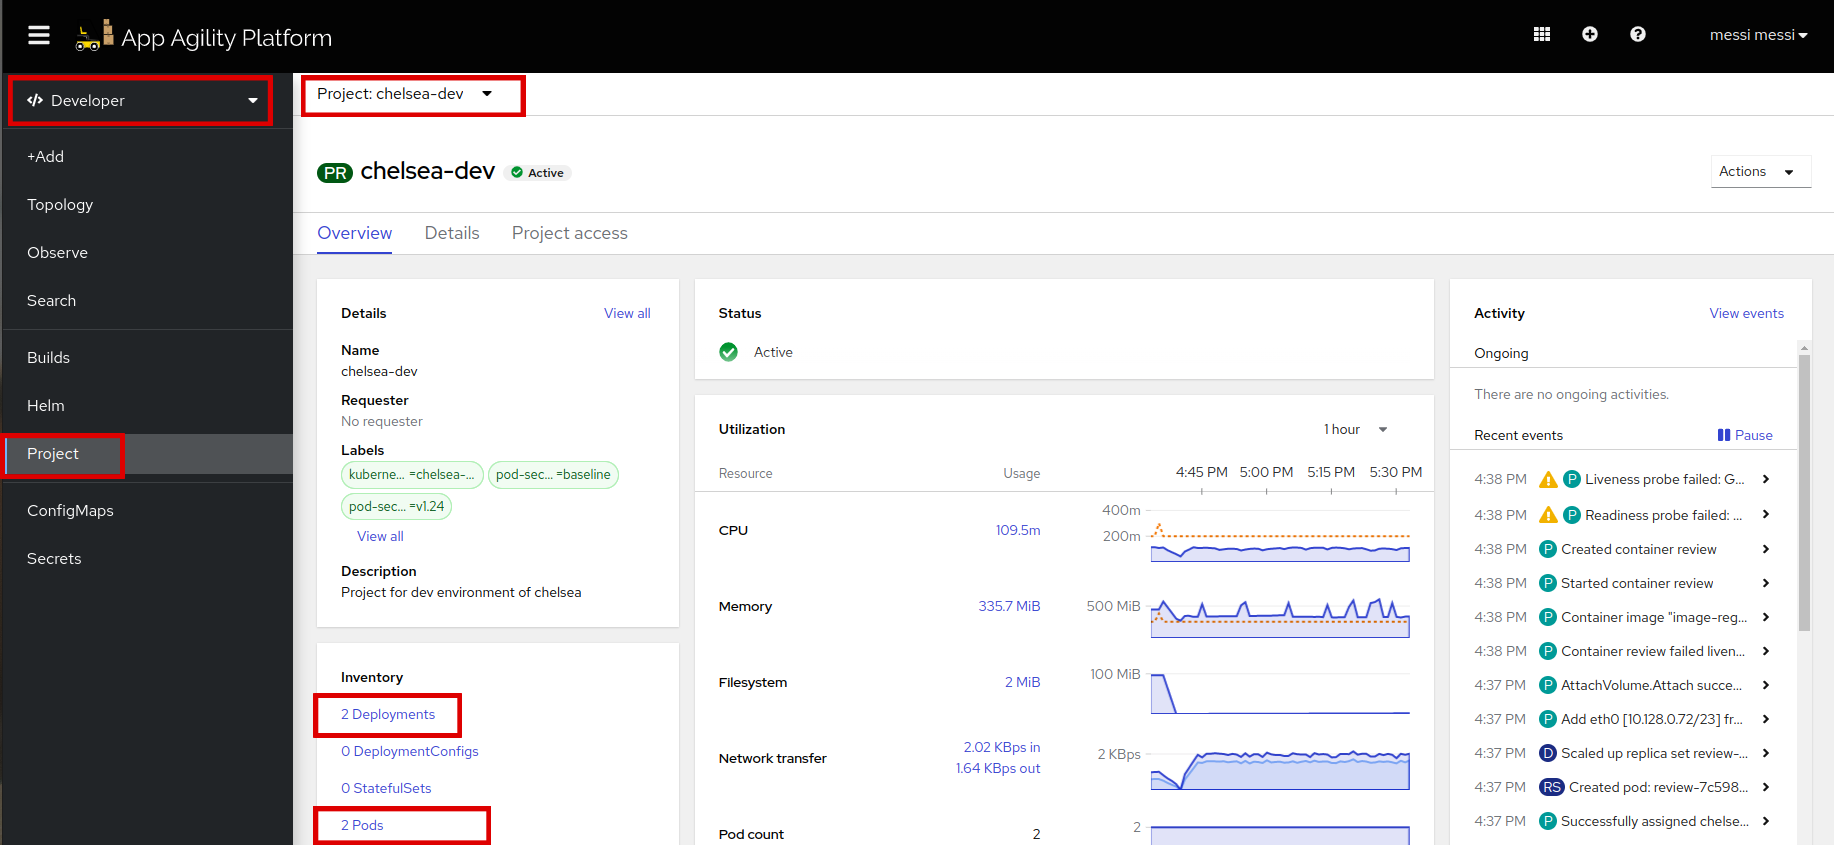
Let's view your application pods
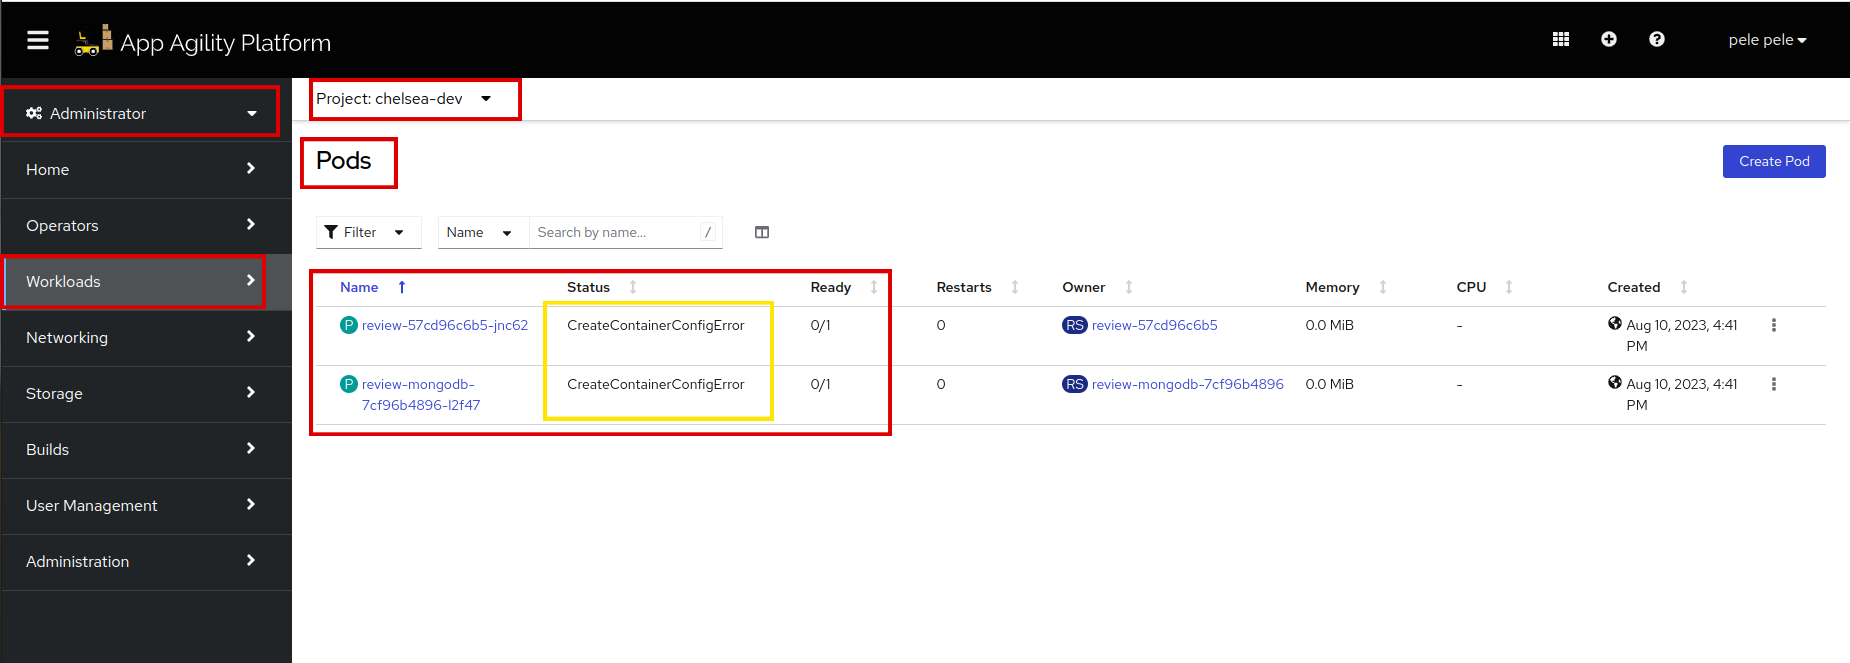
We can see there is an error on both API and MongoDB pods. Let's see the events of both pods to find the actual error:

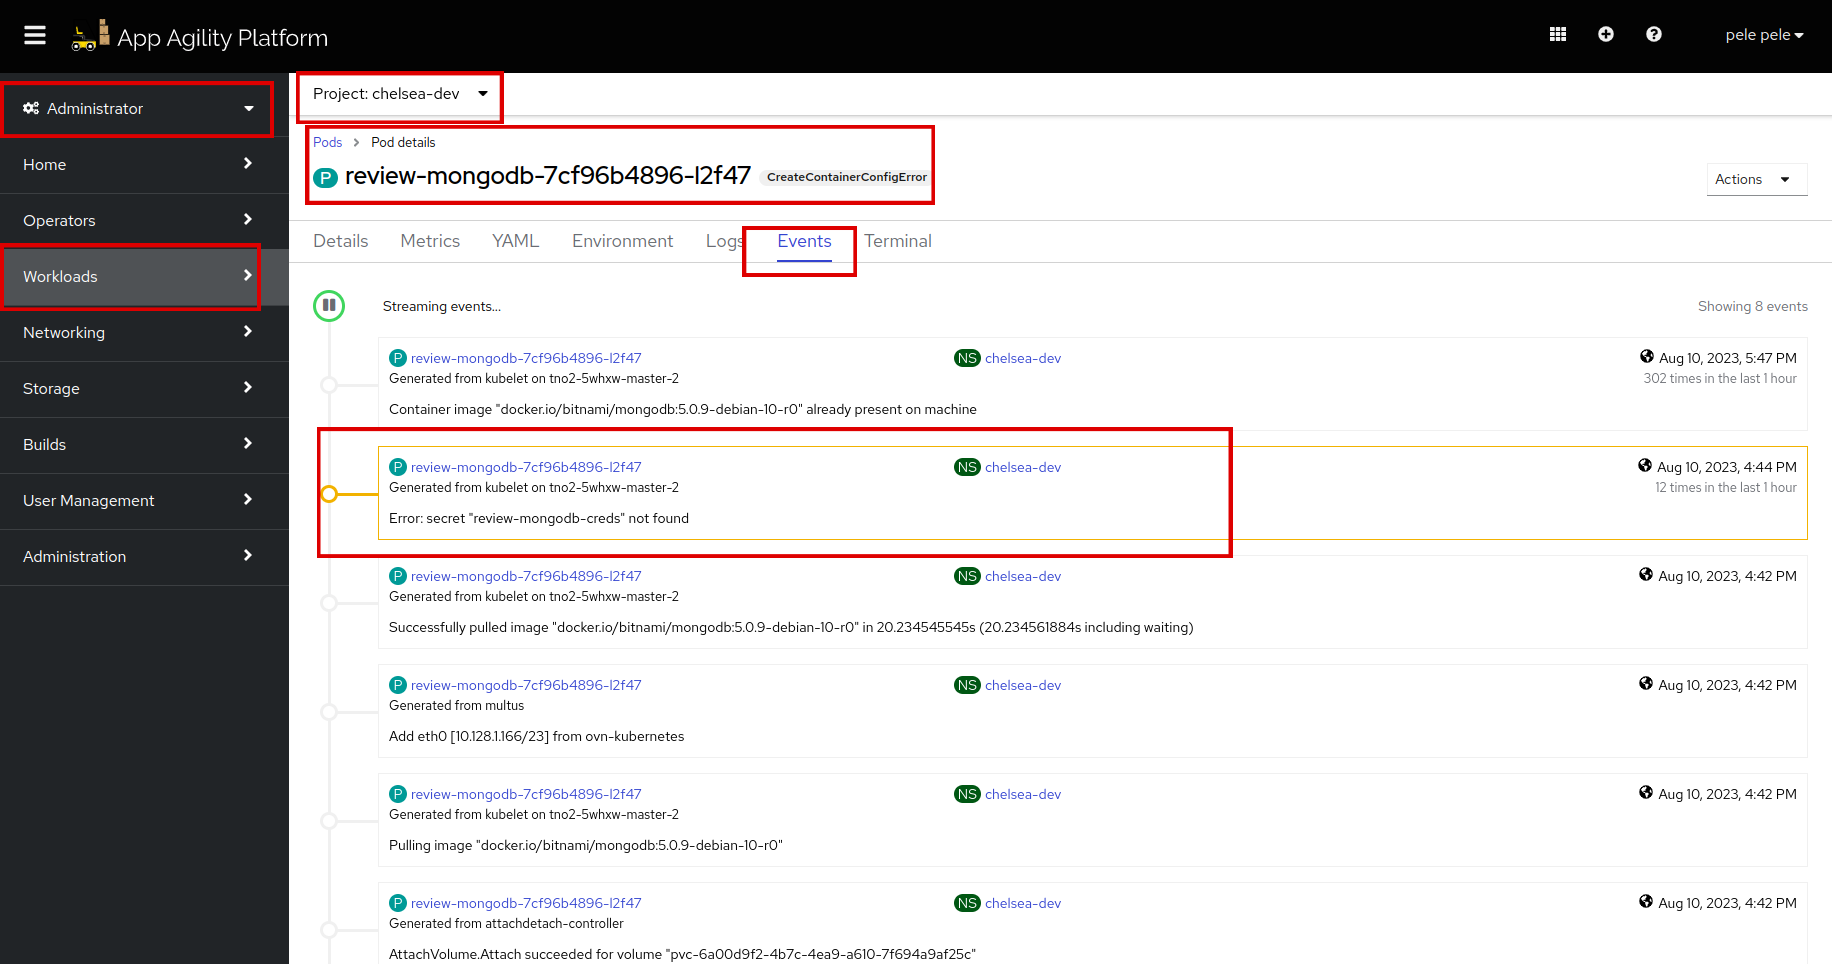
There is a secret missing named,
review-mongodb-creds.
Let's create this secret in the next chapter and deploy the app.