Deploy a demo app#
By the end of this tutorial, you will have built a container image, pushed it to Harbor, packaged a Helm chart, deployed it via ArgoCD, and verified the application is running in your cluster.
This tutorial uses stakater-nordmart-review-web as the demo application. Replace APP_NAME with stakater-nordmart-review-web as you follow along, or substitute your own application.
Prerequisites:
- A tenant is defined in your infra GitOps repository — see Configure the infra GitOps repository.
- The tenant is onboarded in your apps GitOps repository — see Configure the apps GitOps repository.
- Harbor registry is available. Contact your administrator for credentials.
- Tools installed:
helm,git,oc,buildah
Replace the following placeholders with your own values throughout this tutorial:
| Placeholder | Description |
|---|---|
TENANT_NAME |
Your tenant name |
APP_NAME |
Your application name (use stakater-nordmart-review-web for this demo) |
IMAGE_TAG |
The image tag (e.g. 1.0.0) |
HARBOR_REGISTRY_URL |
The Harbor Docker registry hostname (without https://, find it via Forecastle) |
HARBOR_HELM_REPO_URL |
The Harbor Helm registry URL (find it via Forecastle) |
1. Log in to the Harbor registry#
Find the Harbor URL in Forecastle, then log in:
2. Add a Dockerfile#
Your application repository needs a Dockerfile at the root. Clone the demo app to follow along:
git clone https://github.com/stakater-lab/stakater-nordmart-review-web
cd stakater-nordmart-review-web
The demo app already includes a Dockerfile. For your own application, create one based on a suitable base image from the Red Hat container catalog. Below is the demo app's Dockerfile as a reference:
FROM node:14 as builder
LABEL name="Nordmart review"

RUN mkdir -p $HOME/application
WORKDIR $HOME/application

COPY . .

RUN npm ci
ARG VERSION
RUN npm run build -- --env VERSION=$VERSION

EXPOSE 4200
CMD ["node", "server.js"]
Use multi-stage builds to keep the final image small — build in one stage, copy only the output into a minimal runtime image.
3. Build and push the image#
Build the image from your application directory:
buildah bud --format=docker --tls-verify=false --no-cache \
  -f ./Dockerfile \
  -t HARBOR_REGISTRY_URL/TENANT_NAME/APP_NAME:IMAGE_TAG .
Push it to Harbor:
buildah push HARBOR_REGISTRY_URL/TENANT_NAME/APP_NAME:IMAGE_TAG \
  docker://HARBOR_REGISTRY_URL/TENANT_NAME/APP_NAME:IMAGE_TAG
4. Add a Helm chart#
In your application repository, create a deploy/ folder at the root with two files.
deploy/Chart.yaml:
apiVersion: v2
name: APP_NAME
description: A Helm chart for Kubernetes
dependencies:
  - name: application
    version: 2.1.13
    repository: https://stakater.github.io/stakater-charts
type: application
version: IMAGE_TAG
deploy/values.yaml:
application:
  applicationName: APP_NAME
  deployment:
    imagePullSecrets: nexus-docker-config-forked
    image:
      repository: APP_NAME
      tag: IMAGE_TAG
  route:
    enabled: true
    port:
      targetPort: http
Validate the chart before committing:
Open output.yaml to confirm the generated manifests look correct.
5. Package and push the chart to Harbor#
helm package .
curl -u "HARBOR_USERNAME":"HARBOR_PASSWORD" HARBOR_HELM_REPO_URL \
  --upload-file "APP_NAME-IMAGE_TAG.tgz"
6. Add the application to apps-gitops-config#
In your apps-gitops-config repository, create the deployment folder at TENANT_NAME/APP_NAME/dev/.
TENANT_NAME/APP_NAME/dev/Chart.yaml:
apiVersion: v2
name: APP_NAME
description: A Helm chart for Kubernetes
dependencies:
  - name: APP_NAME
    version: IMAGE_TAG
    repository: HARBOR_HELM_REPO_URL
version: IMAGE_TAG
TENANT_NAME/APP_NAME/dev/values.yaml:
APP_NAME:
  application:
    deployment:
      image:
        repository: HARBOR_REGISTRY_URL/TENANT_NAME/APP_NAME
        tag: IMAGE_TAG
Commit and push both files.
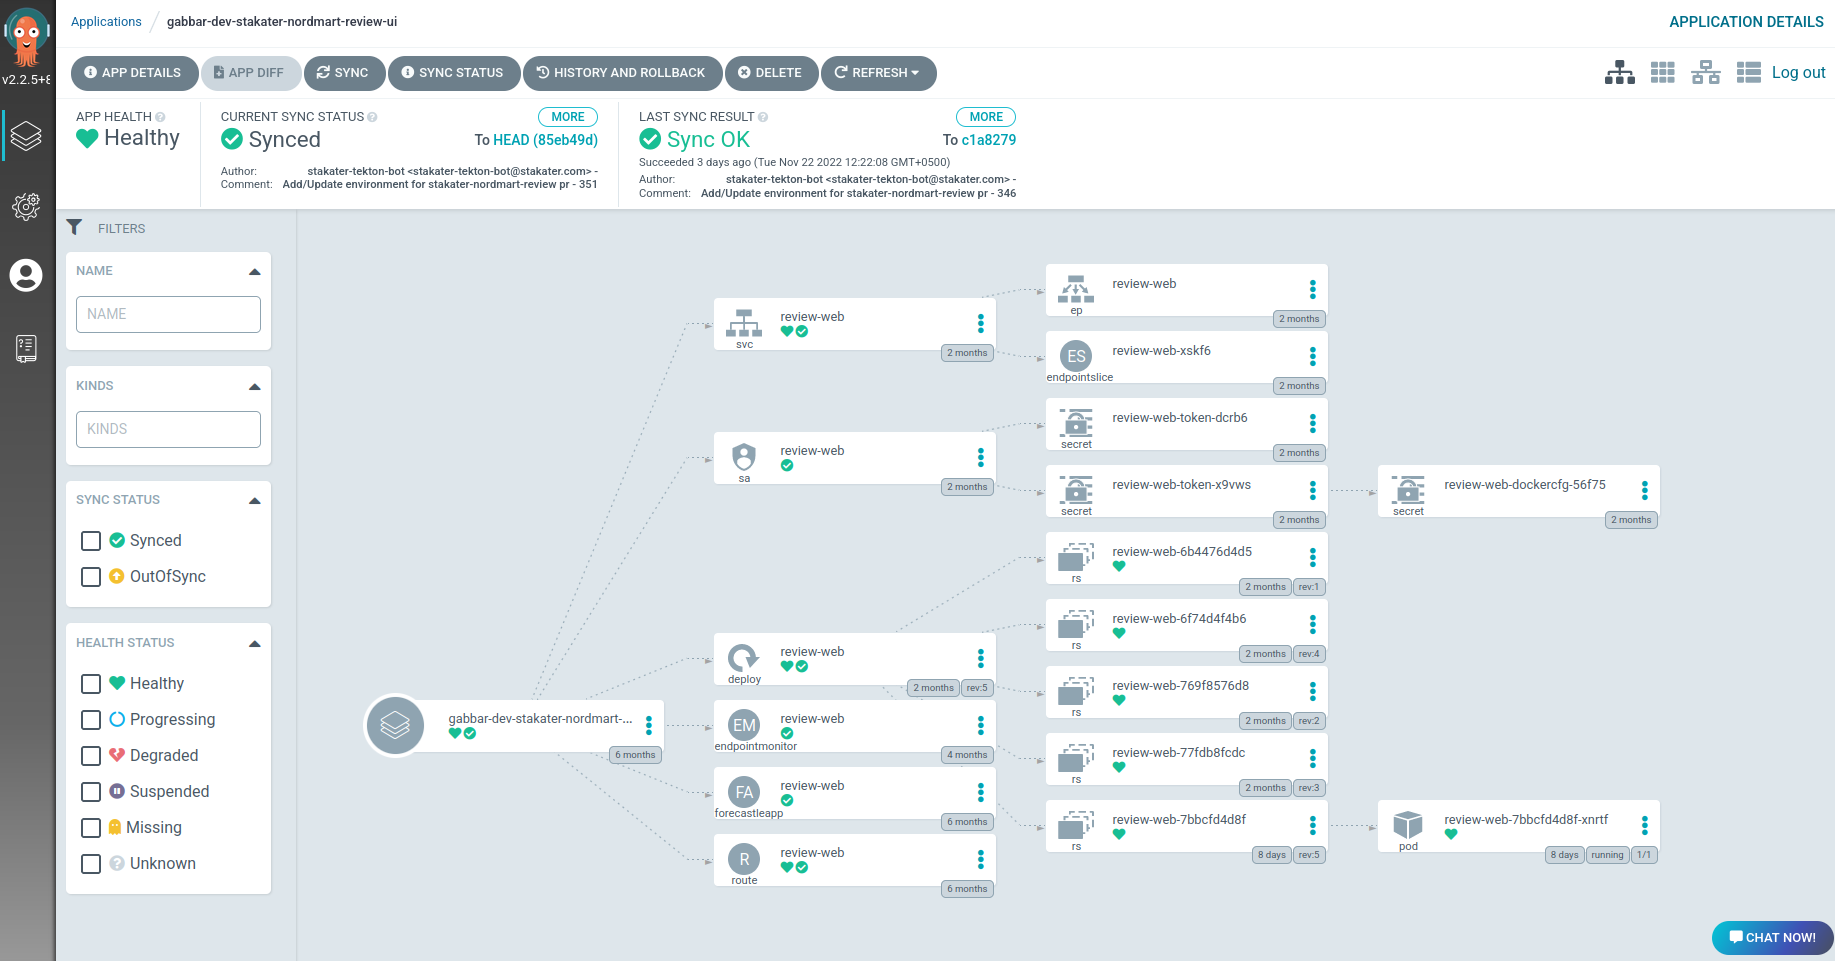
7. Verify in ArgoCD#
Log in to ArgoCD via Forecastle. Locate the application named TENANT_NAME-dev-APP_NAME and confirm it has synced successfully.
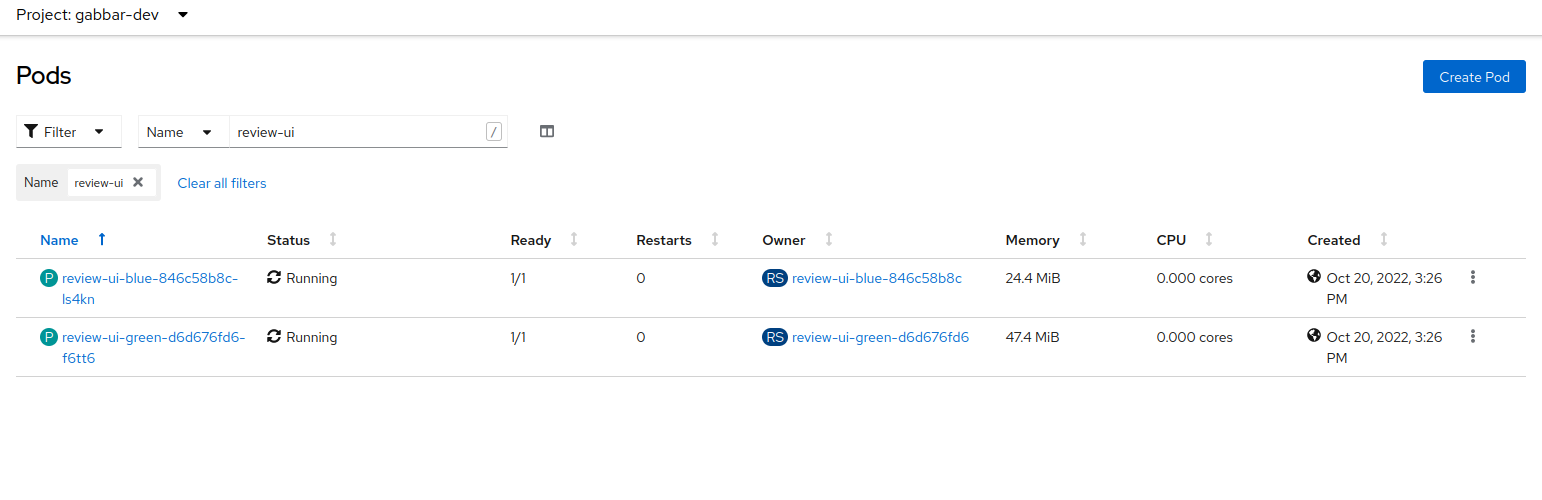
Open the OpenShift console, navigate to Workloads > Pods in the TENANT_NAME-dev namespace, and confirm the pods are running.
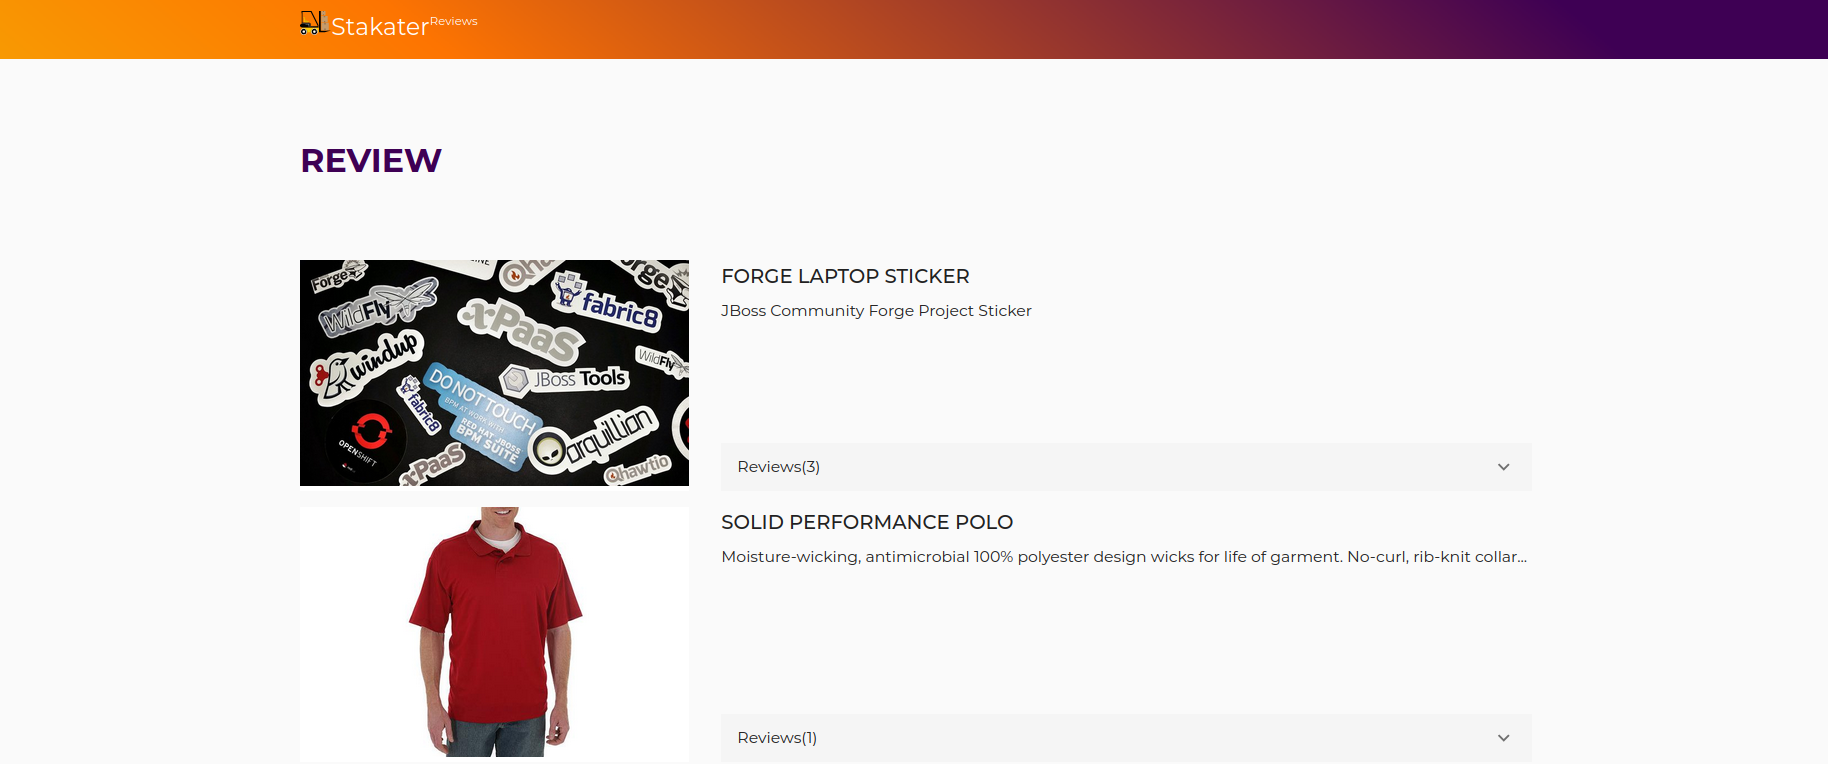
Open the route URL to confirm the application is serving traffic.
With your first application deployed, continue to Promote your application to release it to the next environment.