Adding External Secrets for your Application#
Securing sensitive information, such as API keys, passwords, and tokens, is crucial for any application. In this tutorial, we will explore how to leverage ExternalSecrets to securely manage and consume secrets stored in OpenBao for your Stakater Nordmart Review application. Now, we will set up applications to consume secrets from OpenBao, using ExternalSecrets.
Objectives#
-
Successfully integrate External Secrets within the Stakater Application Chart, allowing your application to consume secrets from OpenBao.
-
Create a secret using ExternalSecrets for the Stakater Nordmart Review API application.
-
Observe the dynamic retrieval of secrets from OpenBao and their seamless integration into your application, ensuring enhanced security and simplified secret management.
Key Results#
-
Discover how to configure the External Secrets Operator to fetch secret data from OpenBao and create Kubernetes secrets within the cluster.
-
Explore how to integrate External Secrets into your Stakater Application Chart, enabling seamless consumption of OpenBao secrets by your applications.
Tutorial#
Create Secret in OpenBao#
Login to OpenBao to view your tenant path.
-
Access OpenBao from
Forecastleconsole, searchOpenBaoand open theOpenBaotile.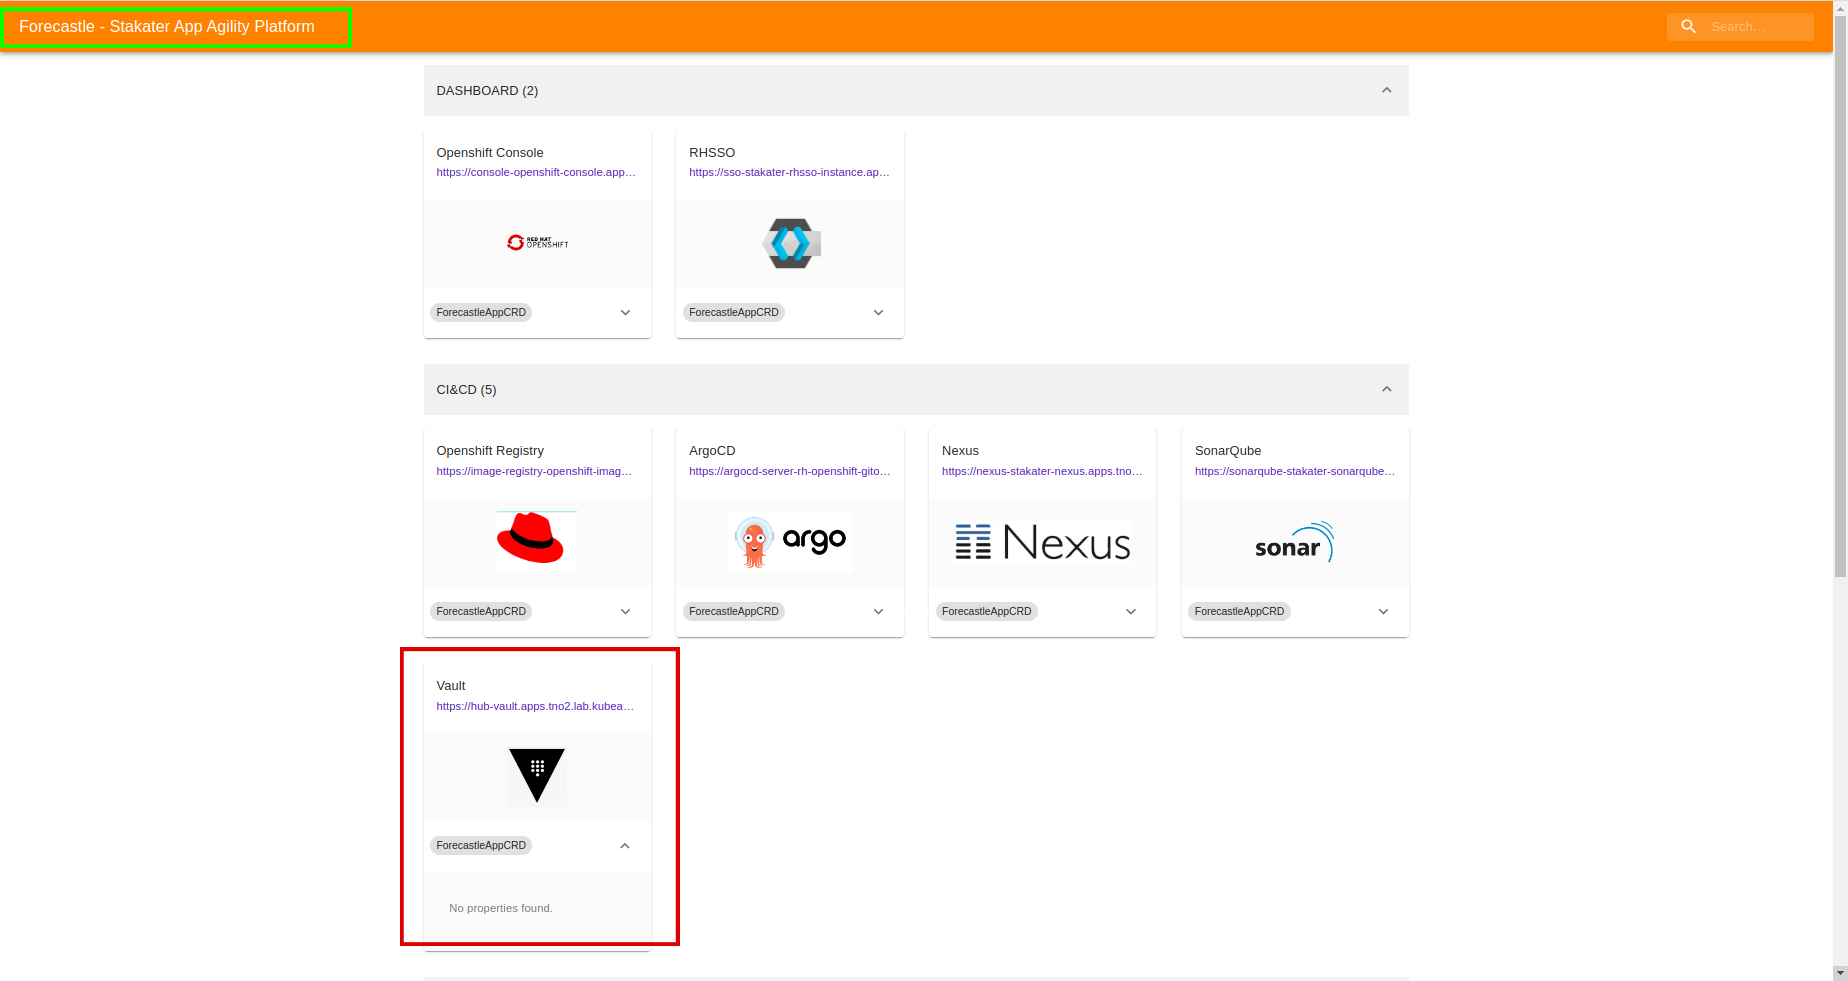
-
From the drop-down menu under
Method, selectOIDCand click onSign in with OIDC Providerand selectworkshopidentity Provider.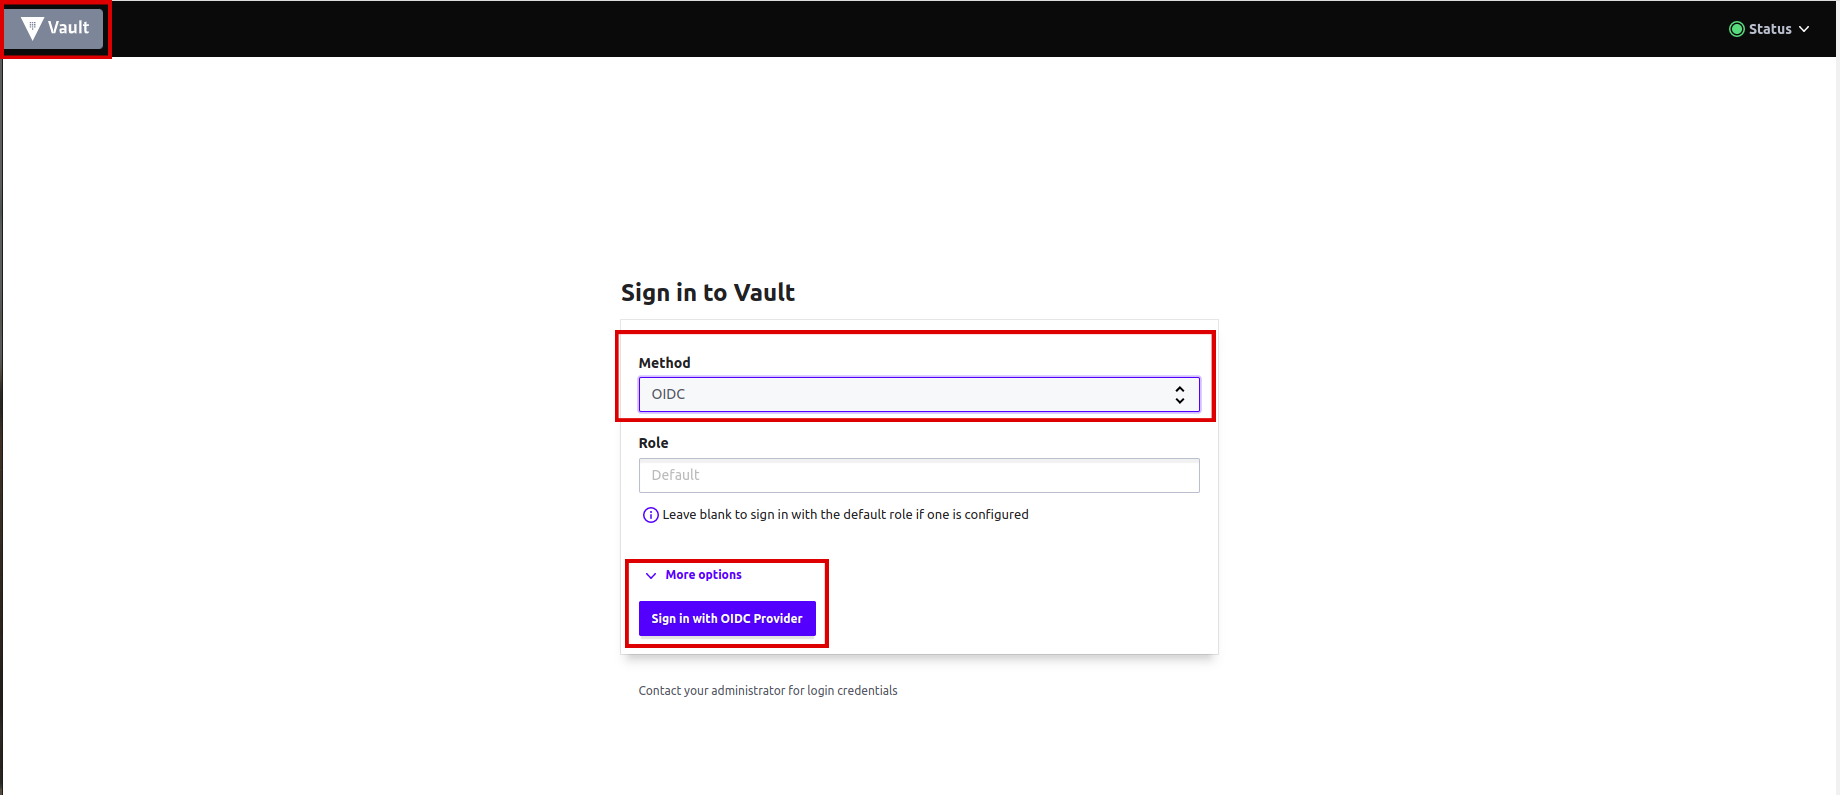
-
You will be brought to the
OpenBaoconsole. You should see the key/value path for your tenant.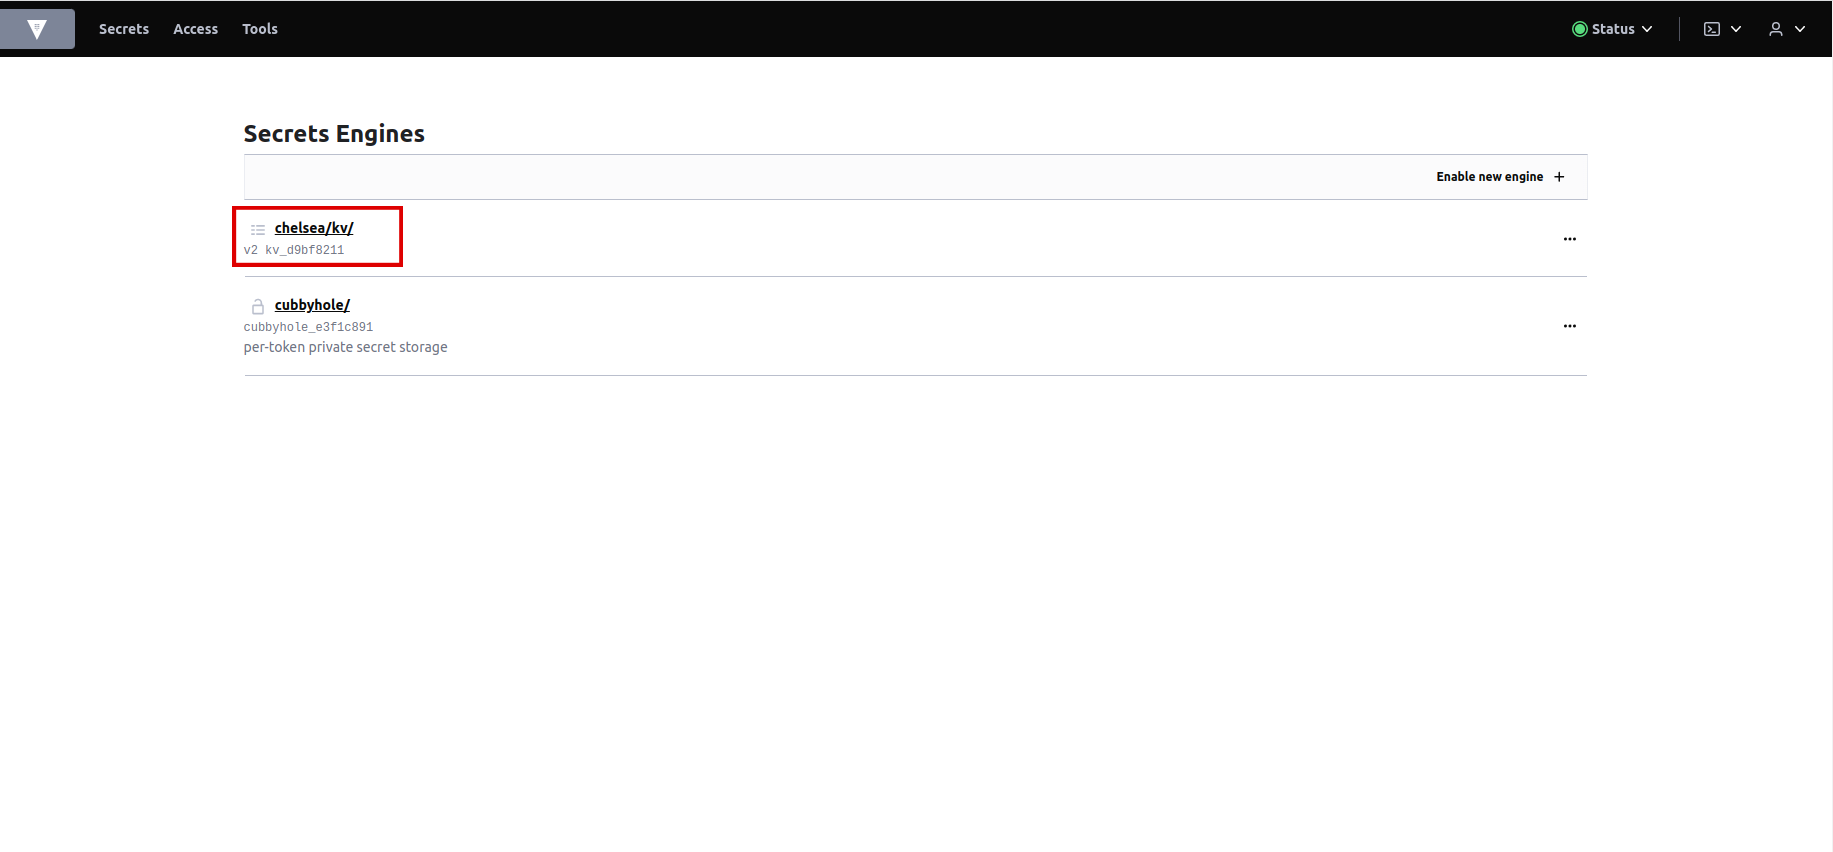
-
Click on
<your-tenant>/kv/. -
You will now be brought to the
secretsand theconfigurationsin OpenBao for your tenant. Click oncreate secret.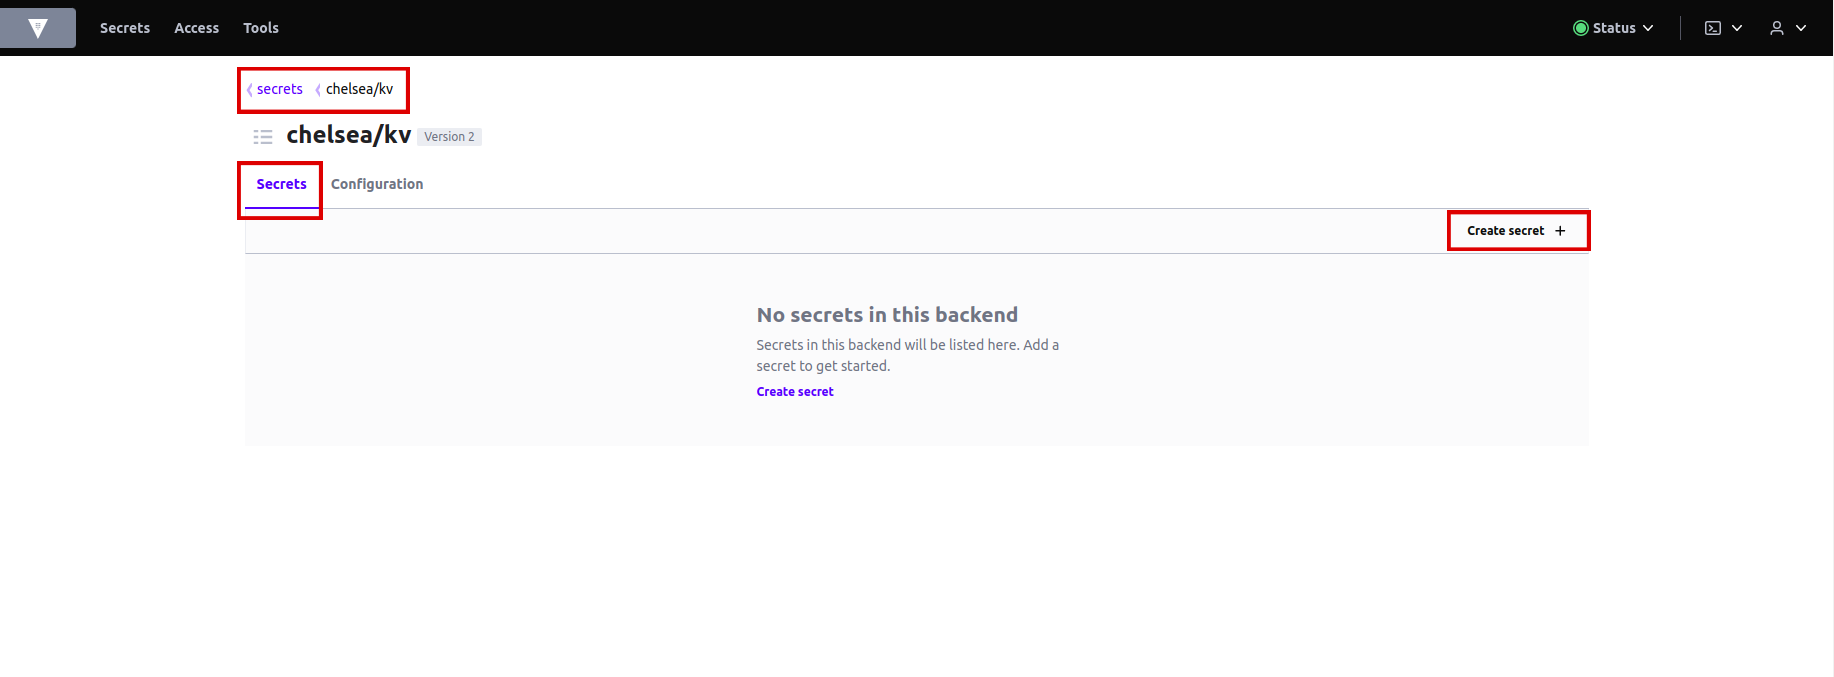
-
Let's create a MongoDB secret. Write the name of the secret in
pathwhich isreview-mongodb-creds. Addsecret datamongodb-passwordandmongodb-root-passwordand assign any password you like. Hit save.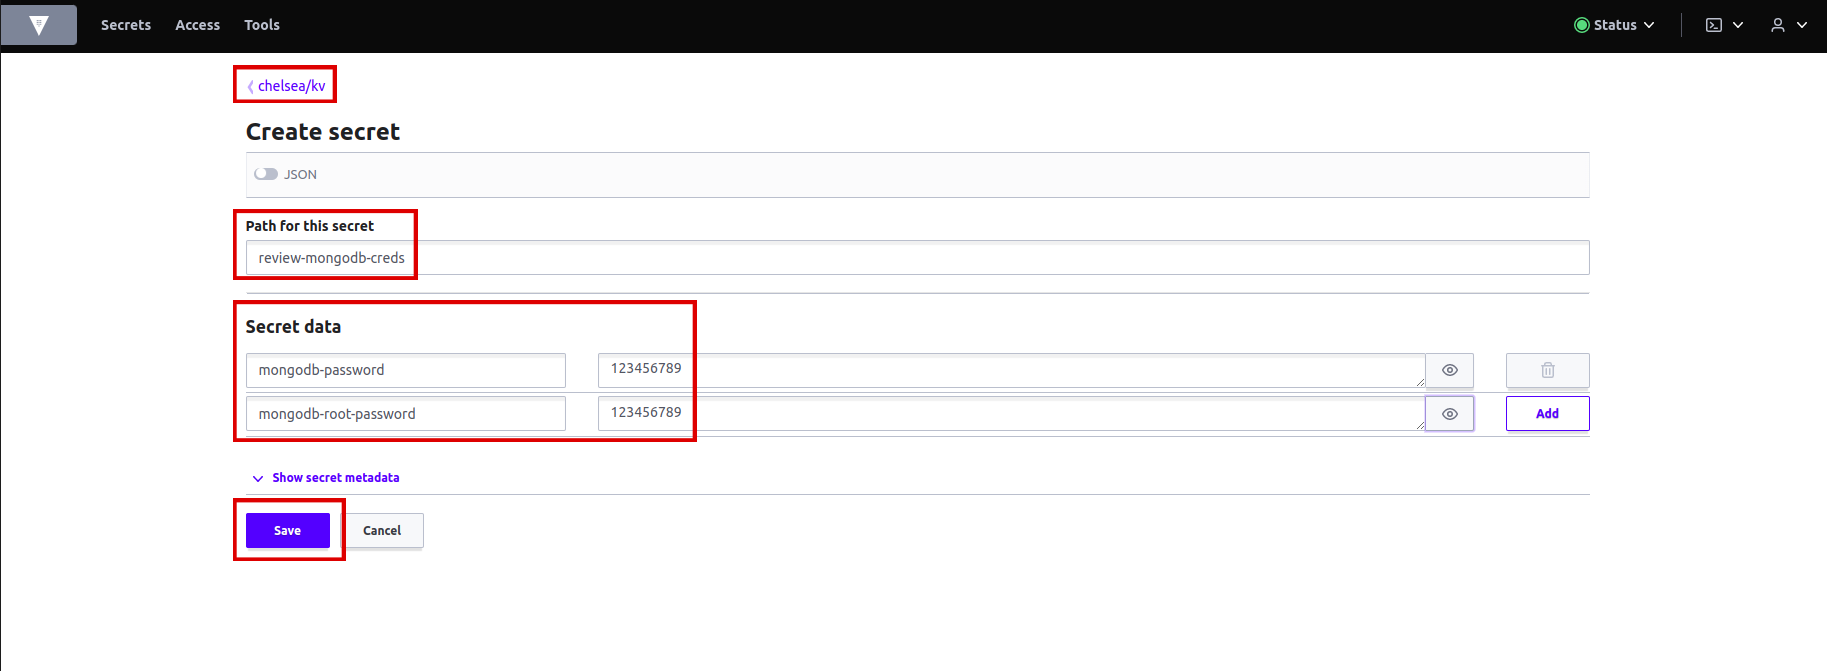
-
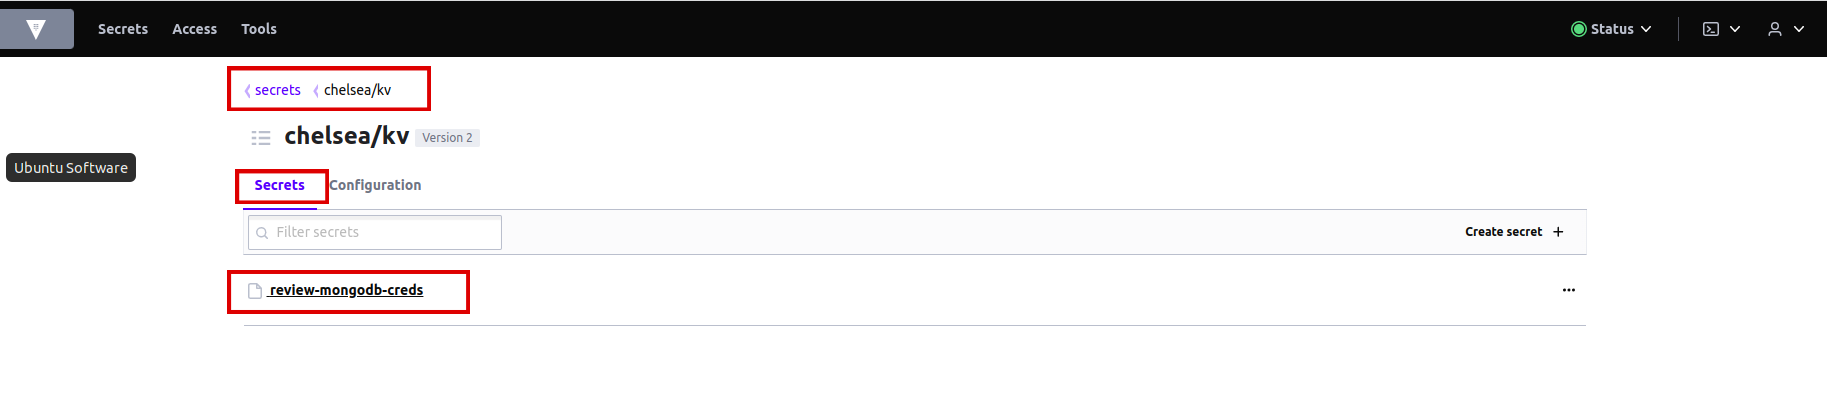
Secret is created in OpenBao.
Access and Create a Secret on KubeStack+ from OpenBao#
- External Secrets Operator is used to fetch secret data from OpenBao and create Kubernetes secret in the KubeStack+.
- External Secrets Operator uses SecretStore to make a connection to the OpenBao.
- SecretStore uses ServiceAccount with OpenBao label to access OpenBao.
- SecretStore and ServiceAccount are created in each tenant namespace.
- Each ExternalSecret CR contains a reference to SecretStore to be used.
-
Stakater Application Chart contains support for ExternalSecret.
-
In
deploy/values.yamlfile, add the following YAML for external secret:# Enable the usage of ExternalSecrets for this application externalSecret: enabled: true # The name of the SecretStore to be used for fetching secret data from OpenBao, this name is constant secretStore: name: tenant-vault-secret-store kind: SecretStore # Define the interval at which ExternalSecrets should refresh and update the secrets refreshInterval: "1m" # Define a named secret entry within ExternalSecrets files: # Name of the secret only suffix mongodb-creds: # Fetch secret data from OpenBao using a specific key in the specified tenant's KV engine dataFrom: key: <your-tenant>/kv/review-mongodb-credsNote
Replace
with the actual name of your tenant or the appropriate path in your OpenBao instance. The indentation should be application.externalSecret. -
Save the
values.yamland runtilt upat the root of your directory. Press the space key to view the progress in Tilt web UI. The application should be running in the namespace used intilt_options.jsonfile. -
Log in to KubeStack+ and find
secretsin your namespace.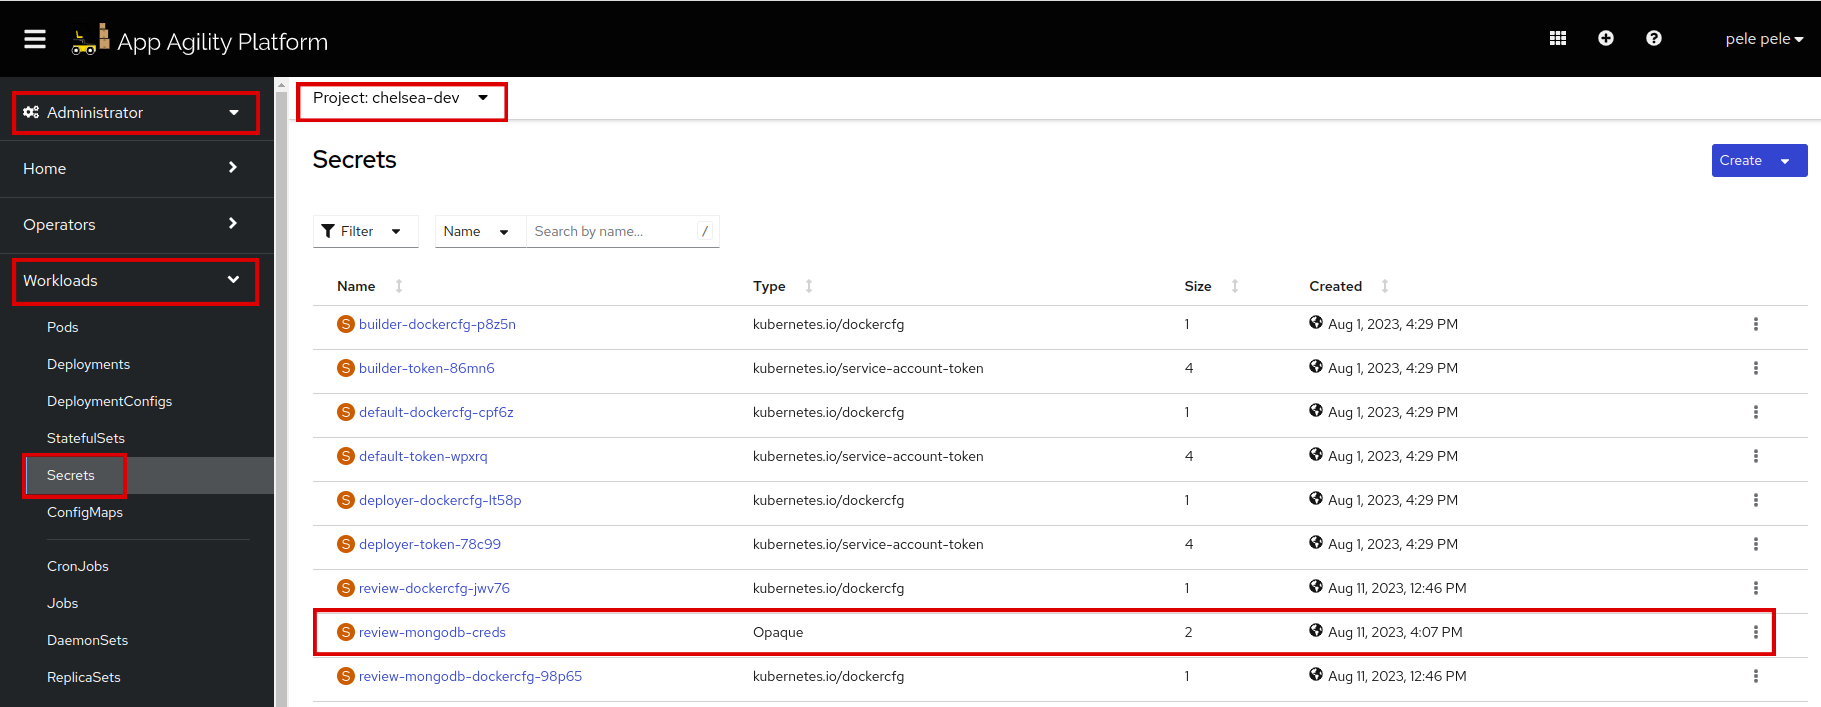
-
Click on the
review-mongodb-credssecret. Scroll down to see the data of your secret. So the secret is created accurately.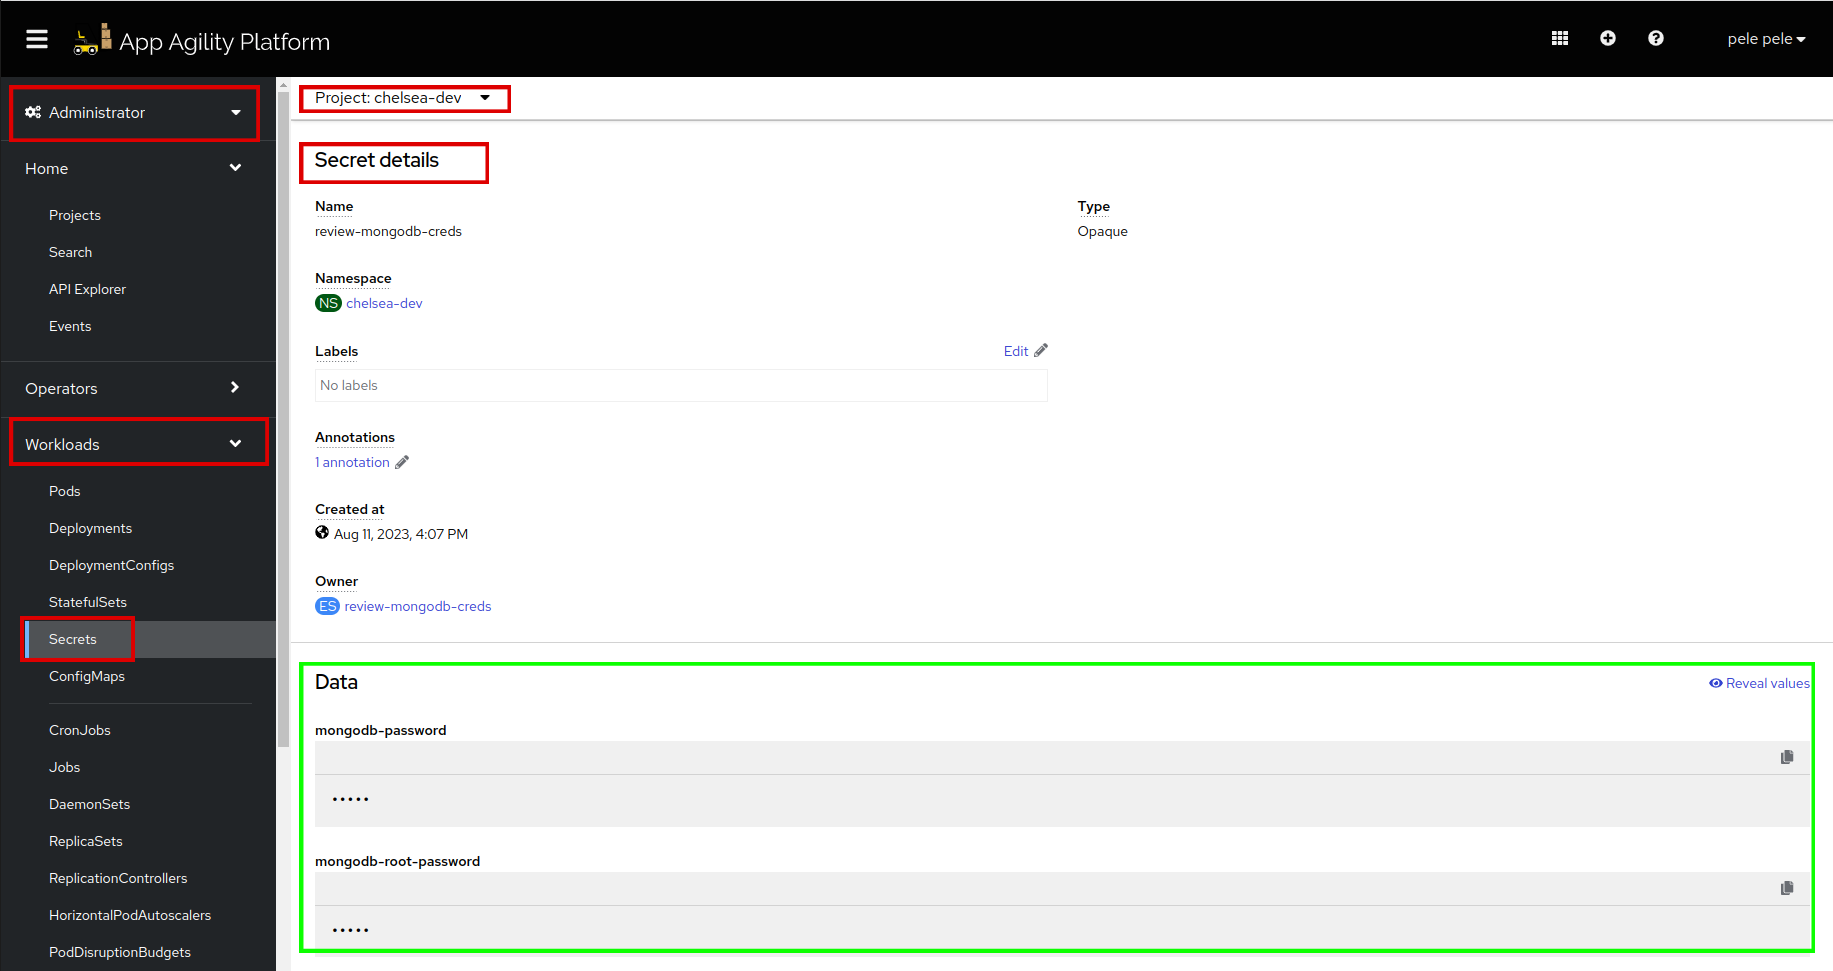
-
Scroll up to see the owner, which manages your secret.
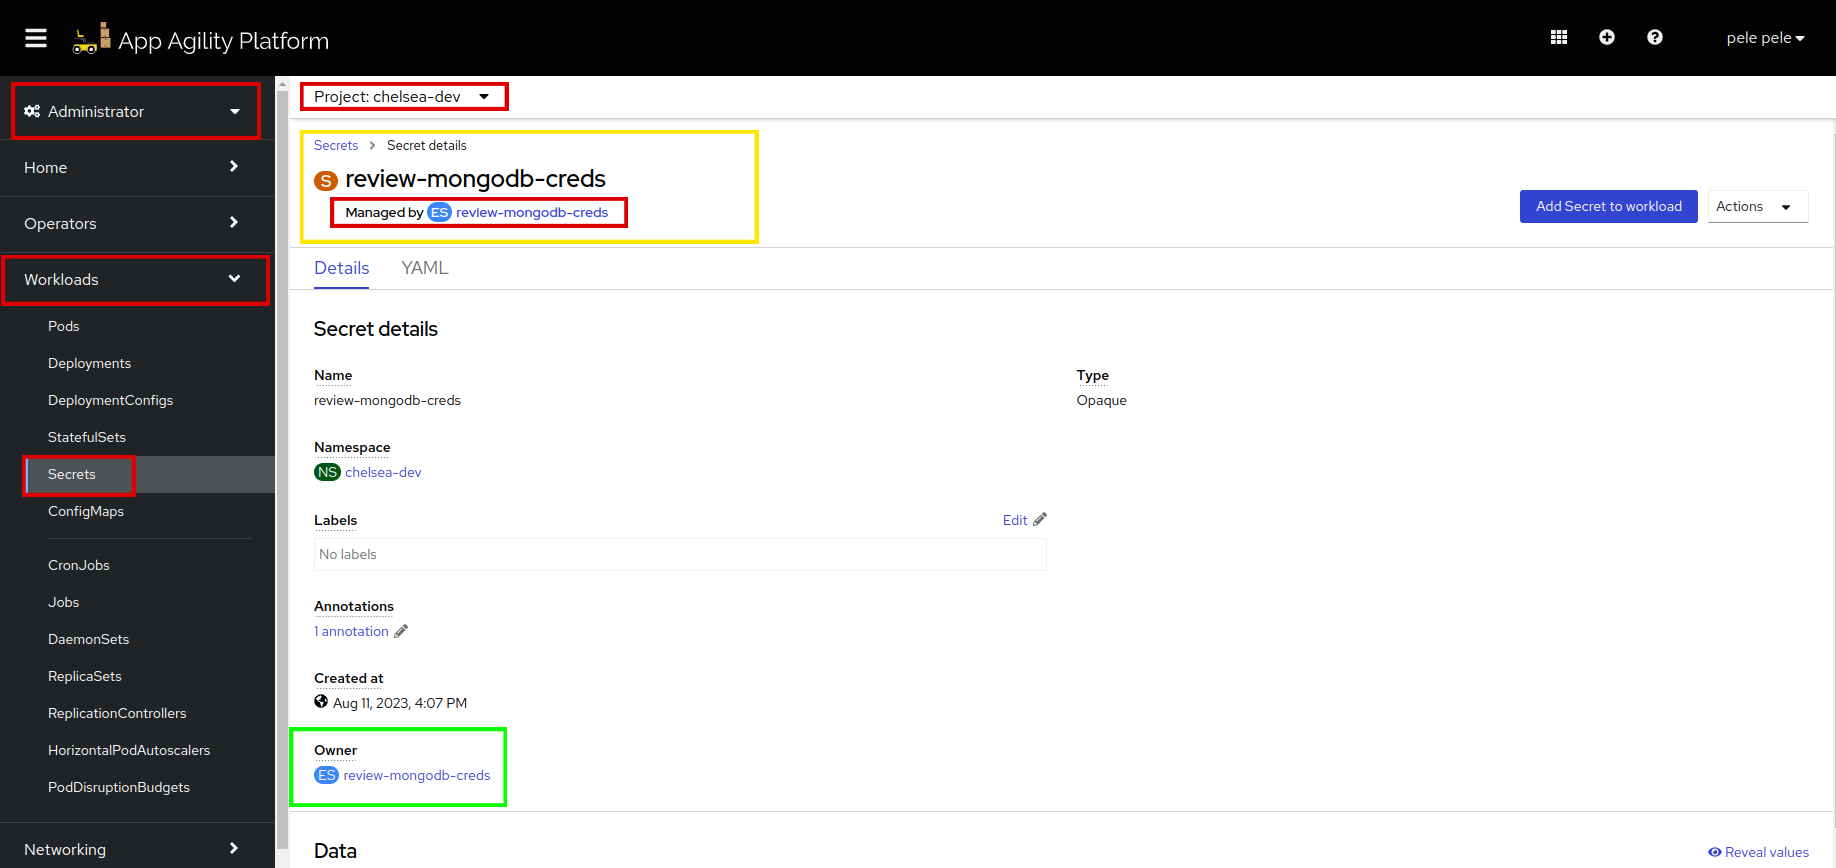
-
Click on
review-mongodb-creds, to see theExternal SecretCR. Click on resources to verify whatExternal Secretis managing.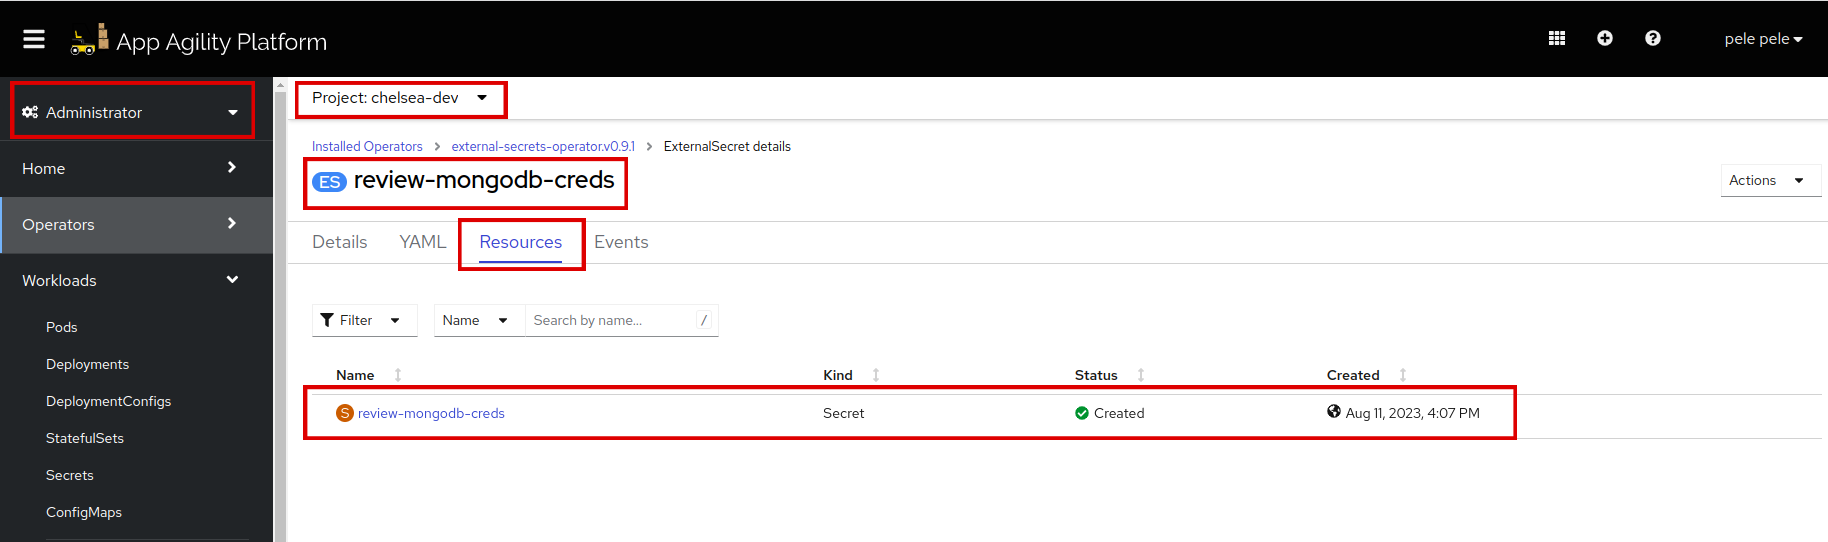
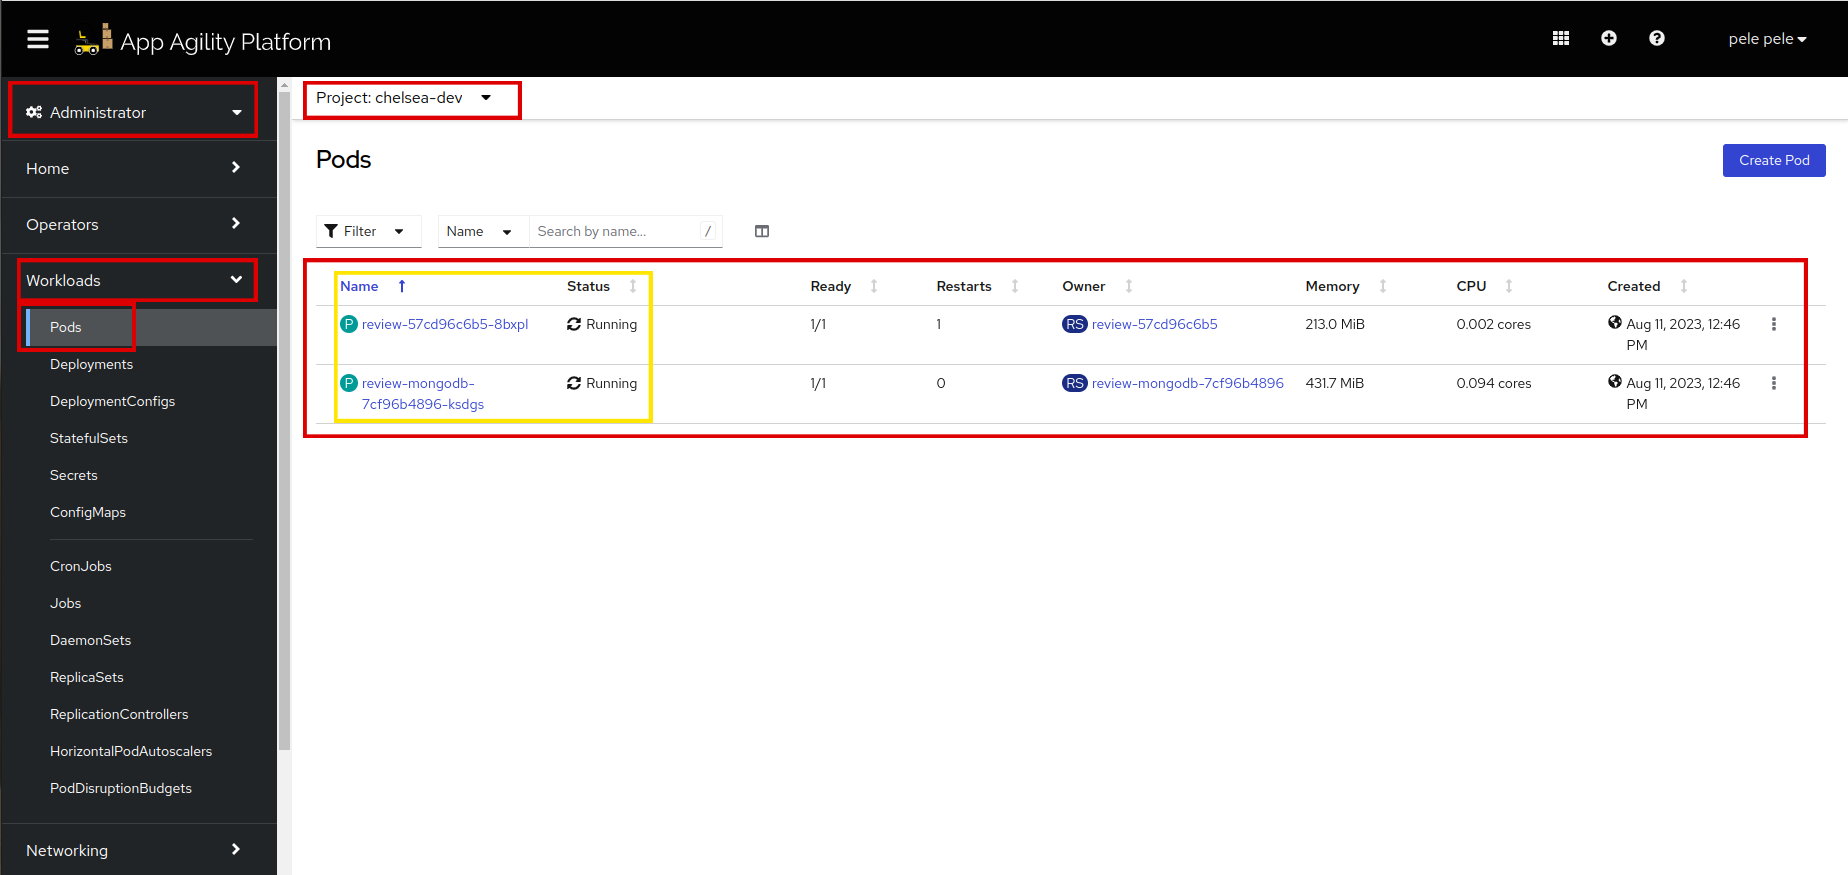
Once the updated secret is created, the application pod will be recreated. Refresh to see if the pods are running.
For more information on ExternalSecrets, see External Secrets documentation
You are doing great!! Let's see how to configure probes for your application in the next tutorial.