Configuring Azure AD Group Sync Application#
For Azure AD, two applications are needed, one for group synchronization, and one for the identity provider. Only users in target groups are synchronized. These are the steps to enable group sync:
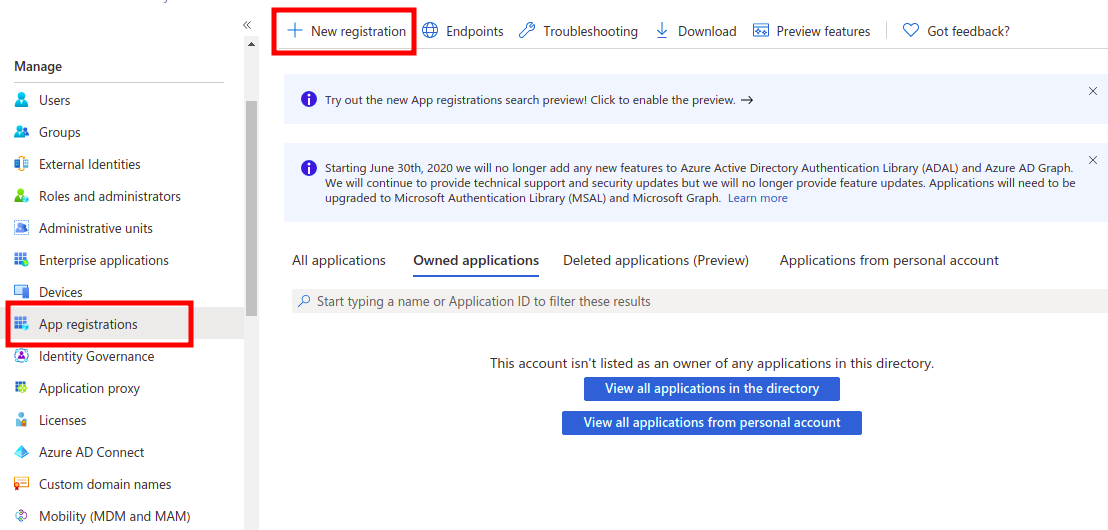
- To enable sync groups from the Microsoft Azure AD account to Stakater Cloud you first have to register an application on Azure. Go to the Azure Portal.
- Open the
Azure Active Directoryservice - On the left tab under the Manage section, click
App registrations -
Click on
New registration. Entergroup-syncas name and clickRegister: -
The
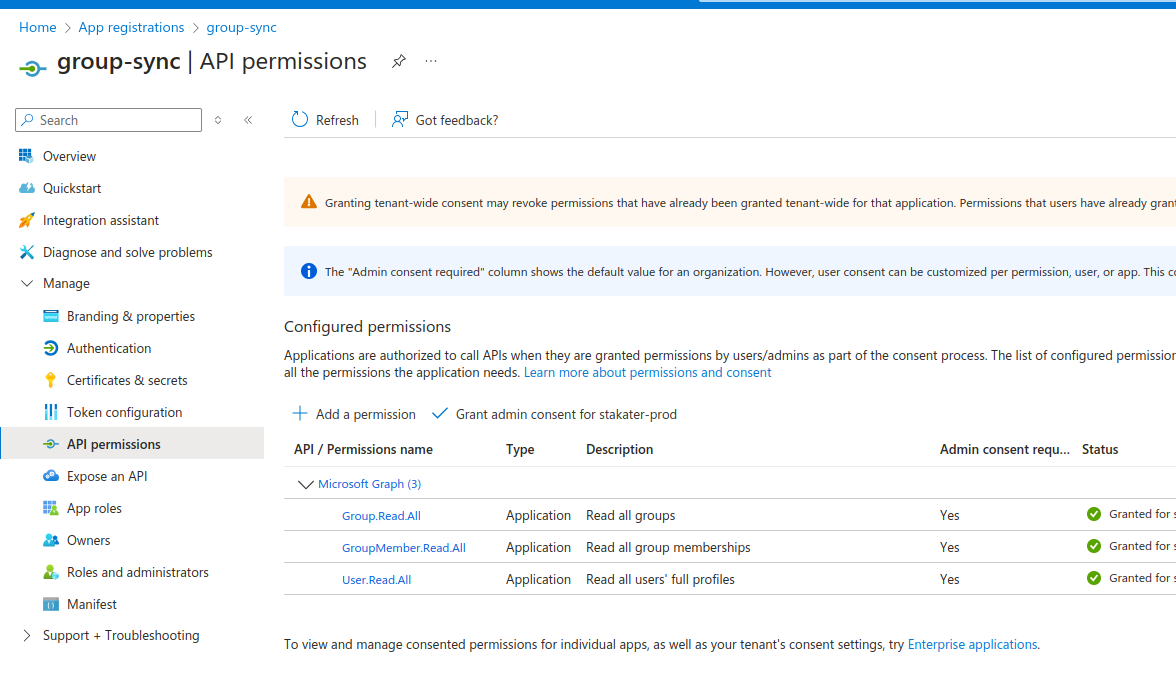
GroupSyncjob requires additional permissions on the Azure AD tenant. To set these up, add these permissions underAPI permissions>Configured permissions:Group.Read.AllGroupMember.Read.AllUser.Read.All
-
Click on the newly created app
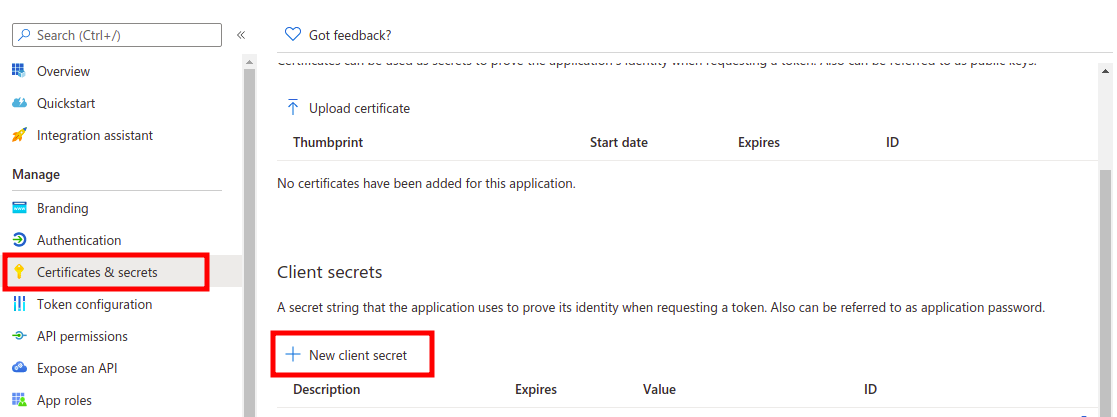
group-sync. ClickCertificates & secretsfrom the left tab. ClickNew client secret. UnderExpirespick any option. UnderDescriptionentersaap-group-sync, and clickAdd: -
Copy the value of the newly created client secret and note the
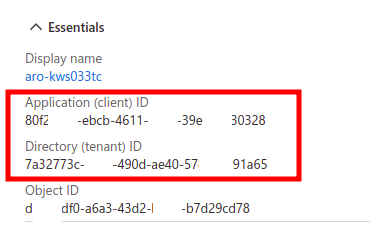
Application (client) IDandDirectory (tenant) IDof thegroup-syncapp registration from theOverviewtab, and send them to Stakater Support:
Items to be provided to Stakater Support#
Please provide the secrets via password manager:
Application (client) IDDirectory (tenant) IDClient Secret


