Using Pod Disruption Budgets (PDB) in SAAP#
Pod Disruption Budget (PDB) is a crucial tool for maintaining the availability and stability of your applications in SAAP during updates and disruptions. By setting the minimum and maximum pod availability, you can ensure that your application remains operational even in the face of cluster changes.
In this tutorial, you will learn how to use Pod Disruption Budget (PDB) to manage the availability and stability of your applications in SAAP during updates and maintenance activities. PDB help ensure that a minimum number of pods are available and operational at all times, reducing the risk of service disruptions.
Objectives#
- Enable replicas.
- Configure a Pod Disruption Budget for an application deployed on SAAP.
- Observe the behavior of the PDB by deleting a pod and analyzing the changes in PDB status.
Key Results#
- Successfully enable and monitor a Pod Disruption Budget for the application's deployment on SAAP.
Tutorial#
Let's scale up the number of replicas to see how pdb works.
-
Add
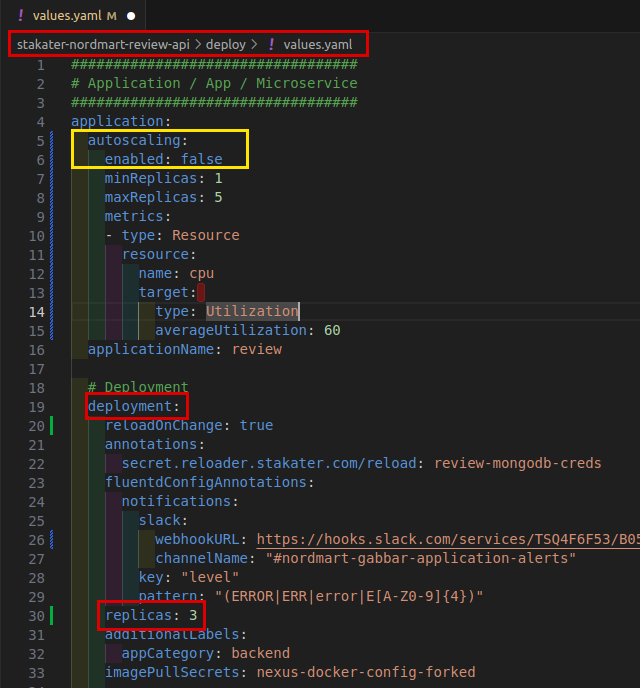
replicas: 3indeploy/values.yaml.It should look like this
Make sure autoscaling is
enabled: false, or you can scale up theminReplicasto match the replicas, that way you don't need to disable autoscaling.Note
The indentation should be application.deployment.replicas.
-
Enable
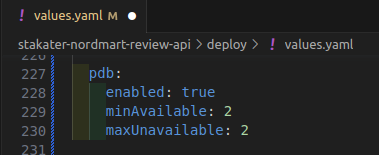
pdbin yourdeploy/values.yamlfile. Add the following YAML:# Enable Pod Disruption Budget (PDB) for your application's pods. pdb: # Set PDB enabled to true to activate the Pod Disruption Budget. enabled: true # Specify the minimum number of available pods during disruptions. In this case, ensure at least 1 pod is available at all times. minAvailable: 2 # Specify the maximum number of pods that can be unavailable simultaneously during disruptions maxUnavailable: 2It should look like this:
Look at the different colors that indicates indentation.
Note
The indentation should be
application.pdb. -
Save and run
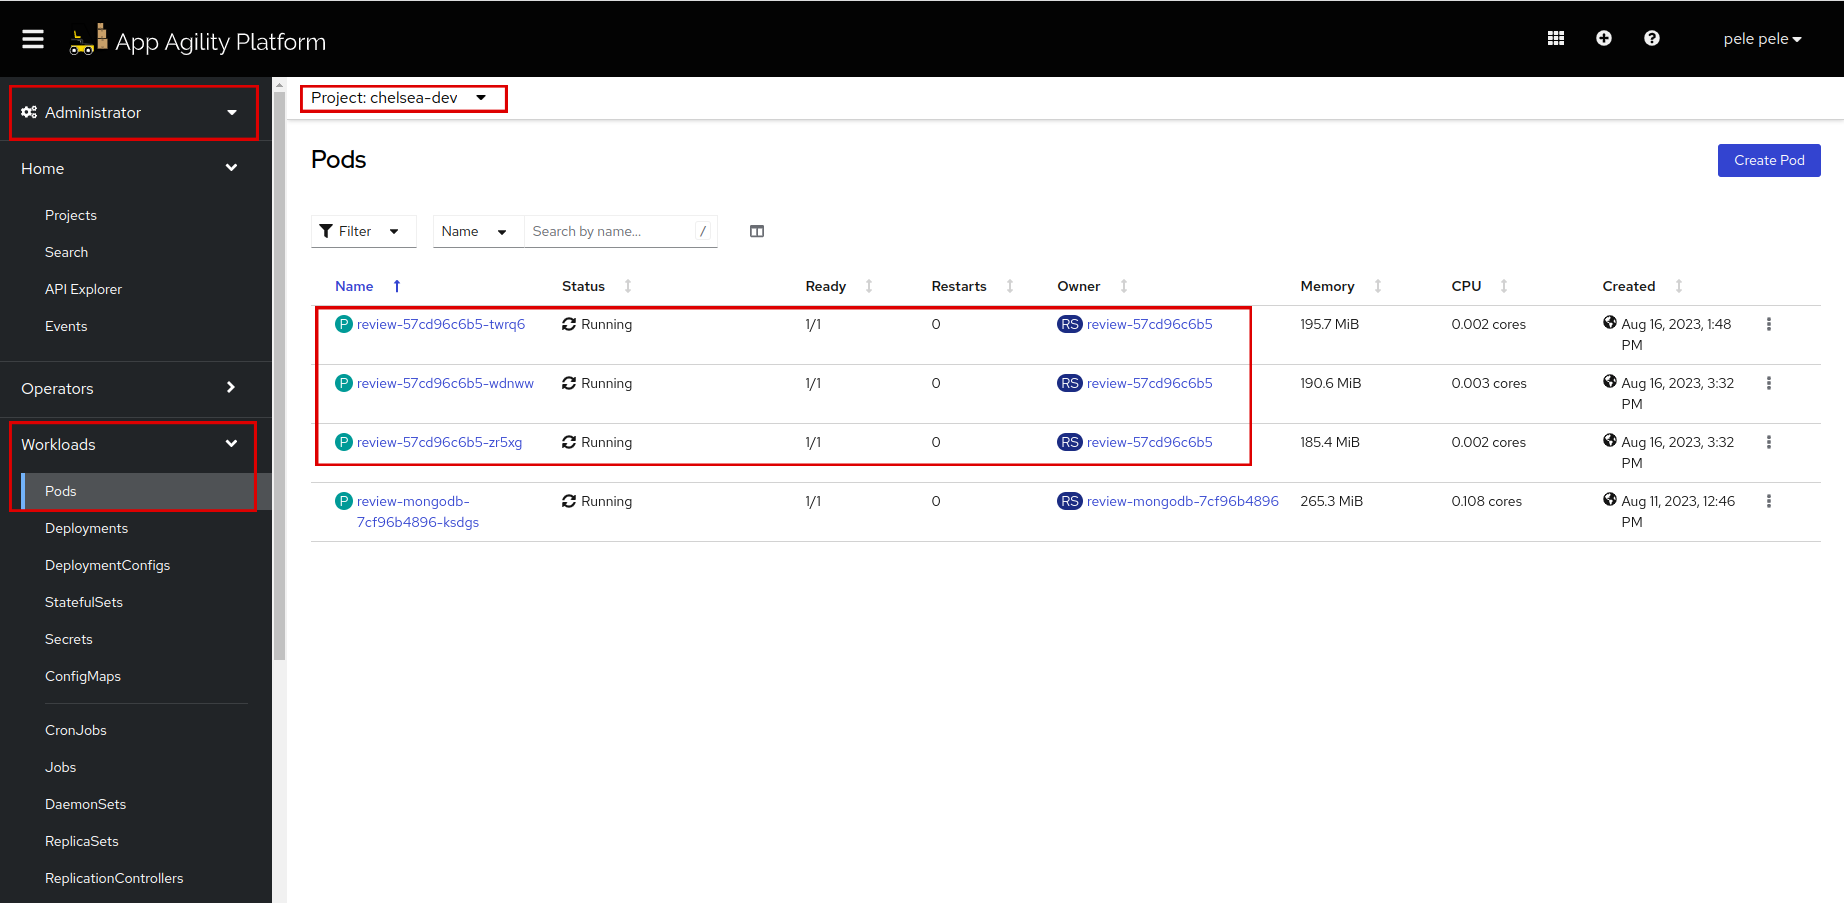
tilt upat the root of your directory. Hit the space bar and the browser withTILTlogs will be shown. If everything is green then the changes will be deployed on the cluster.Let's see the number of replicas.
-
Log in to SAAP. In your namespace check if the
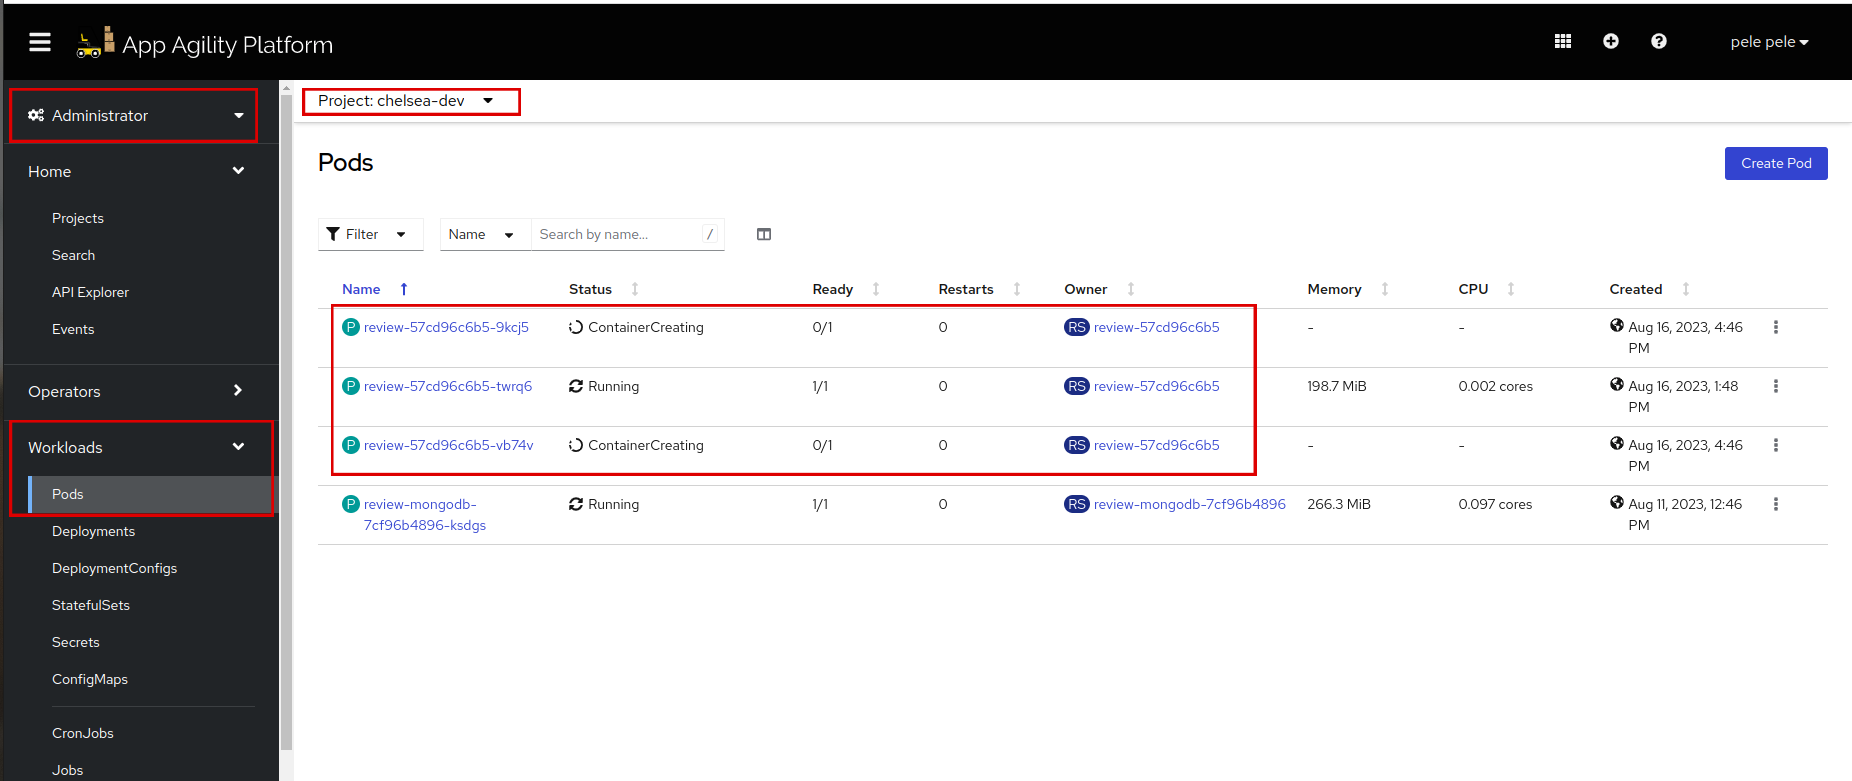
replicaSethas created the number ofreplicaCountswhich is3. -
To check if
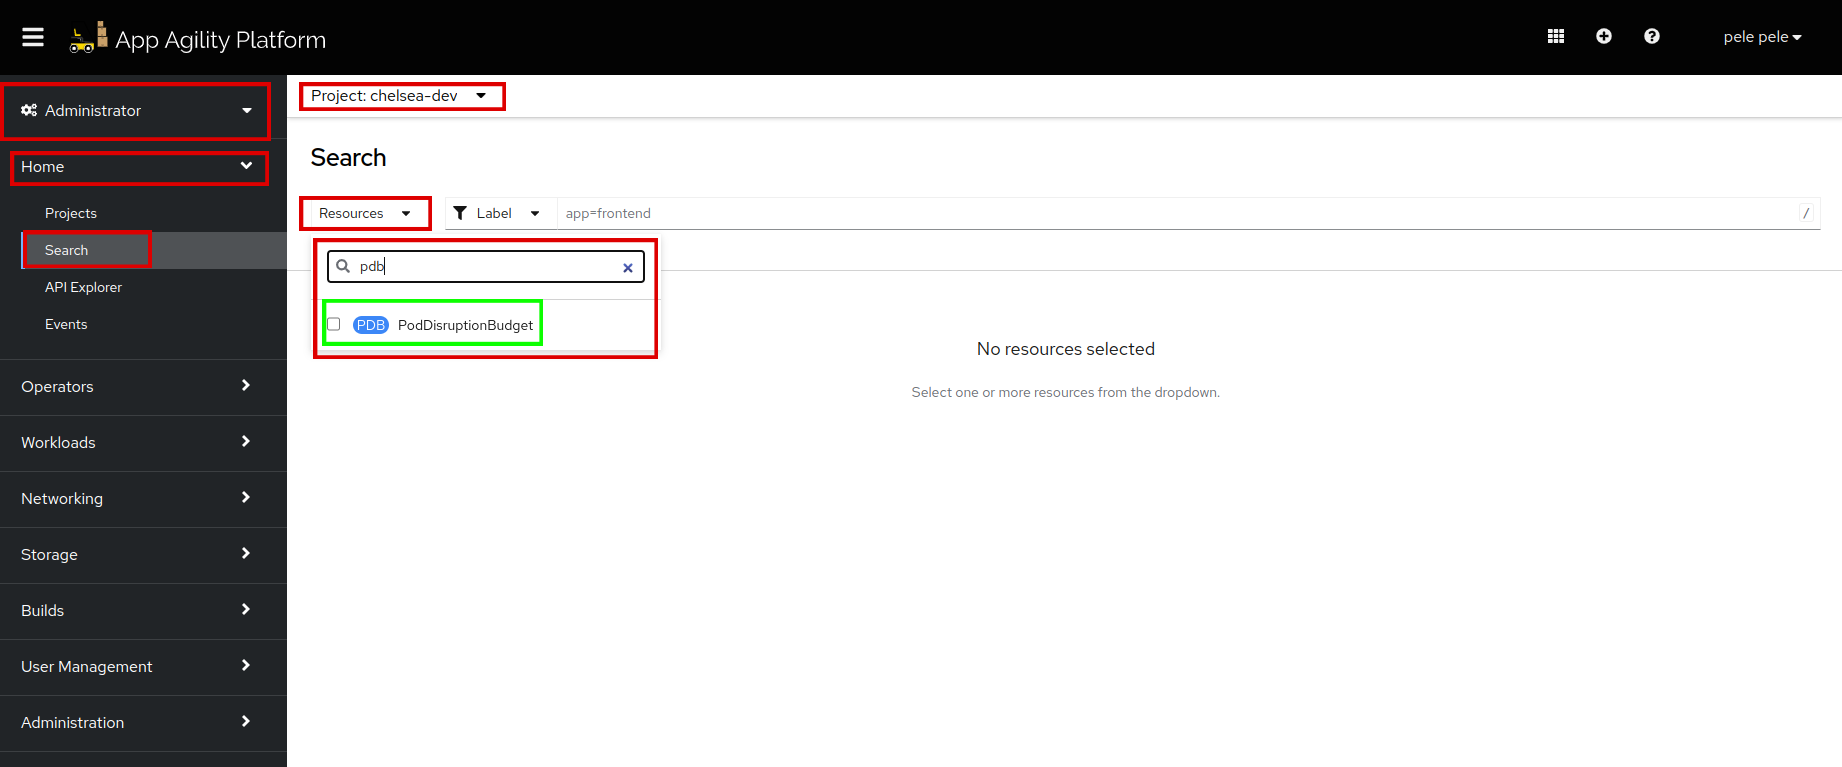
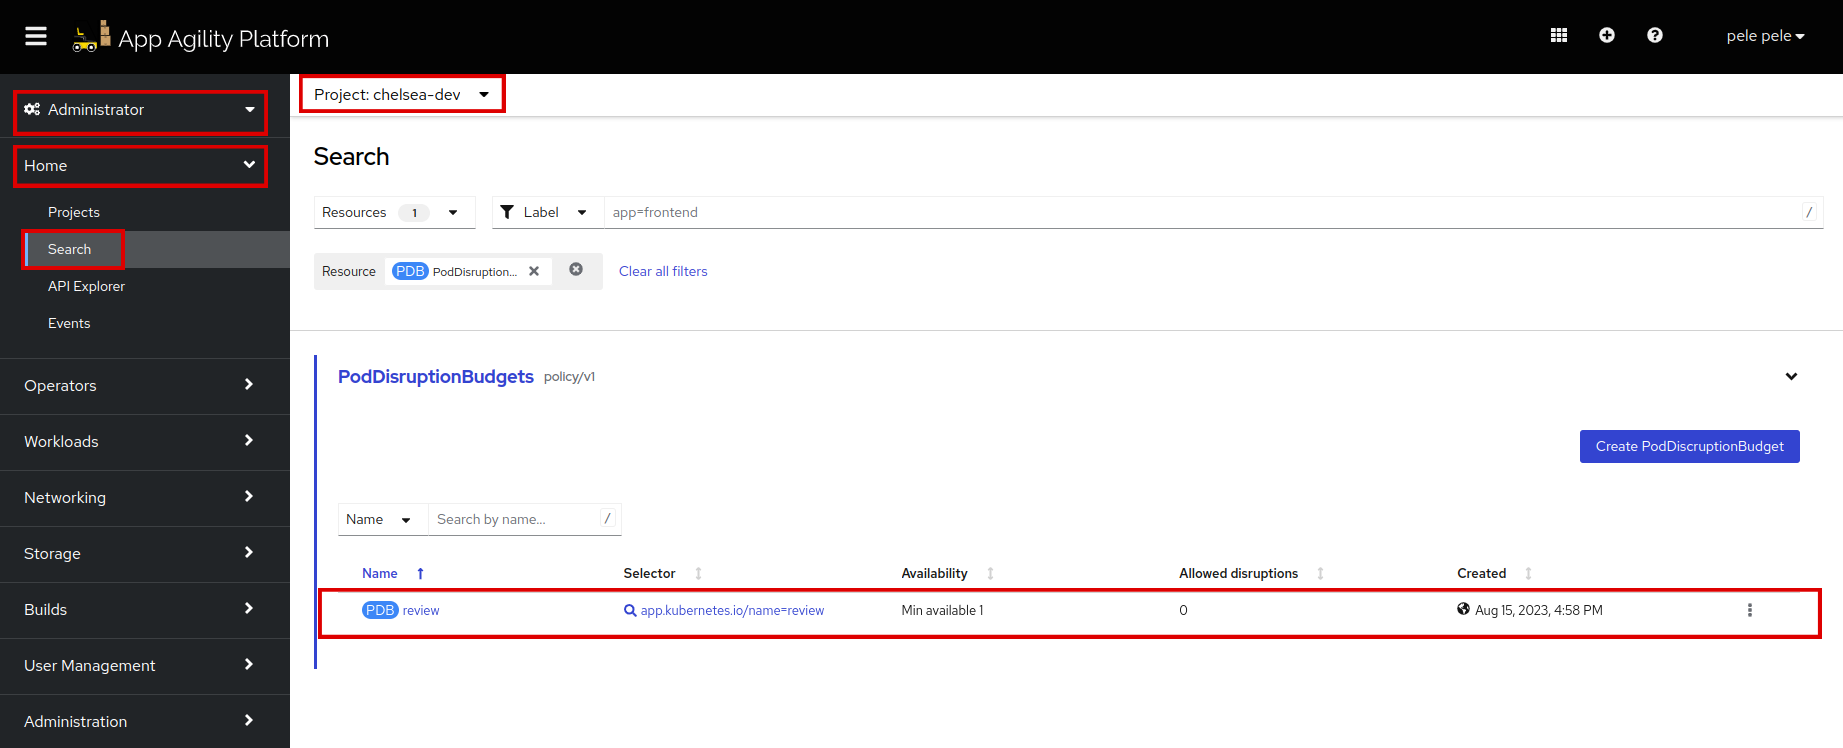
pdbis created, switch to your namespace, go to Administrator > Home > Search and search forpdb. -
Click on
PodDisruptionBudgetand see the newly createdpdbnamedreview. -
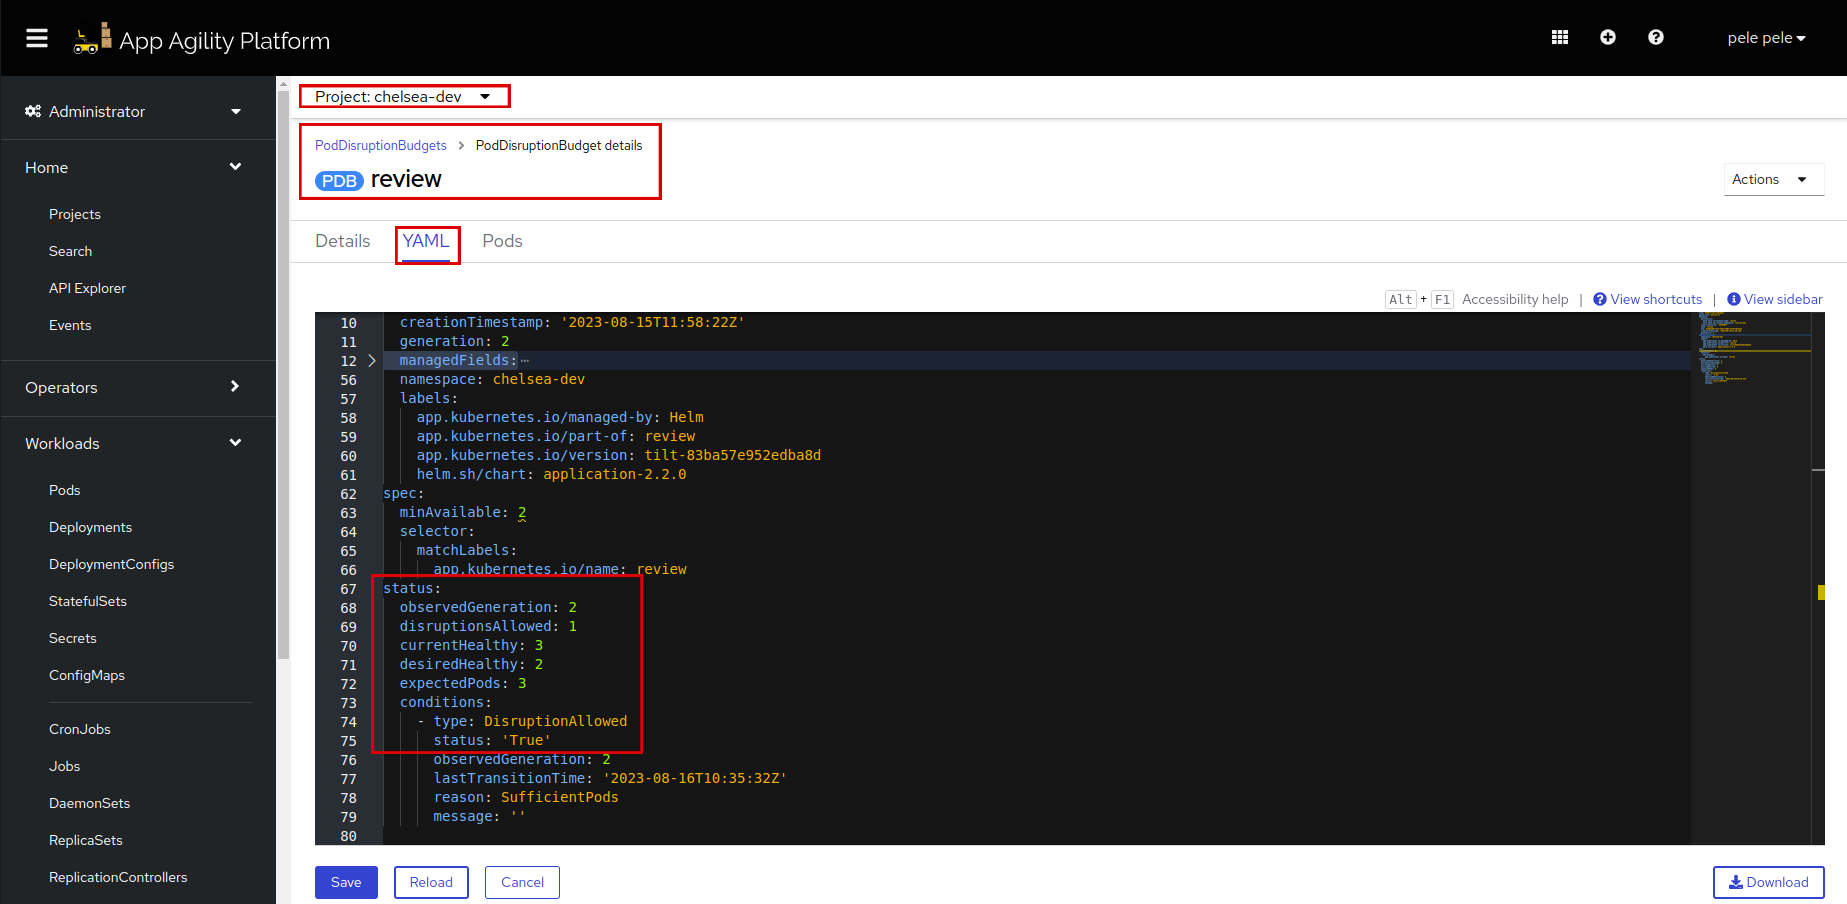
Click on
reviewpdb. Go toYAML, scroll down and see thestatusofpdb. Check out the status andcurrentHealthy: 3,desiredHealthy: 2which satisfies the condition ofminAvailable: 2. We can see theDisruptionAllowedstatus istrue. -
let's scale down the replicas to create a disruption and see if
pdbworks accurately.As soon as the replicas are scaled down, the
pdbcondition will enforcereplicaSetto make sure the minimum replicas are available. -
Delete the
reviewpod and check thepdb status. -
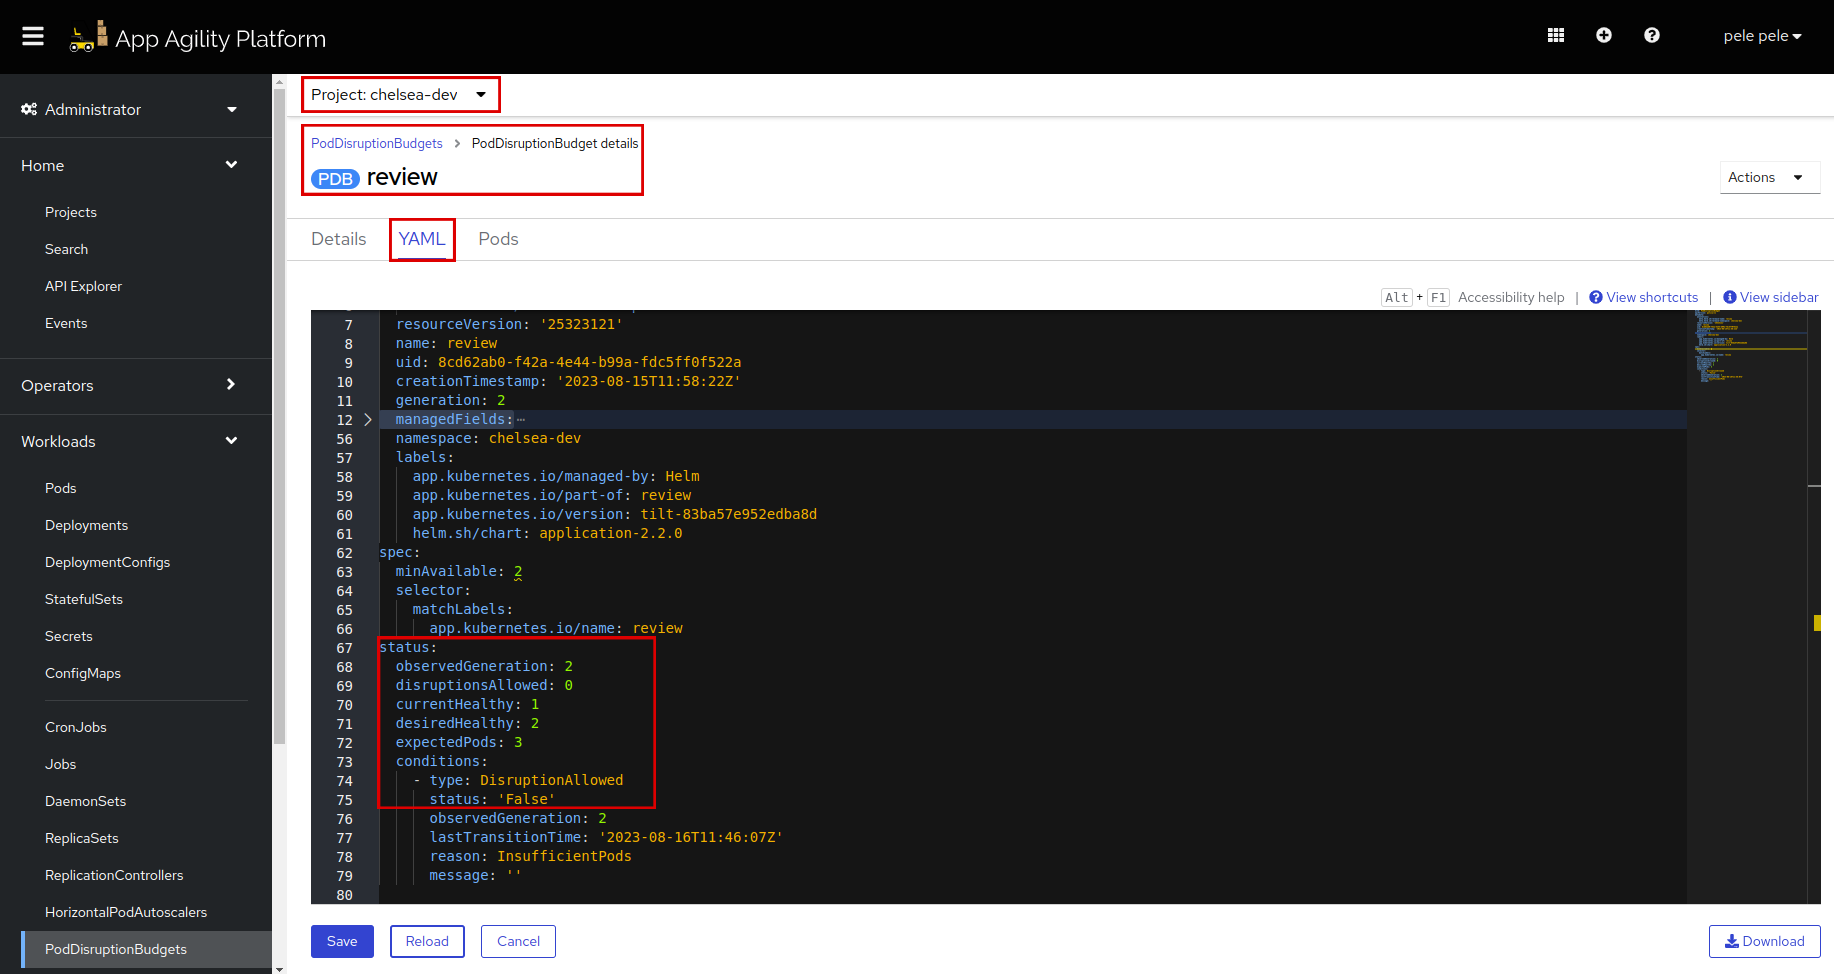
Go to
pdb review, and check thestatusnow. Click on reload. Now look at thecurrentHealthy: 1, which clearly shows thatpdbis working fine.As soon as the pods are recreated,
pdb statuswill change tocurrentHealthy: 3which meets the condition perfectly. Click onreloadand you will see the updated status.
Remember that the behavior of the PDB and the speed at which it restores pod availability may be influenced by factors such as node resources, cluster conditions, and pod scheduling rules. It's important to give the system some time to react and observe how it gradually restores the desired number of healthy pods according to the PDB constraints.
Awesome! Let's move on to the next tutorial to add a network policy to your application.
